
Do you want to insert a semantic search function into your website or online app? Now you can do so - without spending any money! In this example, you will learn how to create a free prototype search engine for your own non-commercial purposes.
Ingredients
- A Rust toolchain
- cargo lambda (install via package manager, download binary or
cargo install cargo-lambda) - The AWS CLI
- Qdrant instance (free tier available)
- An embedding provider service of your choice (see our Embeddings docs. You may be able to get credits from AI Grant, also Cohere has a rate-limited non-commercial free tier)
- AWS Lambda account (12-month free tier available)
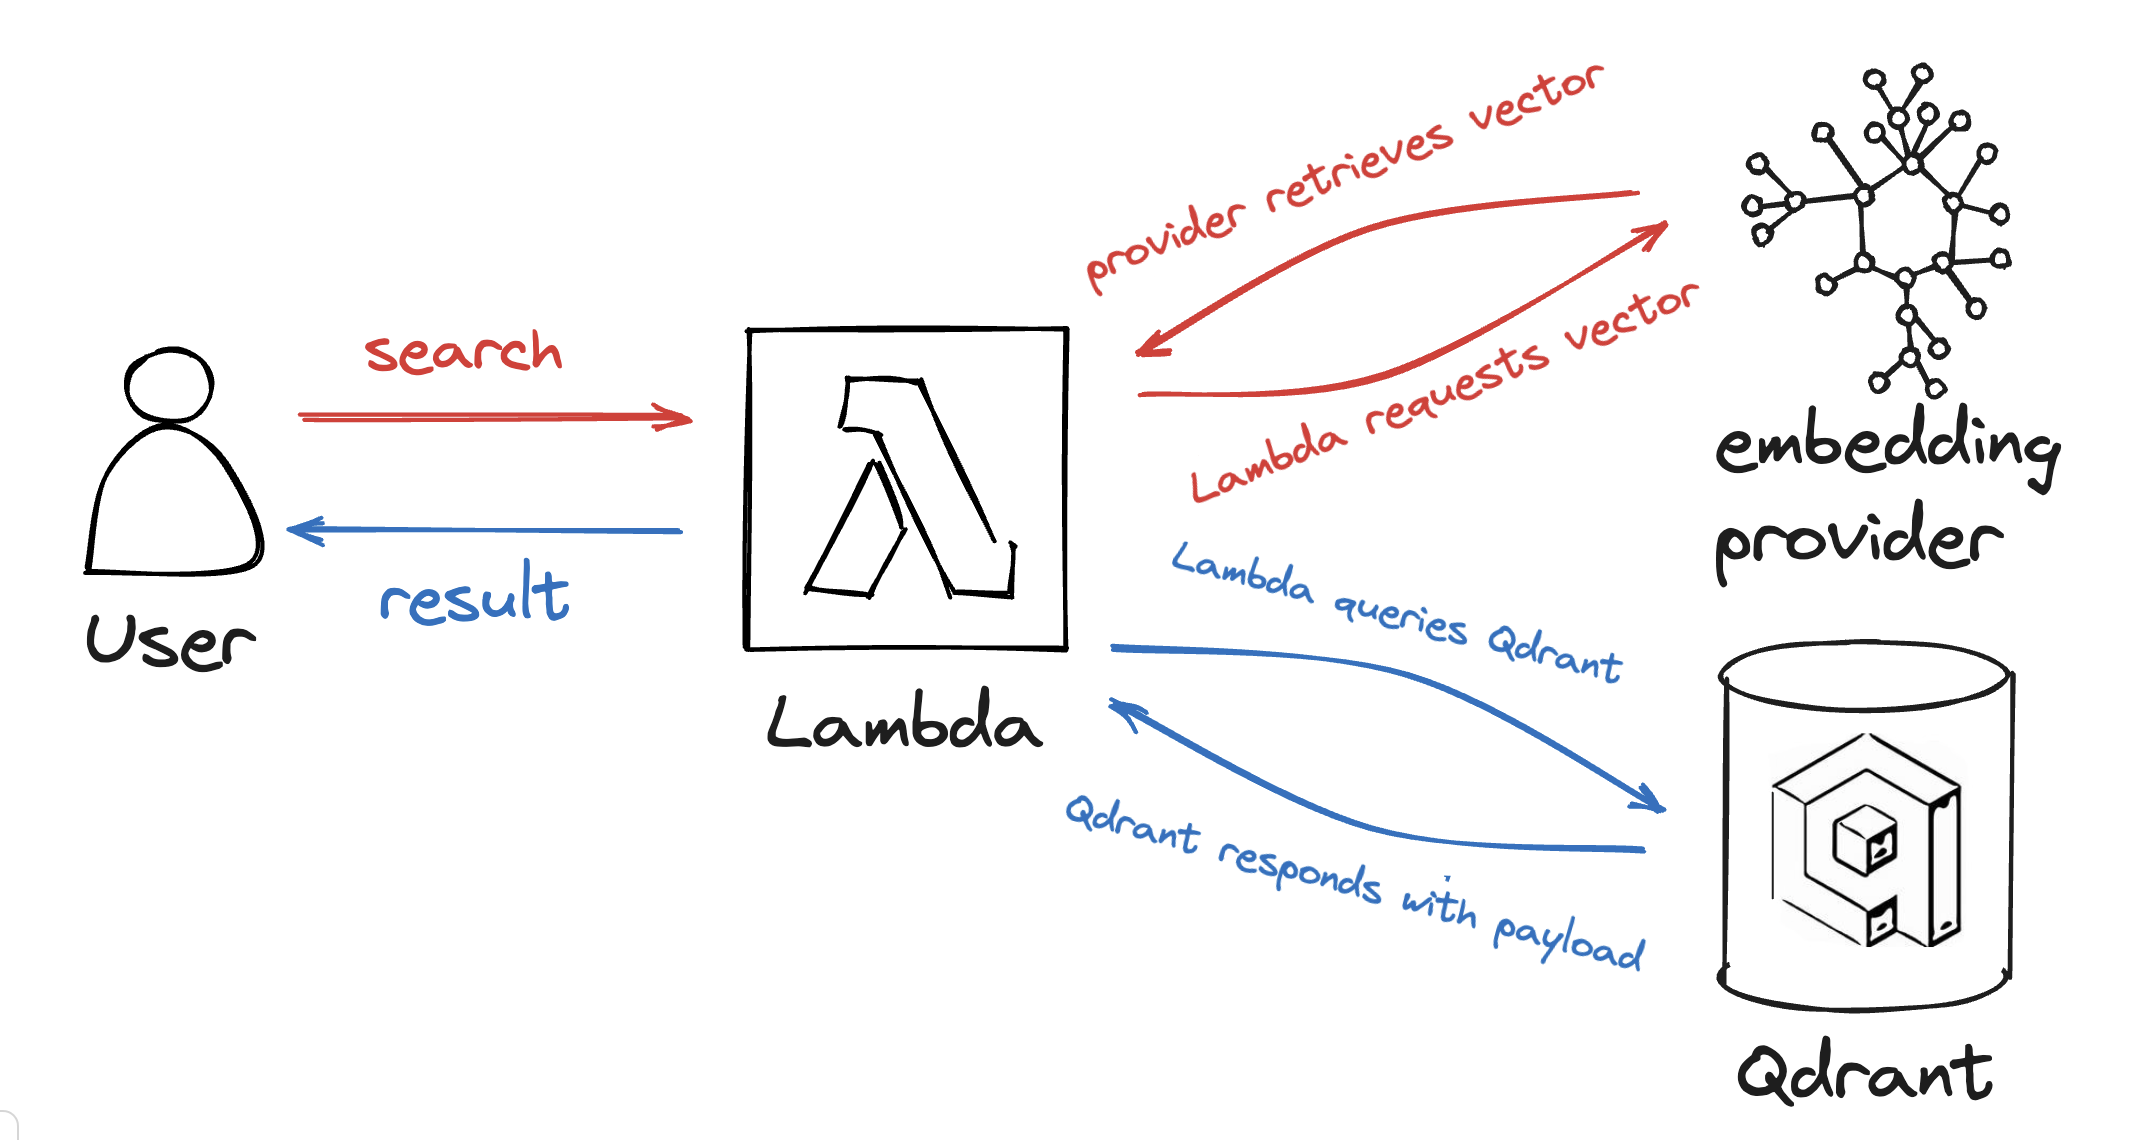
What you’re going to build
You’ll combine the embedding provider and the Qdrant instance to a neat semantic search, calling both services from a small Lambda function.
Now lets look at how to work with each ingredient before connecting them.
Rust and cargo-lambda
You want your function to be quick, lean and safe, so using Rust is a no-brainer. To compile Rust code for use within Lambda functions, the cargo-lambda subcommand has been built. cargo-lambda can put your Rust code in a zip file that AWS Lambda can then deploy on a no-frills provided.al2 runtime.
To interface with AWS Lambda, you will need a Rust project with the following dependencies in your Cargo.toml:
[dependencies]
tokio = { version = "1", features = ["macros"] }
lambda_http = { version = "0.8", default-features = false, features = ["apigw_http"] }
lambda_runtime = "0.8"
This gives you an interface consisting of an entry point to start the Lambda runtime and a way to register your handler for HTTP calls. Put the following snippet into src/helloworld.rs:
use lambda_http::{run, service_fn, Body, Error, Request, RequestExt, Response};

/// This is your callback function for responding to requests at your URL
async fn function_handler(_req: Request) -> Result<Response<Body>, Error> {
    Response::from_text("Hello, Lambda!")
}

#[tokio::main]
async fn main() {
    run(service_fn(function_handler)).await
}
You can also use a closure to bind other arguments to your function handler (the service_fn call then becomes service_fn(|req| function_handler(req, ...))). Also if you want to extract parameters from the request, you can do so using the Request methods (e.g. query_string_parameters or query_string_parameters_ref).
Add the following to your Cargo.toml to define the binary:
[[bin]]
name = "helloworld"
path = "src/helloworld.rs"
On the AWS side, you need to setup a Lambda and IAM role to use with your function.
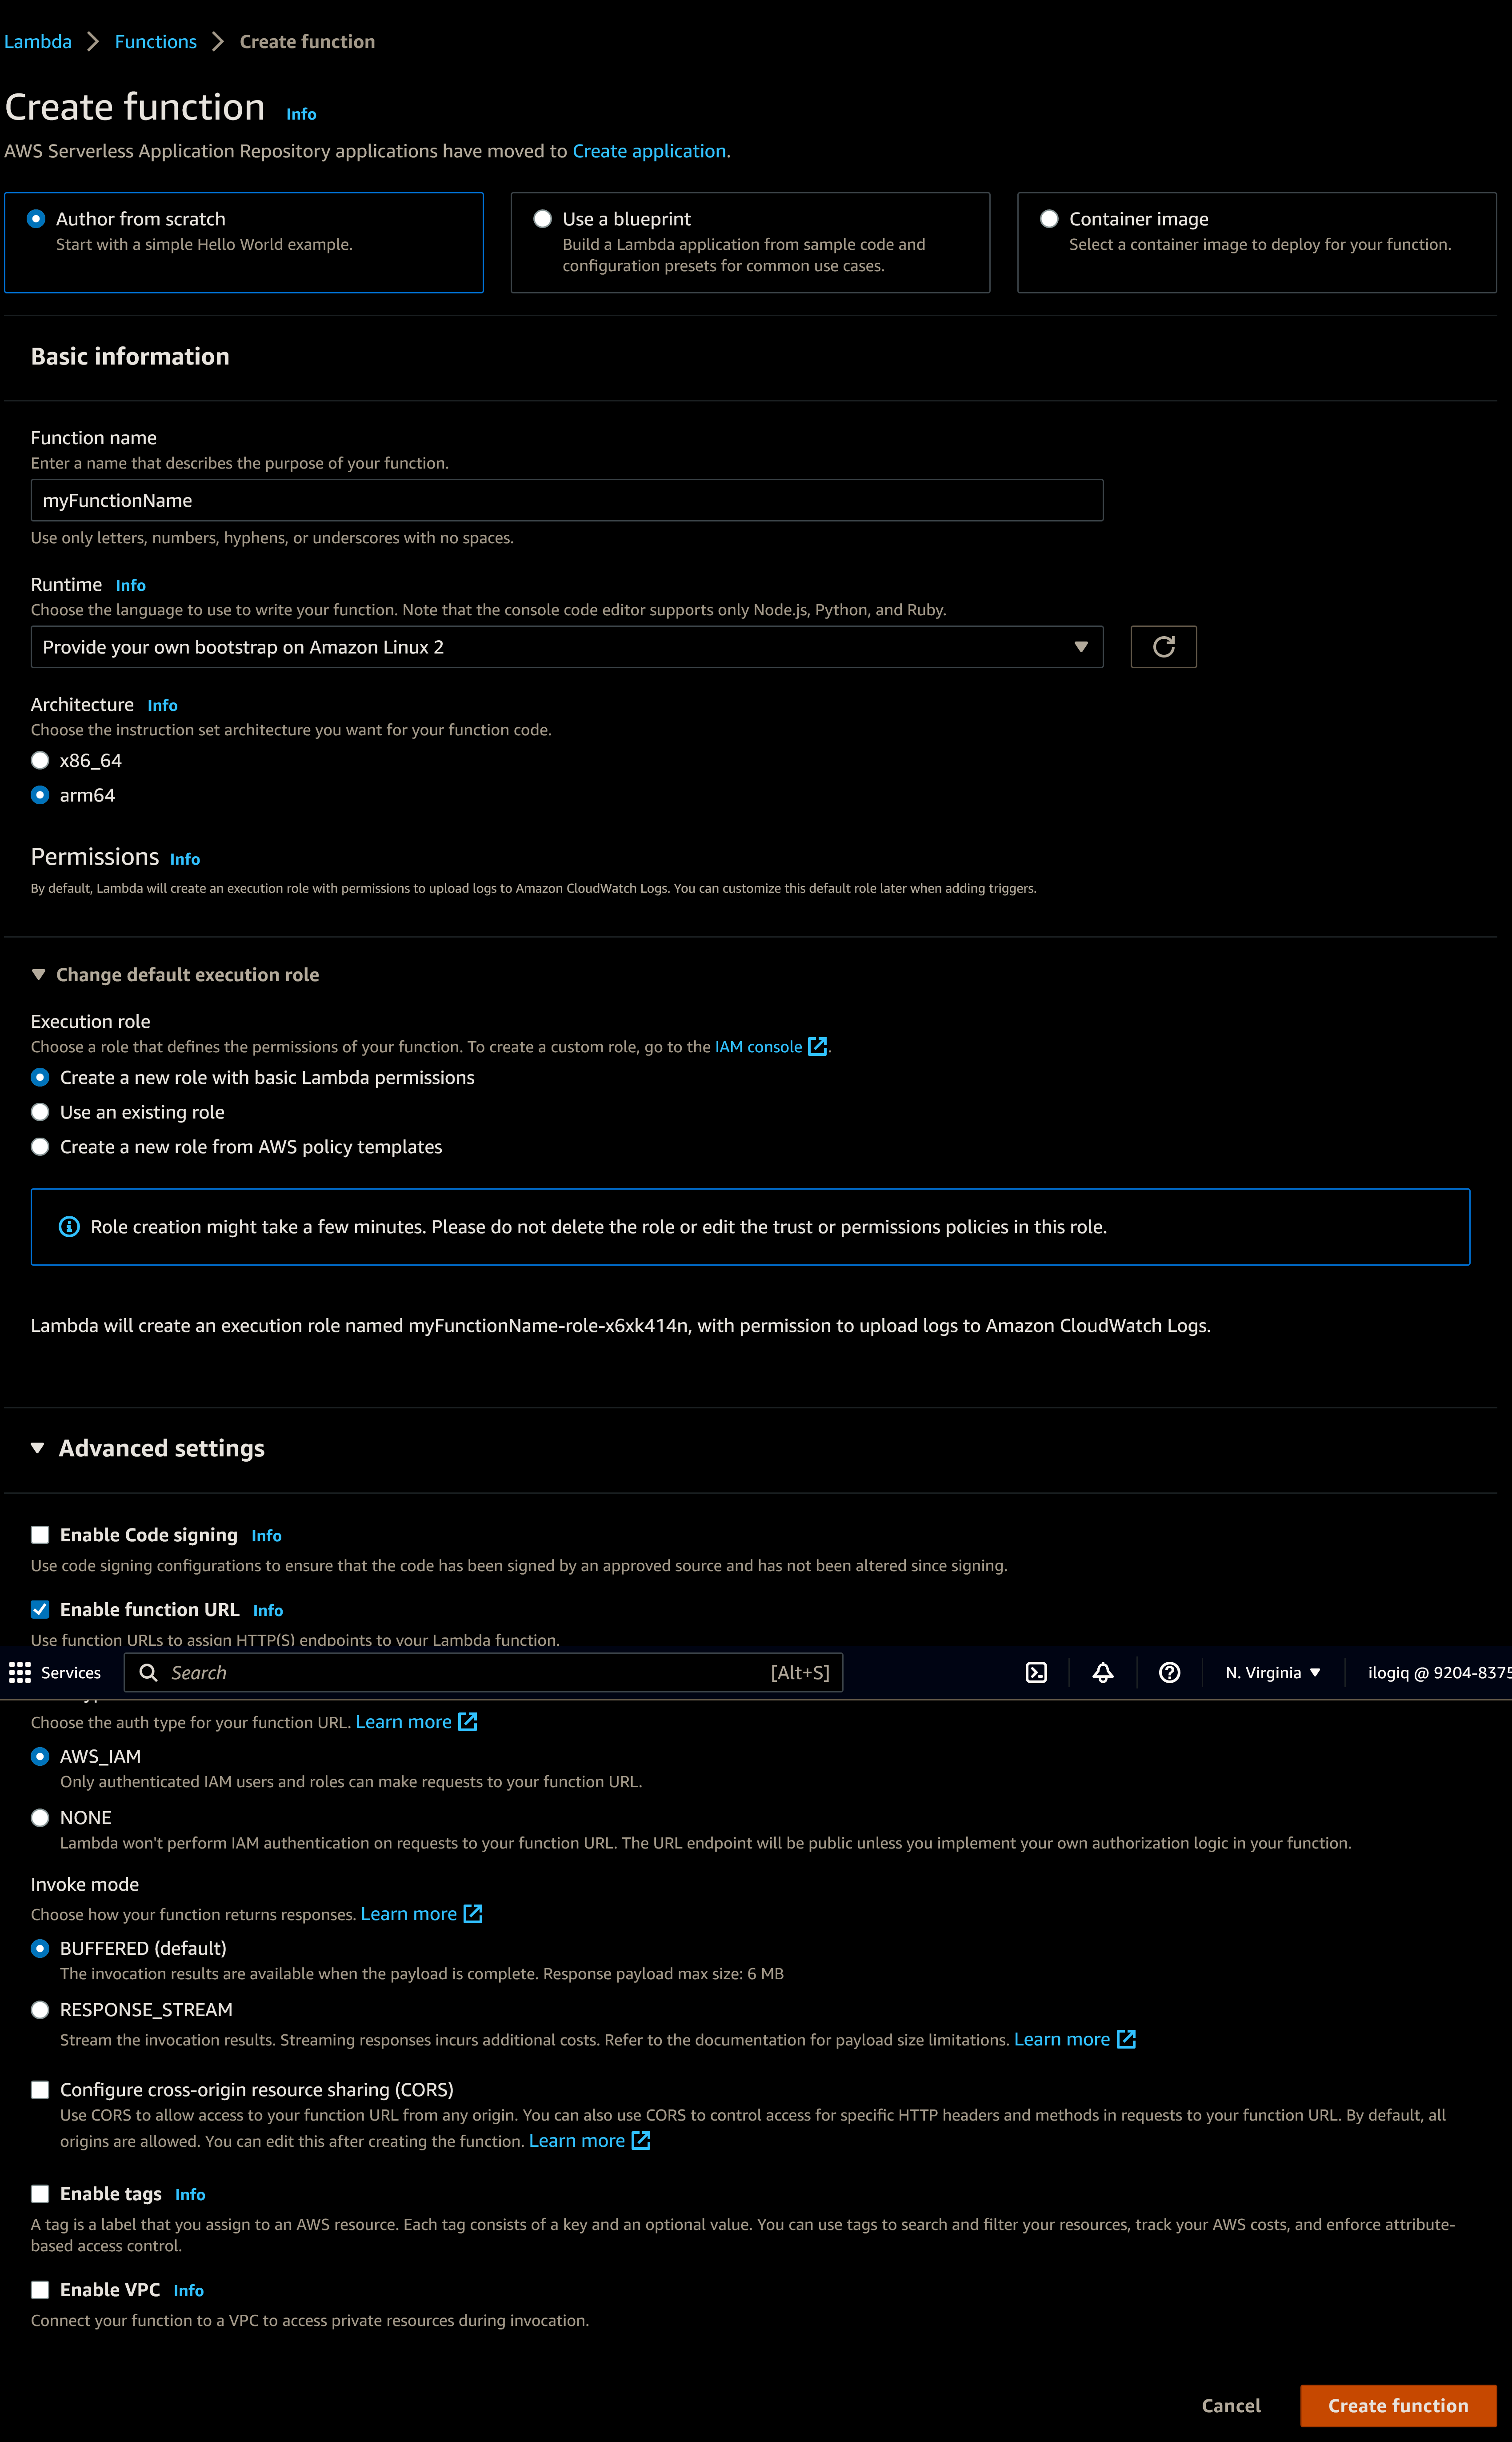
Choose your function name, select “Provide your own bootstrap on Amazon Linux 2”. As architecture, use arm64. You will also activate a function URL. Here it is up to you if you want to protect it via IAM or leave it open, but be aware that open end points can be accessed by anyone, potentially costing money if there is too much traffic.
By default, this will also create a basic role. To look up the role, you can go into the Function overview:
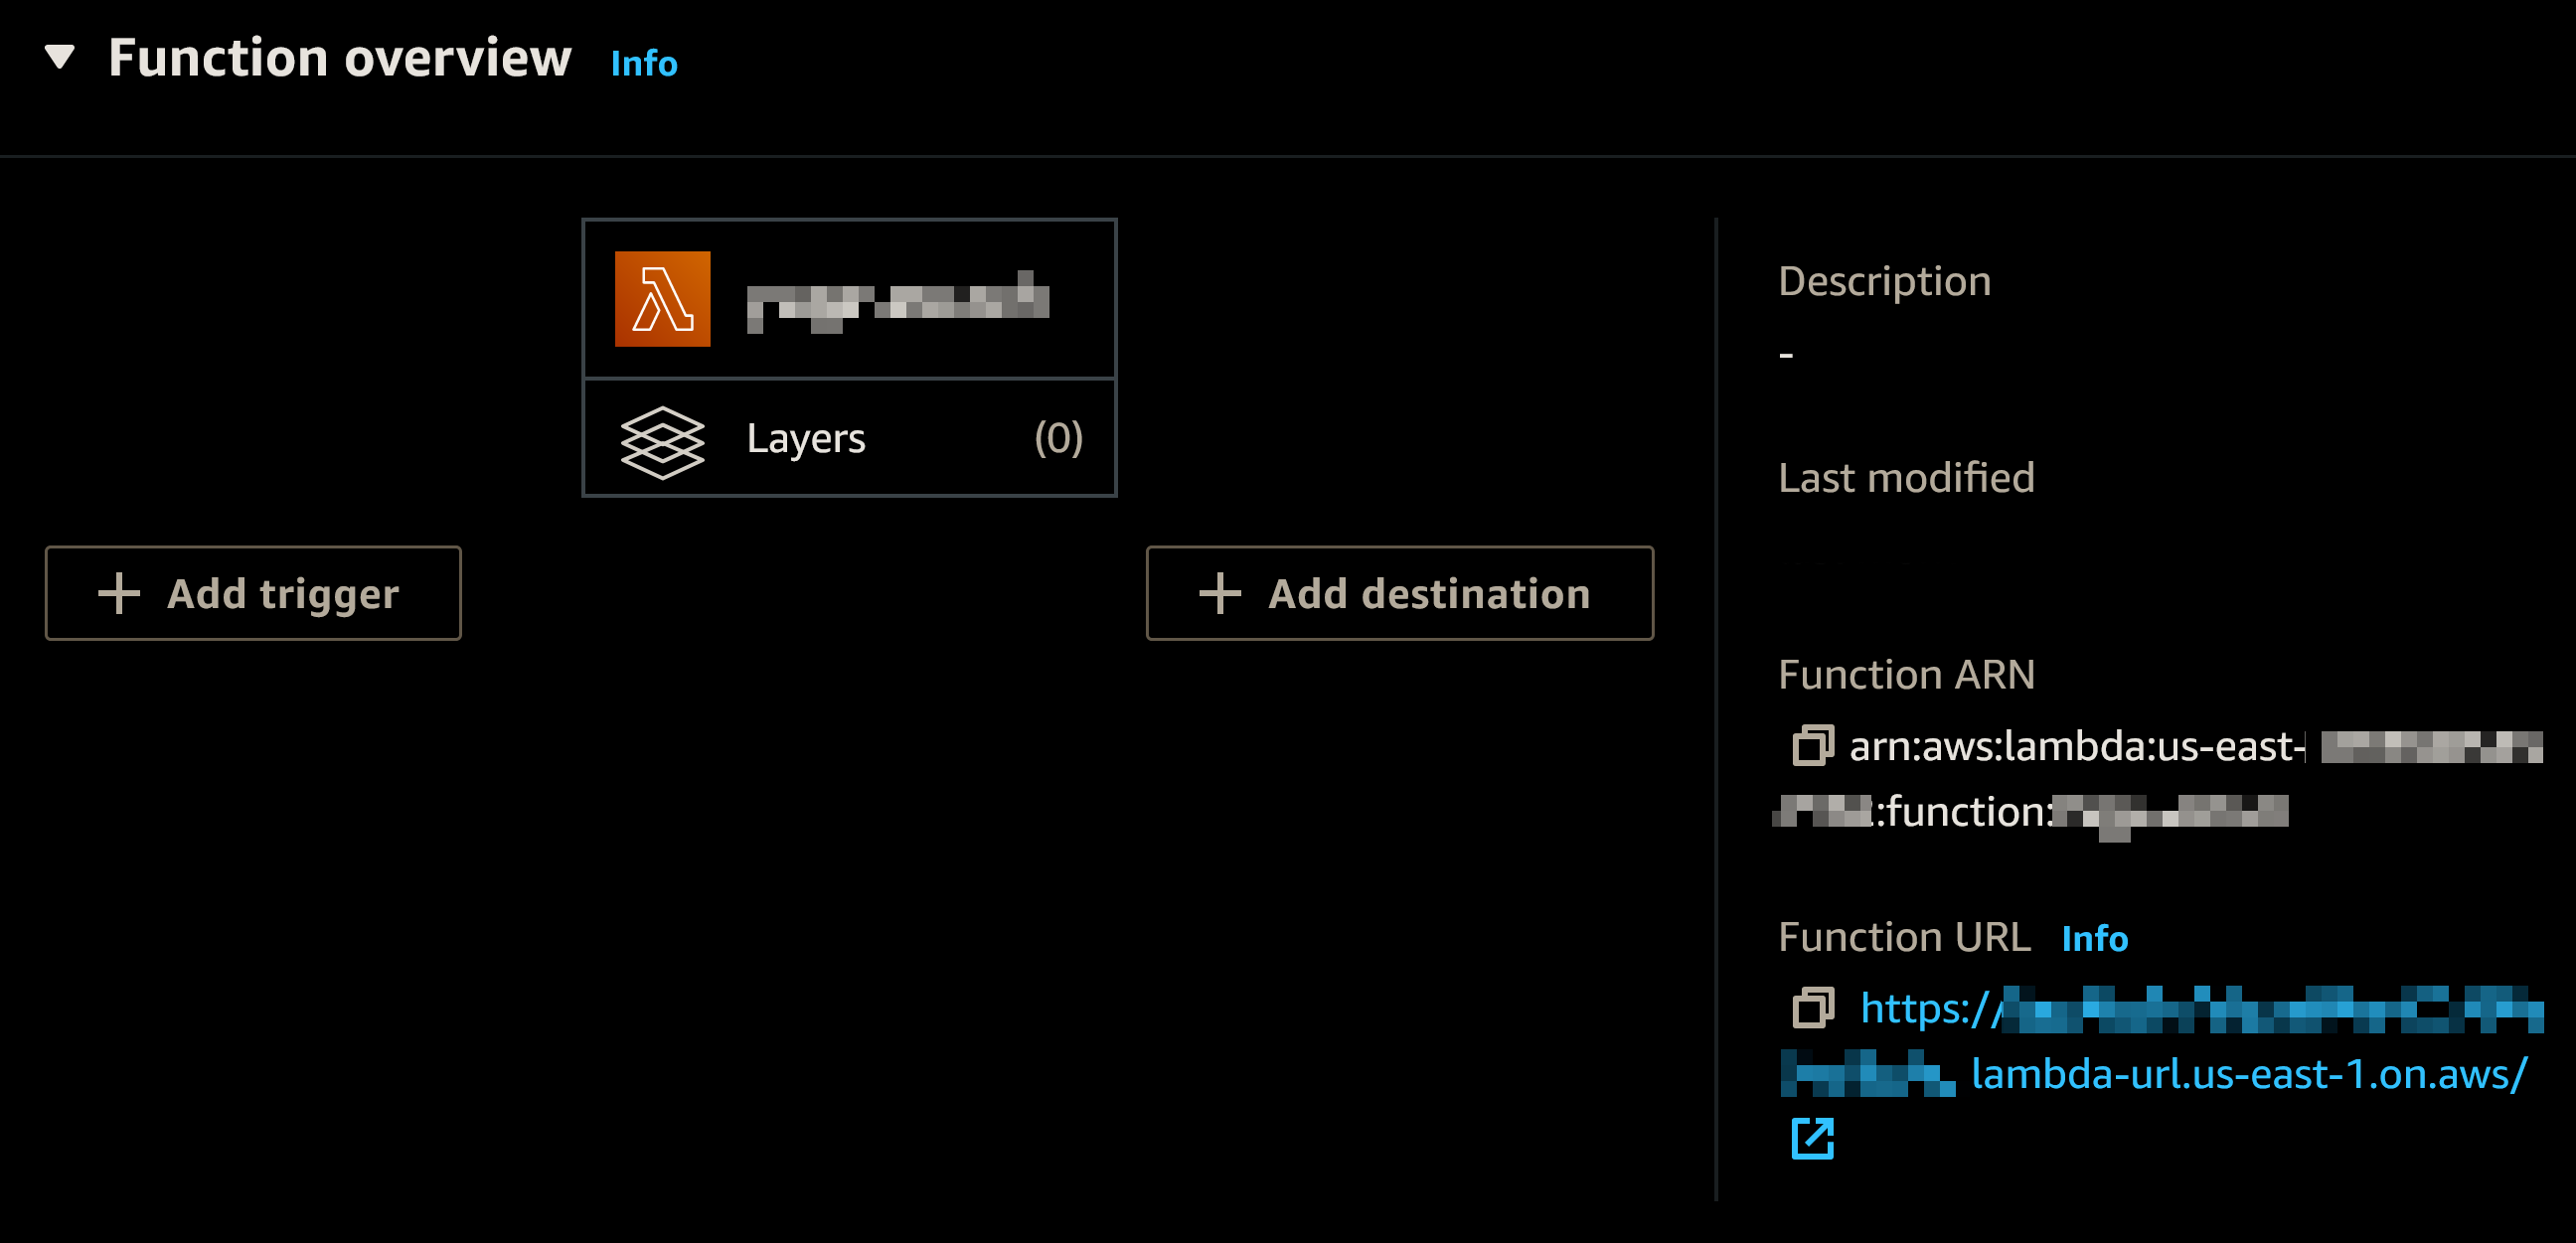
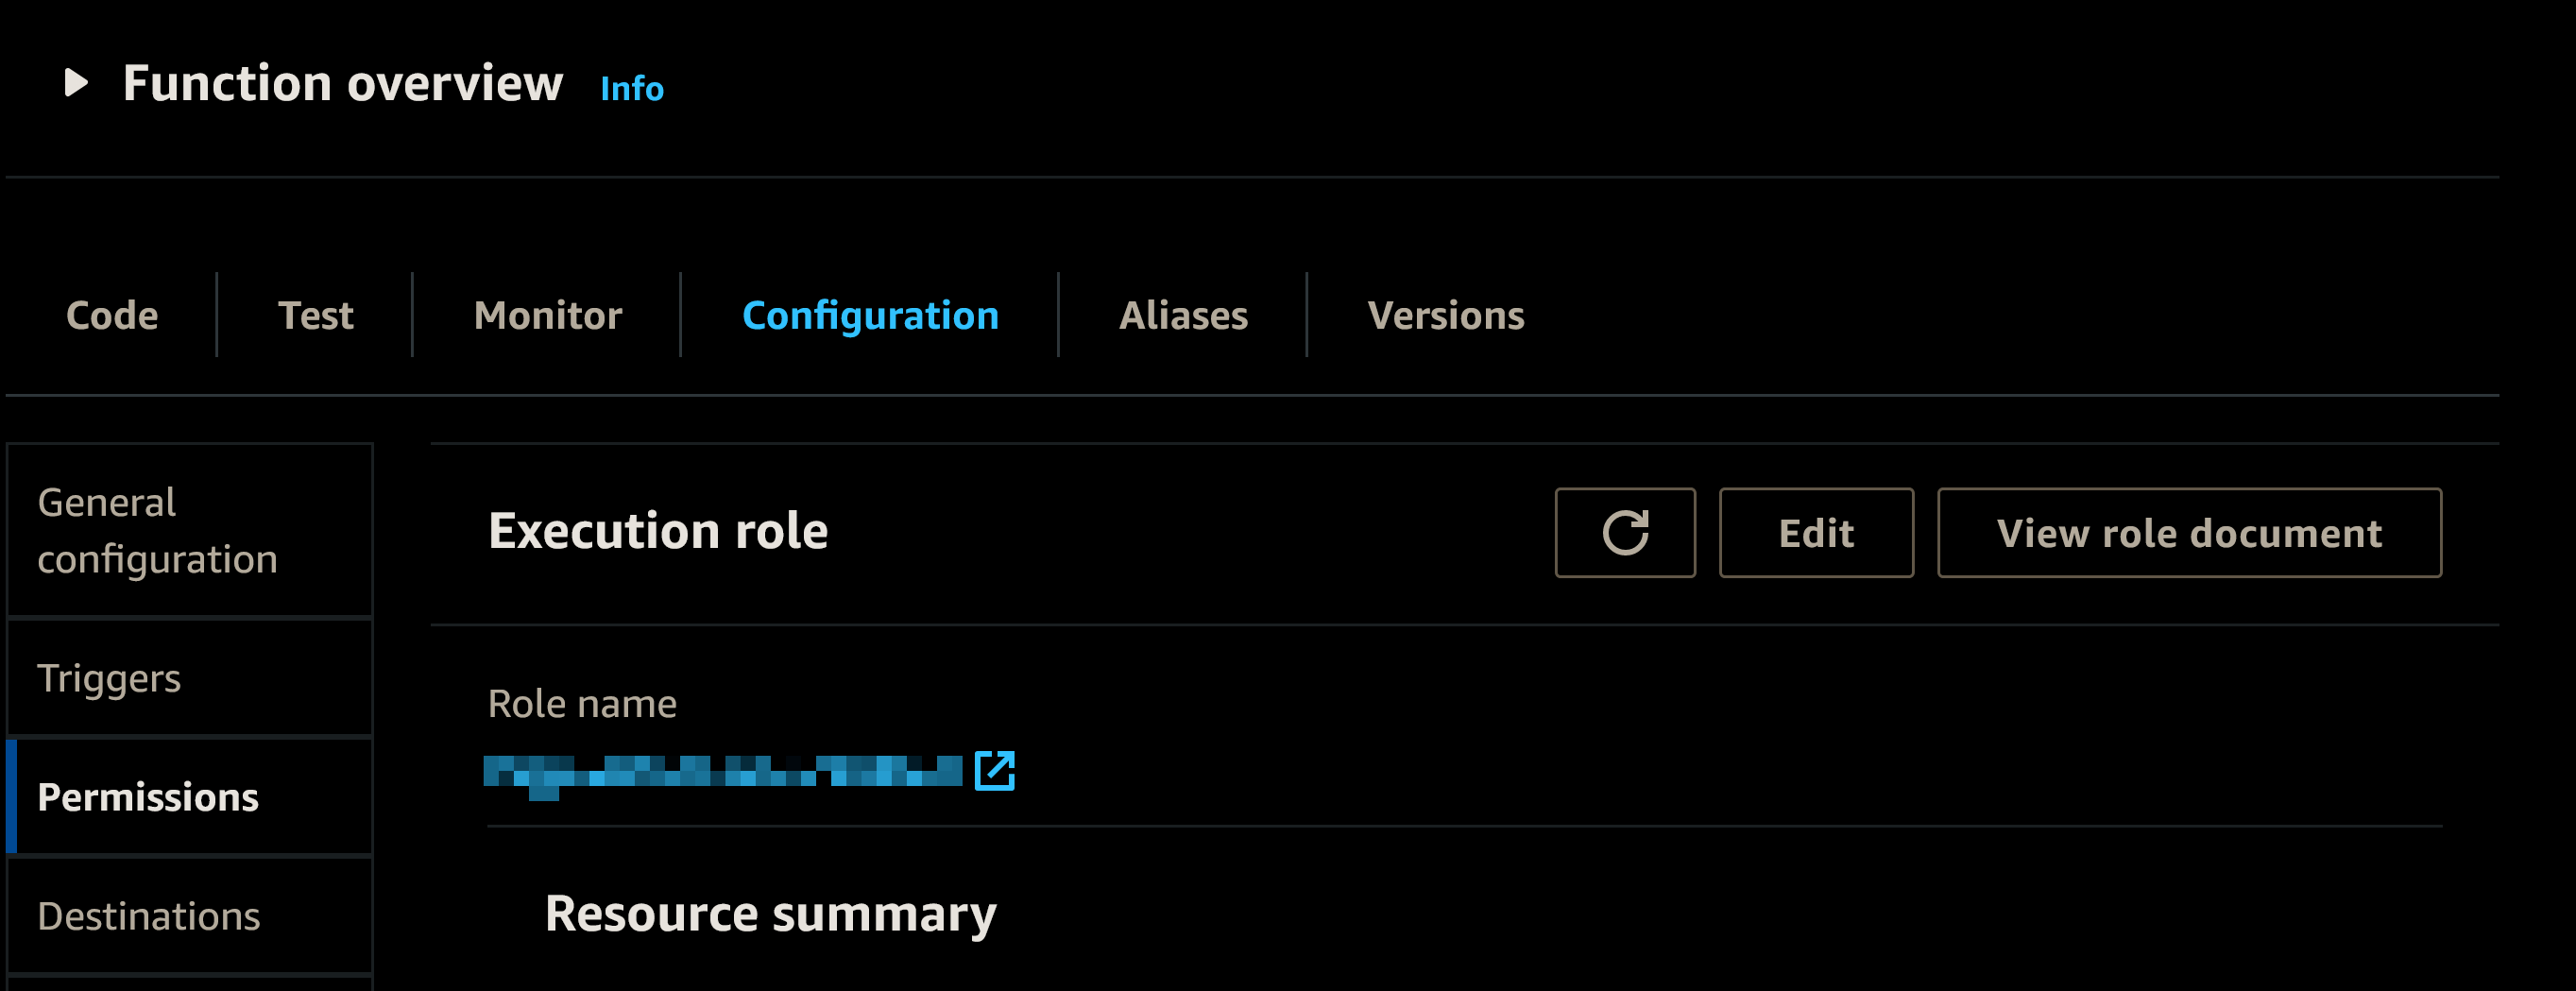
Click on the “Info” link near the “▸ Function overview” heading, and select the “Permissions” tab on the left.
You will find the “Role name” directly under Execution role. Note it down for later.
To test that your “Hello, Lambda” service works, you can compile and upload the function:
$ export LAMBDA_FUNCTION_NAME=hello
$ export LAMBDA_ROLE=<role name from lambda web ui>
$ export LAMBDA_REGION=us-east-1
$ cargo lambda build --release --arm --bin helloworld --output-format zip
  Downloaded libc v0.2.137
# [..] output omitted for brevity
    Finished release [optimized] target(s) in 1m 27s
$ # Delete the old empty definition
$ aws lambda delete-function-url-config --region $LAMBDA_REGION --function-name $LAMBDA_FUNCTION_NAME
$ aws lambda delete-function --region $LAMBDA_REGION --function-name $LAMBDA_FUNCTION_NAME
$ # Upload the function
$ aws lambda create-function --function-name $LAMBDA_FUNCTION_NAME \
    --handler bootstrap \
    --architectures arm64 \
    --zip-file fileb://./target/lambda/helloworld/bootstrap.zip \
    --runtime provided.al2 \
    --region $LAMBDA_REGION \
    --role $LAMBDA_ROLE \
    --tracing-config Mode=Active
$ # Add the function URL
$ aws lambda add-permission \
    --function-name $LAMBDA_FUNCTION_NAME \
    --action lambda:InvokeFunctionUrl \
    --principal "*" \
    --function-url-auth-type "NONE" \
    --region $LAMBDA_REGION \
    --statement-id url
$ # Here for simplicity unauthenticated URL access. Beware!
$ aws lambda create-function-url-config \
    --function-name $LAMBDA_FUNCTION_NAME \
    --region $LAMBDA_REGION \
    --cors "AllowOrigins=*,AllowMethods=*,AllowHeaders=*" \
    --auth-type NONE
Now you can go to your Function Overview and click on the Function URL. You should see something like this:
Hello, Lambda!
Bearer ! You have set up a Lambda function in Rust. On to the next ingredient:
Embedding
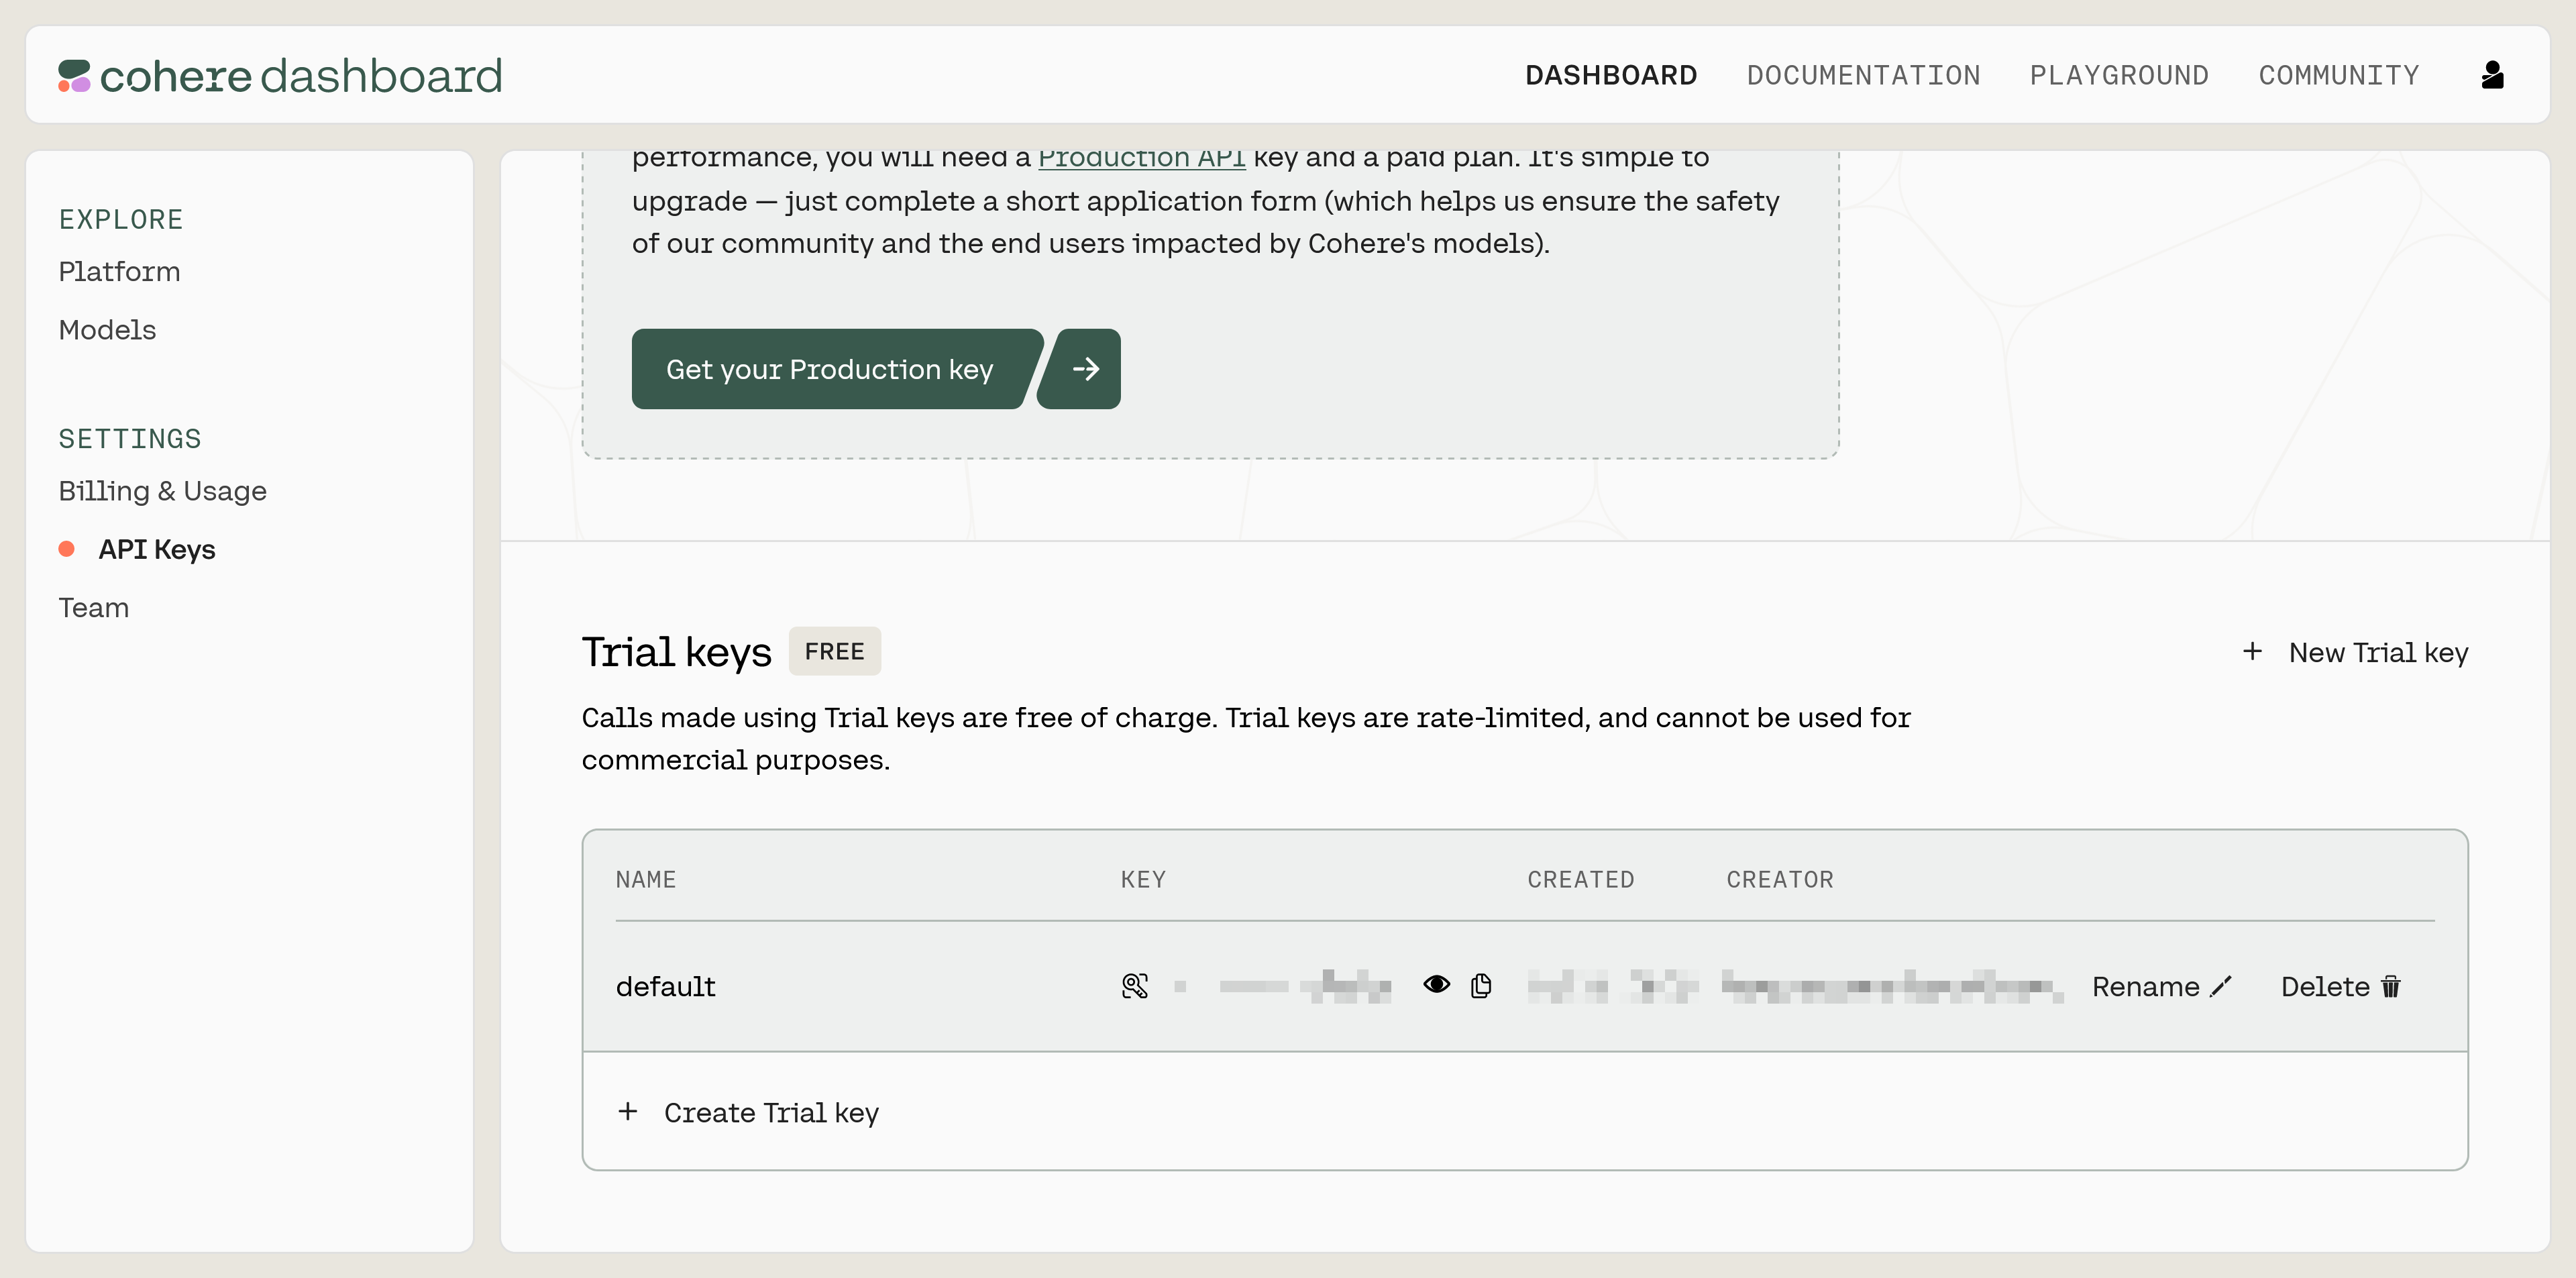
Most providers supply a simple https GET or POST interface you can use with an API key, which you have to supply in an authentication header. If you are using this for non-commercial purposes, the rate limited trial key from Cohere is just a few clicks away. Go to their welcome page, register and you’ll be able to get to the dashboard, which has an “API keys” menu entry which will bring you to the following page: cohere dashboard
From there you can click on the ⎘ symbol next to your API key to copy it to the clipboard. Don’t put your API key in the code! Instead read it from an env variable you can set in the lambda environment. This avoids accidentally putting your key into a public repo. Now all you need to get embeddings is a bit of code. First you need to extend your dependencies with reqwest and also add anyhow for easier error handling:
anyhow = "1.0"
reqwest =  { version = "0.11.18", default-features = false, features = ["json", "rustls-tls"] }
serde = "1.0"
Now given the API key from above, you can make a call to get the embedding vectors:
use anyhow::Result;
use serde::Deserialize;
use reqwest::Client;

#[derive(Deserialize)]
struct CohereResponse { outputs: Vec<Vec<f32>> }

pub async fn embed(client: &Client, text: &str, api_key: &str) -> Result<Vec<Vec<f32>>> {
    let CohereResponse { outputs } = client
        .post("https://api.cohere.ai/embed")
        .header("Authorization", &format!("Bearer {api_key}"))
        .header("Content-Type", "application/json")
        .header("Cohere-Version", "2021-11-08")
        .body(format!("{{\"text\":[\"{text}\"],\"model\":\"small\"}}"))
        .send()
        .await?
        .json()
        .await?;
    Ok(outputs)
}
Note that this may return multiple vectors if the text overflows the input dimensions.
Cohere’s small model has 1024 output dimensions.
Other providers have similar interfaces. Consult our Embeddings docs for further information. See how little code it took to get the embedding?
While you’re at it, it’s a good idea to write a small test to check if embedding works and the vectors are of the expected size:
#[tokio::test]
async fn check_embedding() {
    // ignore this test if API_KEY isn't set
    let Ok(api_key) = &std::env::var("API_KEY") else { return; }
    let embedding = crate::embed("What is semantic search?", api_key).unwrap()[0];
    // Cohere's `small` model has 1024 output dimensions.
    assert_eq!(1024, embedding.len());
}
Run this while setting the API_KEY environment variable to check if the embedding works.
Qdrant search
Now that you have embeddings, it’s time to put them into your Qdrant. You could of course use curl or python to set up your collection and upload the points, but as you already have Rust including some code to obtain the embeddings, you can stay in Rust, adding qdrant-client to the mix.
use anyhow::Result;
use qdrant_client::prelude::*;
use qdrant_client::qdrant::{VectorsConfig, VectorParams};
use qdrant_client::qdrant::vectors_config::Config;
use std::collections::HashMap;

fn setup<'i>(
    embed_client: &reqwest::Client,
    embed_api_key: &str,
    qdrant_url: &str,
    api_key: Option<&str>,
    collection_name: &str,
    data: impl Iterator<Item = (&'i str, HashMap<String, Value>)>,
) -> Result<()> {
    let mut config = QdrantClientConfig::from_url(qdrant_url);
    config.api_key = api_key;
    let client = QdrantClient::new(Some(config))?;

    // create the collections
    if !client.has_collection(collection_name).await? {
        client
            .create_collection(&CreateCollection {
                collection_name: collection_name.into(),
                vectors_config: Some(VectorsConfig {
                    config: Some(Config::Params(VectorParams {
                        size: 1024, // output dimensions from above
                        distance: Distance::Cosine as i32,
                        ..Default::default()
                    })),
                }),
                ..Default::default()
            })
            .await?;
    }
    let mut id_counter = 0_u64;
    let points = data.map(|(text, payload)| {
        let id = std::mem::replace(&mut id_counter, *id_counter + 1);
        let vectors = Some(embed(embed_client, text, embed_api_key).unwrap());
        PointStruct { id, vectors, payload }
    }).collect();
    client.upsert_points(collection_name, points, None).await?;
    Ok(())
}
Depending on whether you want to efficiently filter the data, you can also add some indexes. I’m leaving this out for brevity. Also this does not implement chunking (splitting the data to upsert in multiple requests, which avoids timeout errors).
Add a suitable main method and you can run this code to insert the points (or just use the binary from the example). Be sure to include the port in the qdrant_url.
Now that you have the points inserted, you can search them by embedding:
use anyhow::Result;
use qdrant_client::prelude::*;
pub async fn search(
    text: &str,
    collection_name: String,
    client: &Client,
    api_key: &str,
    qdrant: &QdrantClient,
) -> Result<Vec<ScoredPoint>> {
    Ok(qdrant.search_points(&SearchPoints {
        collection_name,
        limit: 5, // use what fits your use case here
        with_payload: Some(true.into()),
        vector: embed(client, text, api_key)?,
        ..Default::default()
    }).await?.result)
}
You can also filter by adding a filter: ... field to the SearchPoints, and you will likely want to process the result further, but the example code already does that, so feel free to start from there in case you need this functionality.
Putting it all together
Now that you have all the parts, it’s time to join them up. Now copying and wiring up the snippets above is left as an exercise to the reader.
You’ll want to extend the main method a bit to connect with the Client once at the start, also get API keys from the environment so you don’t need to compile them into the code. To do that, you can get them with std::env::var(_) from the rust code and set the environment from the AWS console.
$ export QDRANT_URI=<qour Qdrant instance URI including port>
$ export QDRANT_API_KEY=<your Qdrant API key>
$ export COHERE_API_KEY=<your Cohere API key>
$ export COLLECTION_NAME=site-cohere
$ aws lambda update-function-configuration \
    --function-name $LAMBDA_FUNCTION_NAME \
    --environment "Variables={QDRANT_URI=$QDRANT_URI,\
        QDRANT_API_KEY=$QDRANT_API_KEY,COHERE_API_KEY=${COHERE_API_KEY},\
        COLLECTION_NAME=${COLLECTION_NAME}"`
In any event, you will arrive at one command line program to insert your data and one Lambda function. The former can just be cargo run to set up the collection. For the latter, you can again call cargo lambda and the AWS console:
$ export LAMBDA_FUNCTION_NAME=search
$ export LAMBDA_REGION=us-east-1
$ cargo lambda build --release --arm --output-format zip
  Downloaded libc v0.2.137
# [..] output omitted for brevity
    Finished release [optimized] target(s) in 1m 27s
$ # Update the function
$ aws lambda update-function-code --function-name $LAMBDA_FUNCTION_NAME \
     --zip-file fileb://./target/lambda/page-search/bootstrap.zip \
     --region $LAMBDA_REGION
Discussion
Lambda works by spinning up your function once the URL is called, so they don’t need to keep the compute on hand unless it is actually used. This means that the first call will be burdened by some 1-2 seconds of latency for loading the function, later calls will resolve faster. Of course, there is also the latency for calling the embeddings provider and Qdrant. On the other hand, the free tier doesn’t cost a thing, so you certainly get what you pay for. And for many use cases, a result within one or two seconds is acceptable.
Rust minimizes the overhead for the function, both in terms of file size and runtime. Using an embedding service means you don’t need to care about the details. Knowing the URL, API key and embedding size is sufficient. Finally, with free tiers for both Lambda and Qdrant as well as free credits for the embedding provider, the only cost is your time to set everything up. Who could argue with free?