
 Module 0
Qdrant Setup
Welcome to your first hands-on step. Before you can search anything, you need a place to store your vectors. That’s what Qdrant Cloud gives you: a managed Qdrant environment that runs in the cloud, so there’s nothing to install and nothing to keep running on your own local machine. It comes with a secure connection, backups, easier updates, and a clean interface you’ll use throughout this course.
Don’t worry if some terms here are new. You’ll set up a cluster, get a key that lets your code talk to it, and run one quick check to confirm it’s working. That’s the whole goal for this lesson.
Create Your Cluster
A cluster is your personal Qdrant instance in the cloud. Here’s how to create one:
- Sign up at cloud.qdrant.io with email, Google, or GitHub.
- Open Clusters and select Create a Free Cluster. The Free Tier is enough for this whole course, and you won’t be asked for a card.
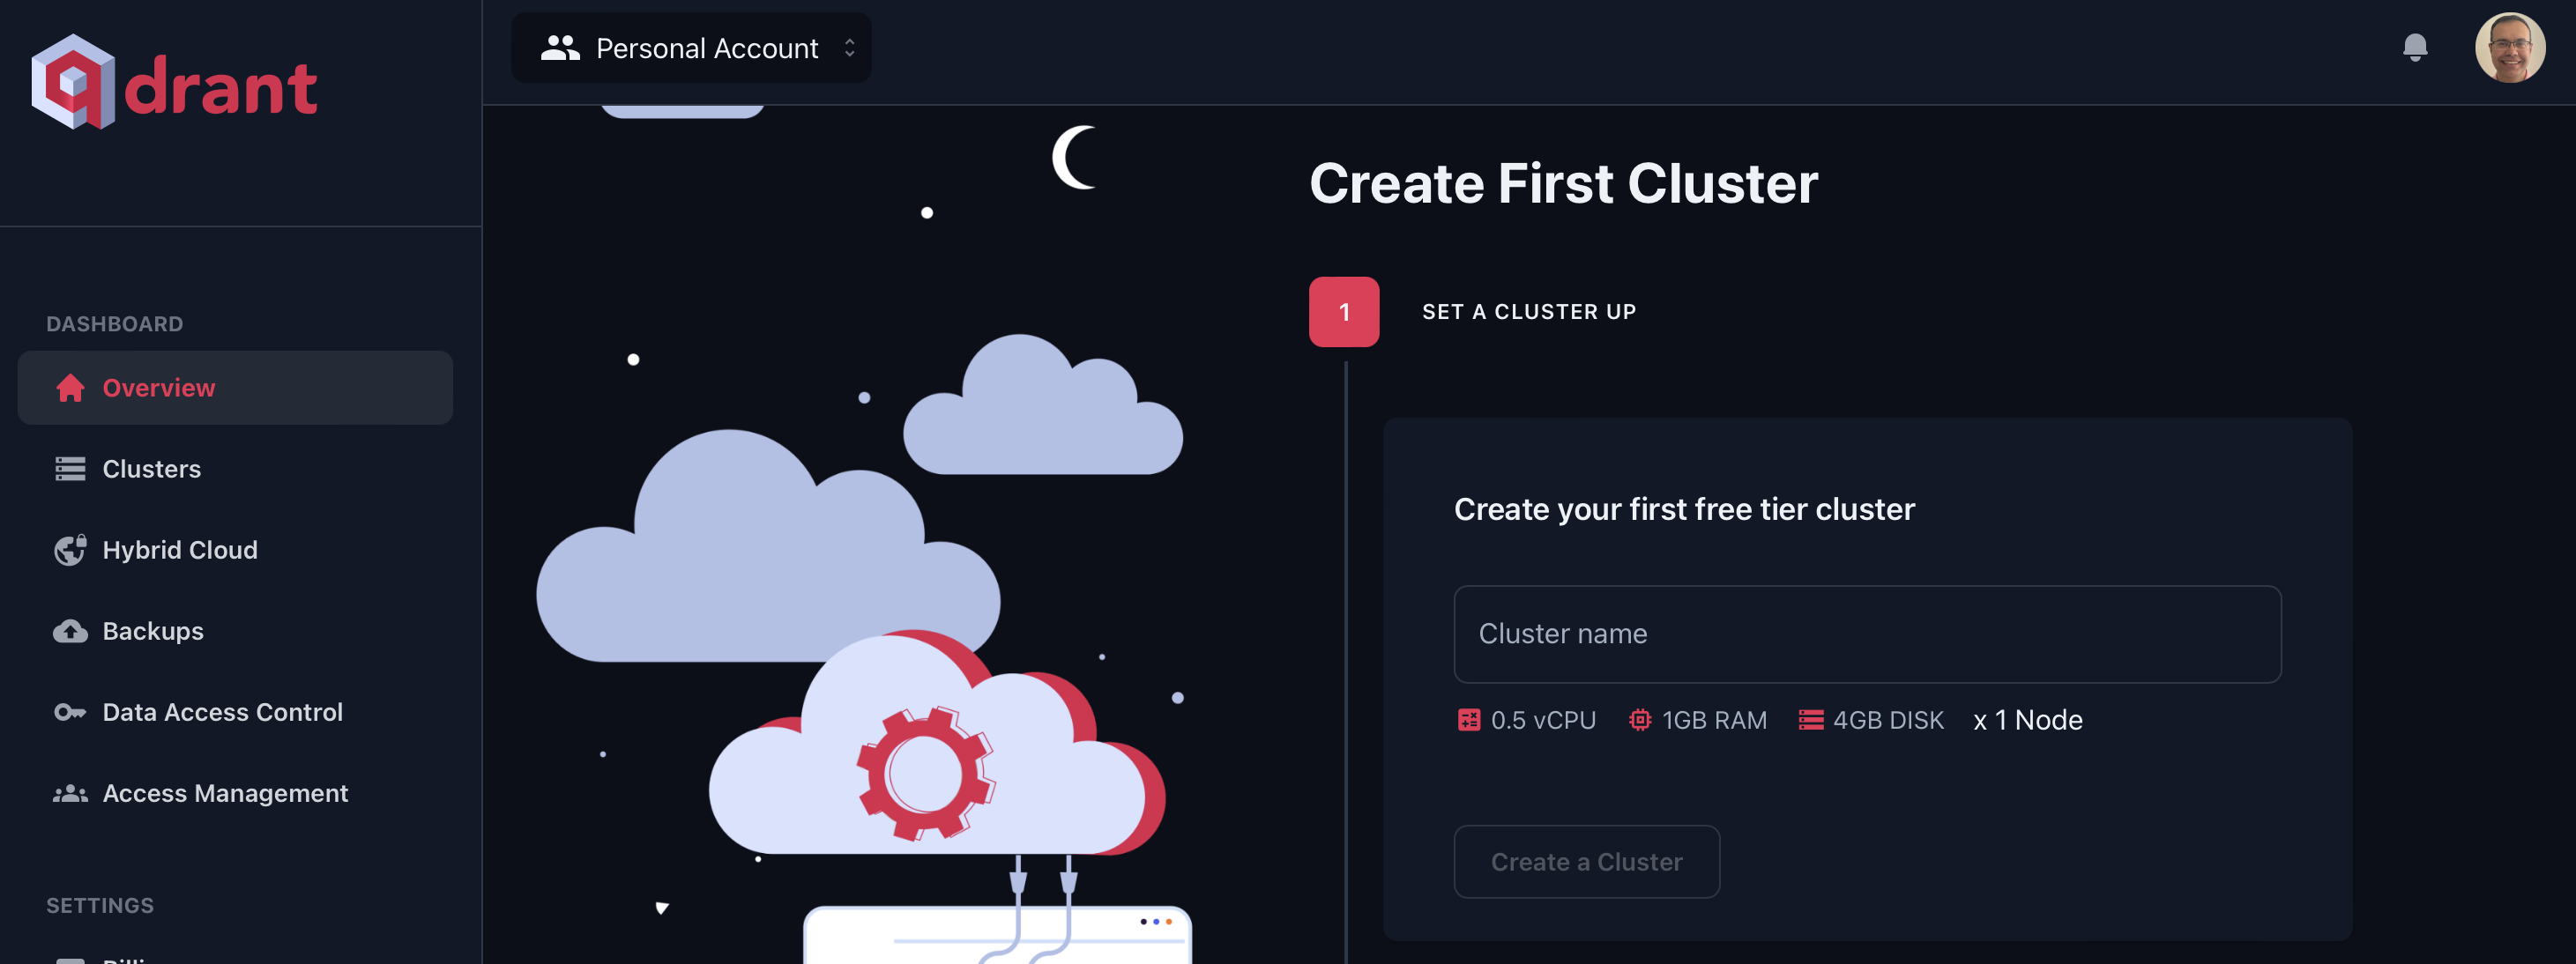
- Pick a region close to you or your users. This keeps things fast.
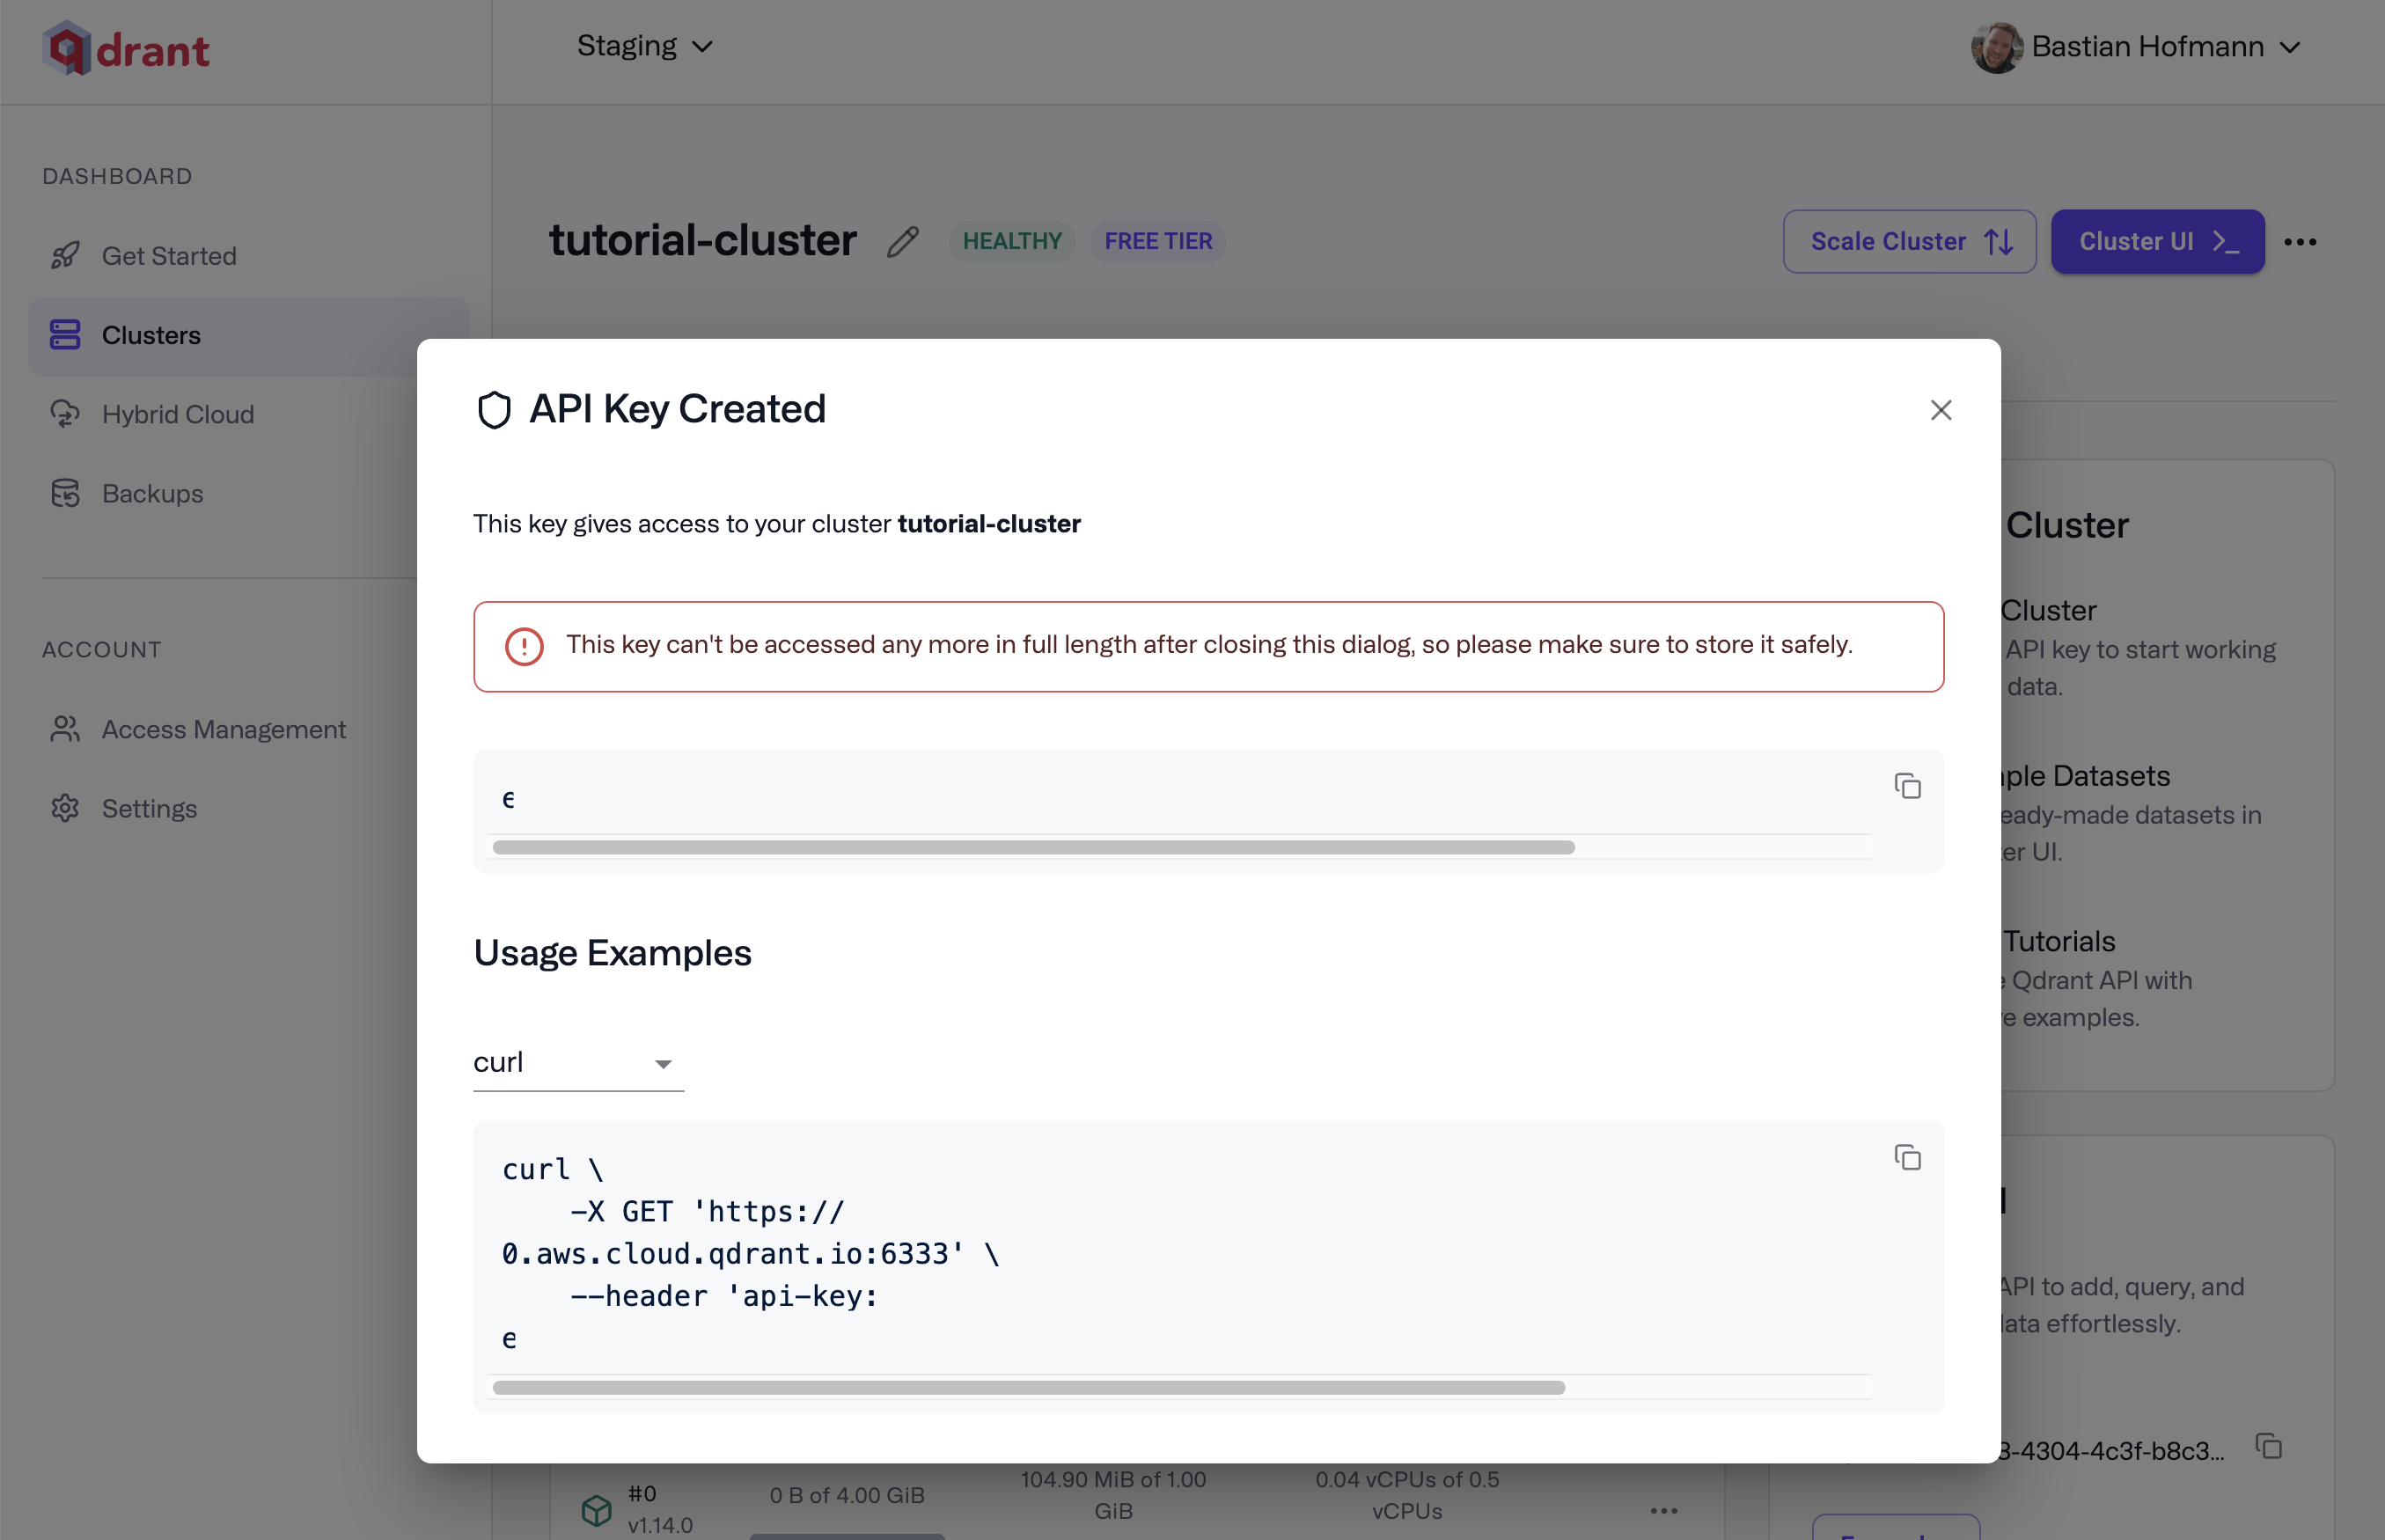
- When the cluster is ready, copy the API key and store it somewhere safe. An API key is like a password your code uses to prove it’s allowed to reach your cluster, so treat it like one. You can always create new keys later from the API Keys section on the cluster page.
Access the Web UI
The Web UI is a dashboard for looking at your data and running searches without writing code. It’s the fastest way to see what’s happening inside your cluster while you learn.
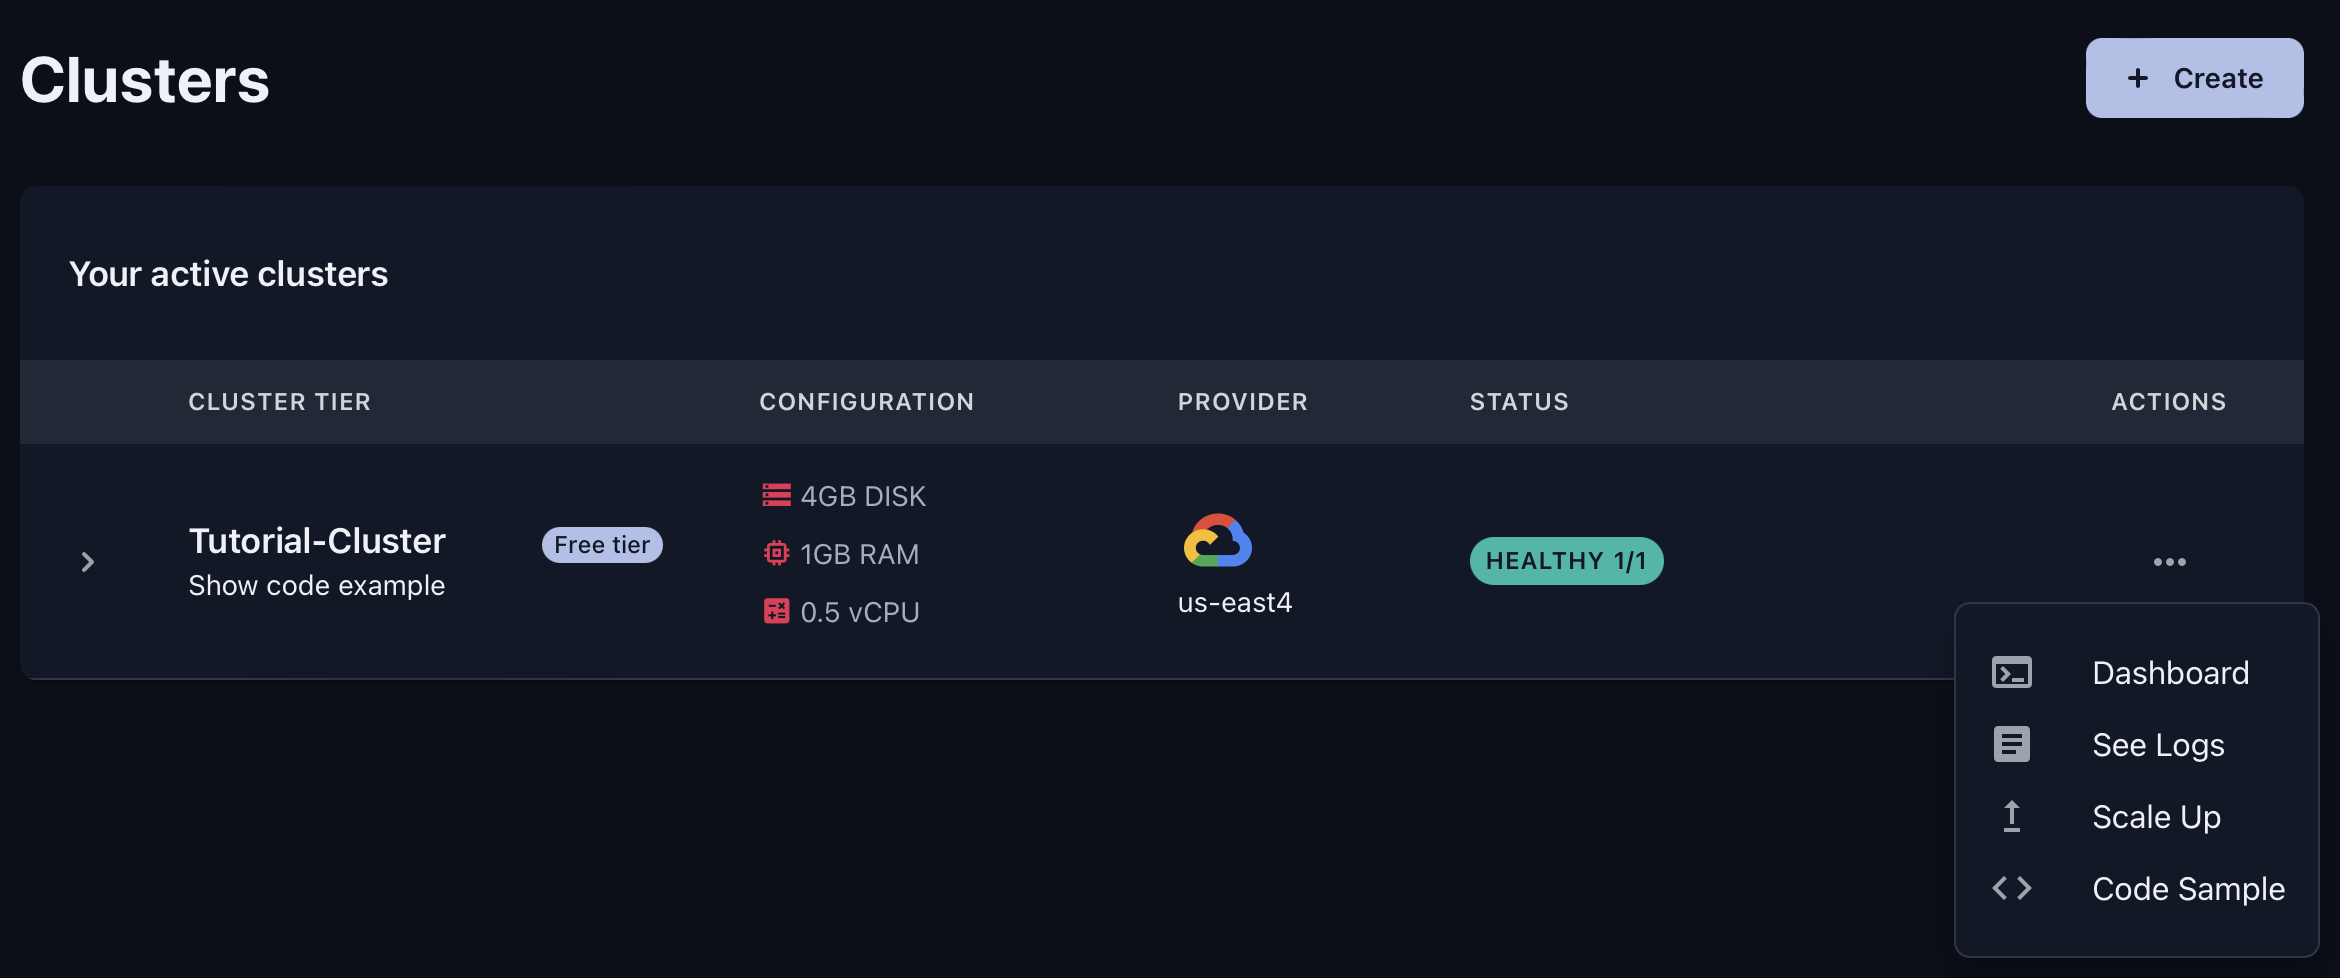
- Select Cluster UI in the top corner of the cluster page to open the dashboard.
What You Can Do in the Web UI
Use the Web UI to manage collections, inspect data, and check how your searches perform.
Main Navigation
- Console: Run commands against Qdrant right in the browser. Great for testing and seeing responses without writing a program.
- Collections: See and manage all your collections in one place, and track their status, size, and settings at a glance.
- Tutorial: Follow a guided walkthrough with sample data. You create a collection, add vectors, and run a search with live results.
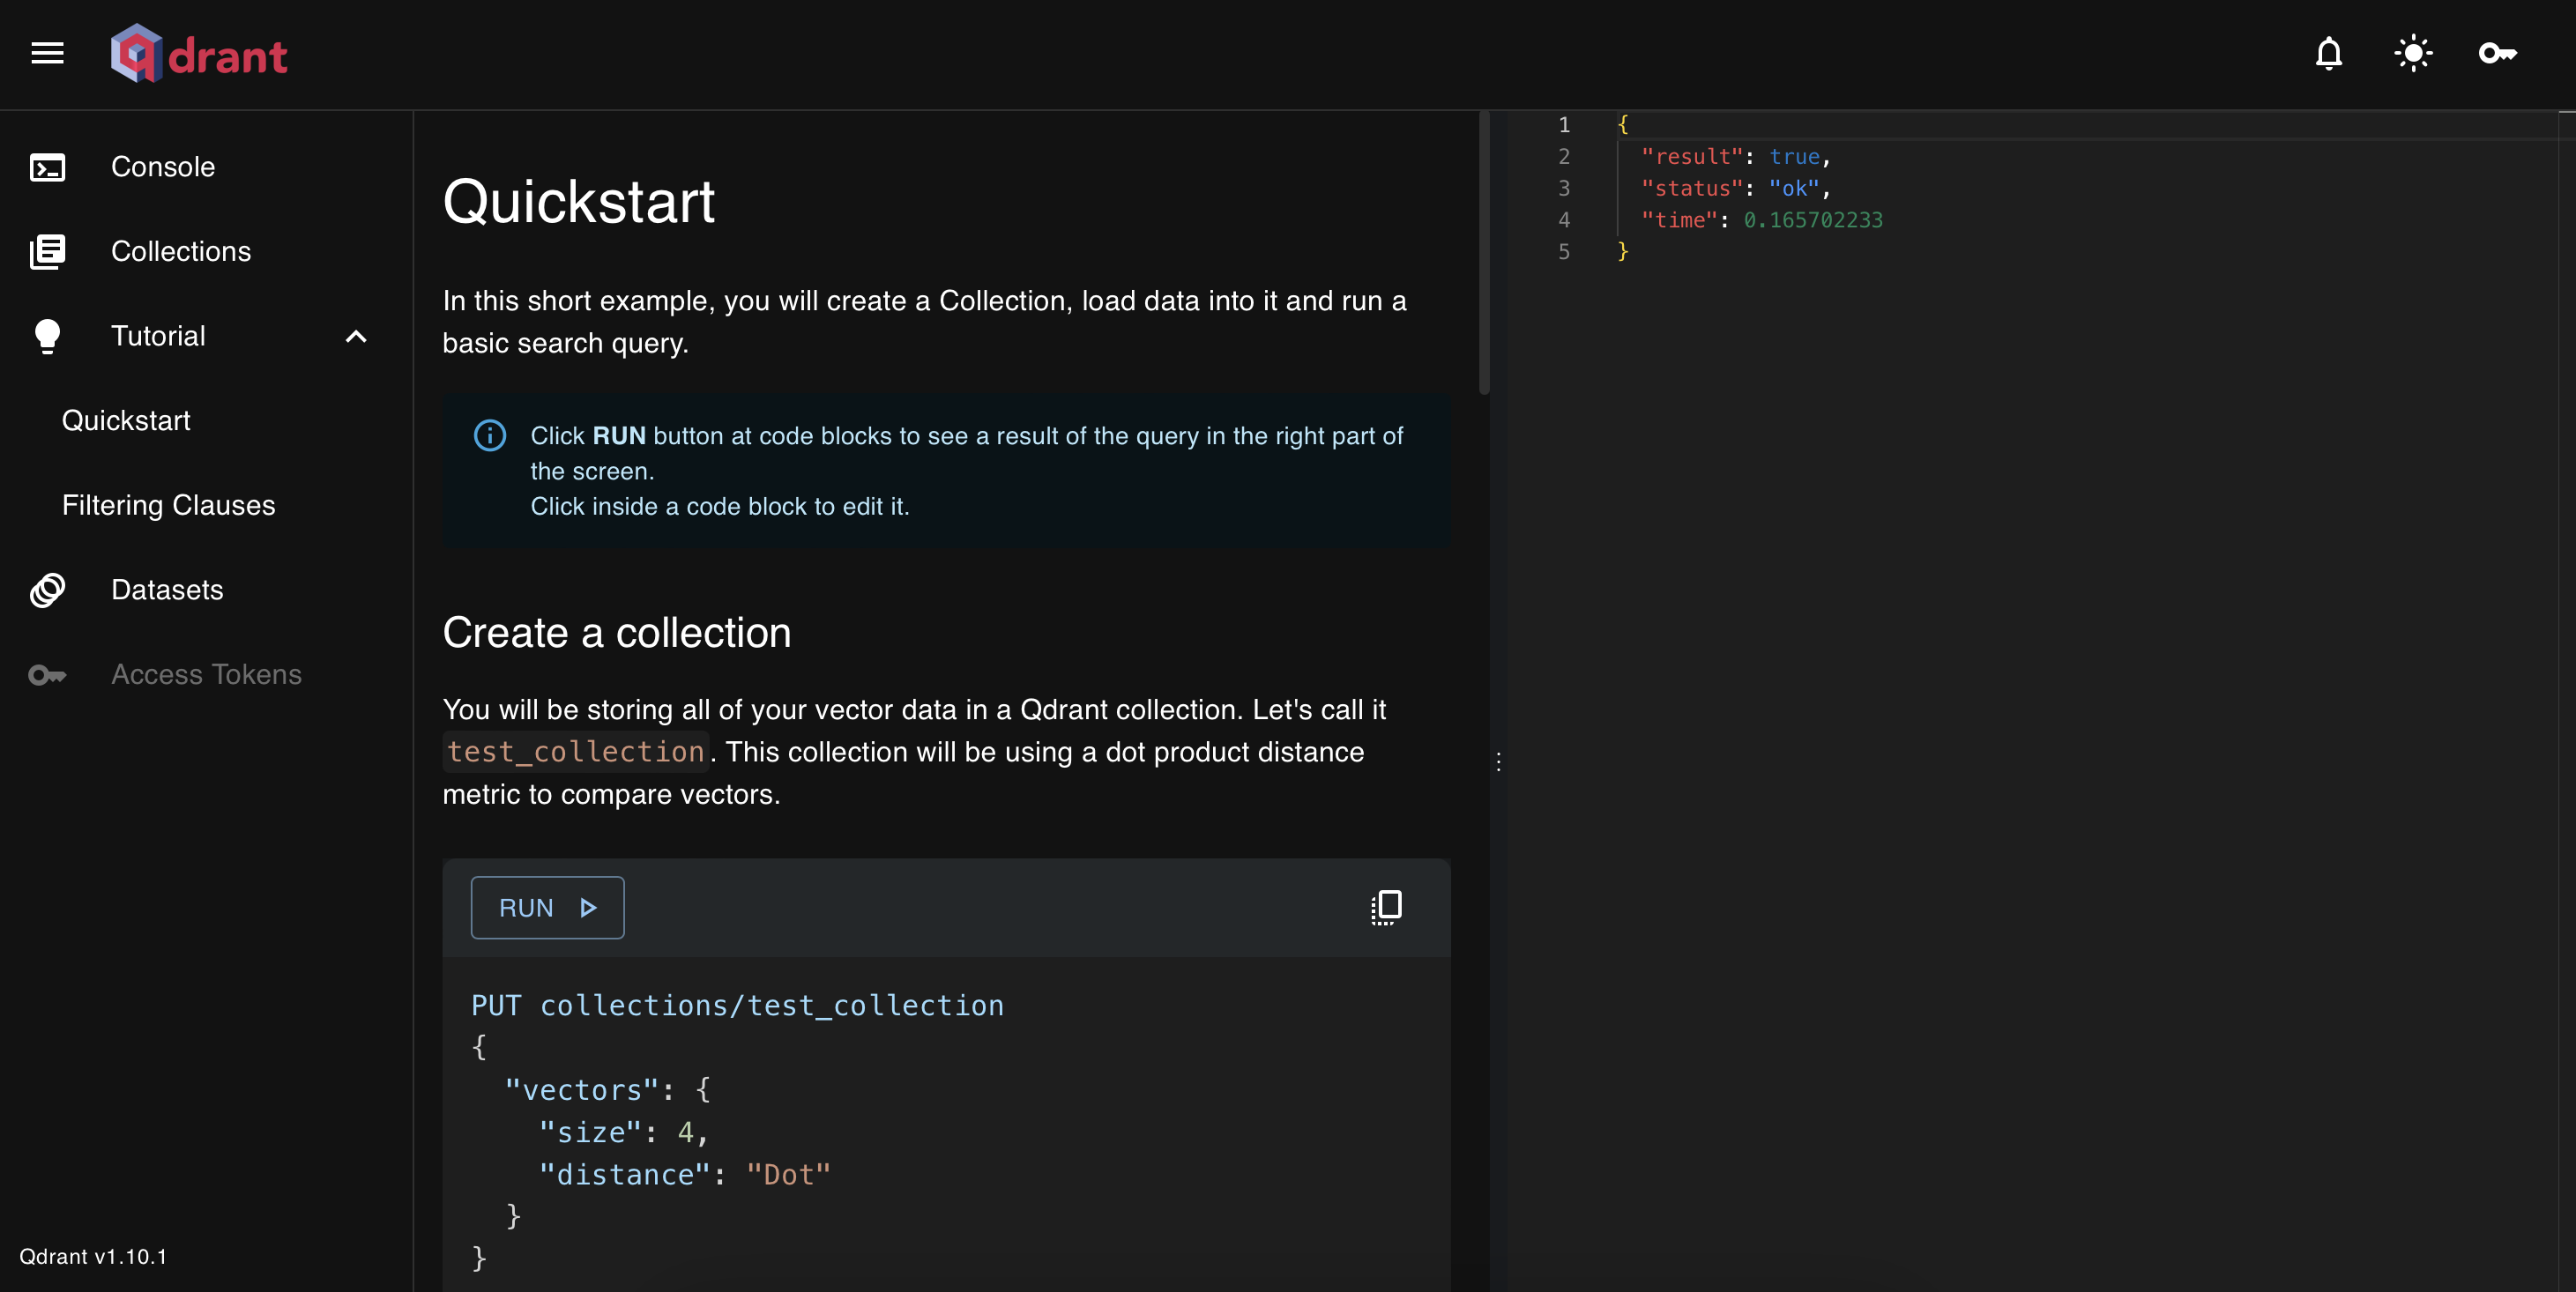
- Datasets: Load ready-made public datasets into your cluster with one click.
Inside a Collection
When you open a collection by selecting its name,
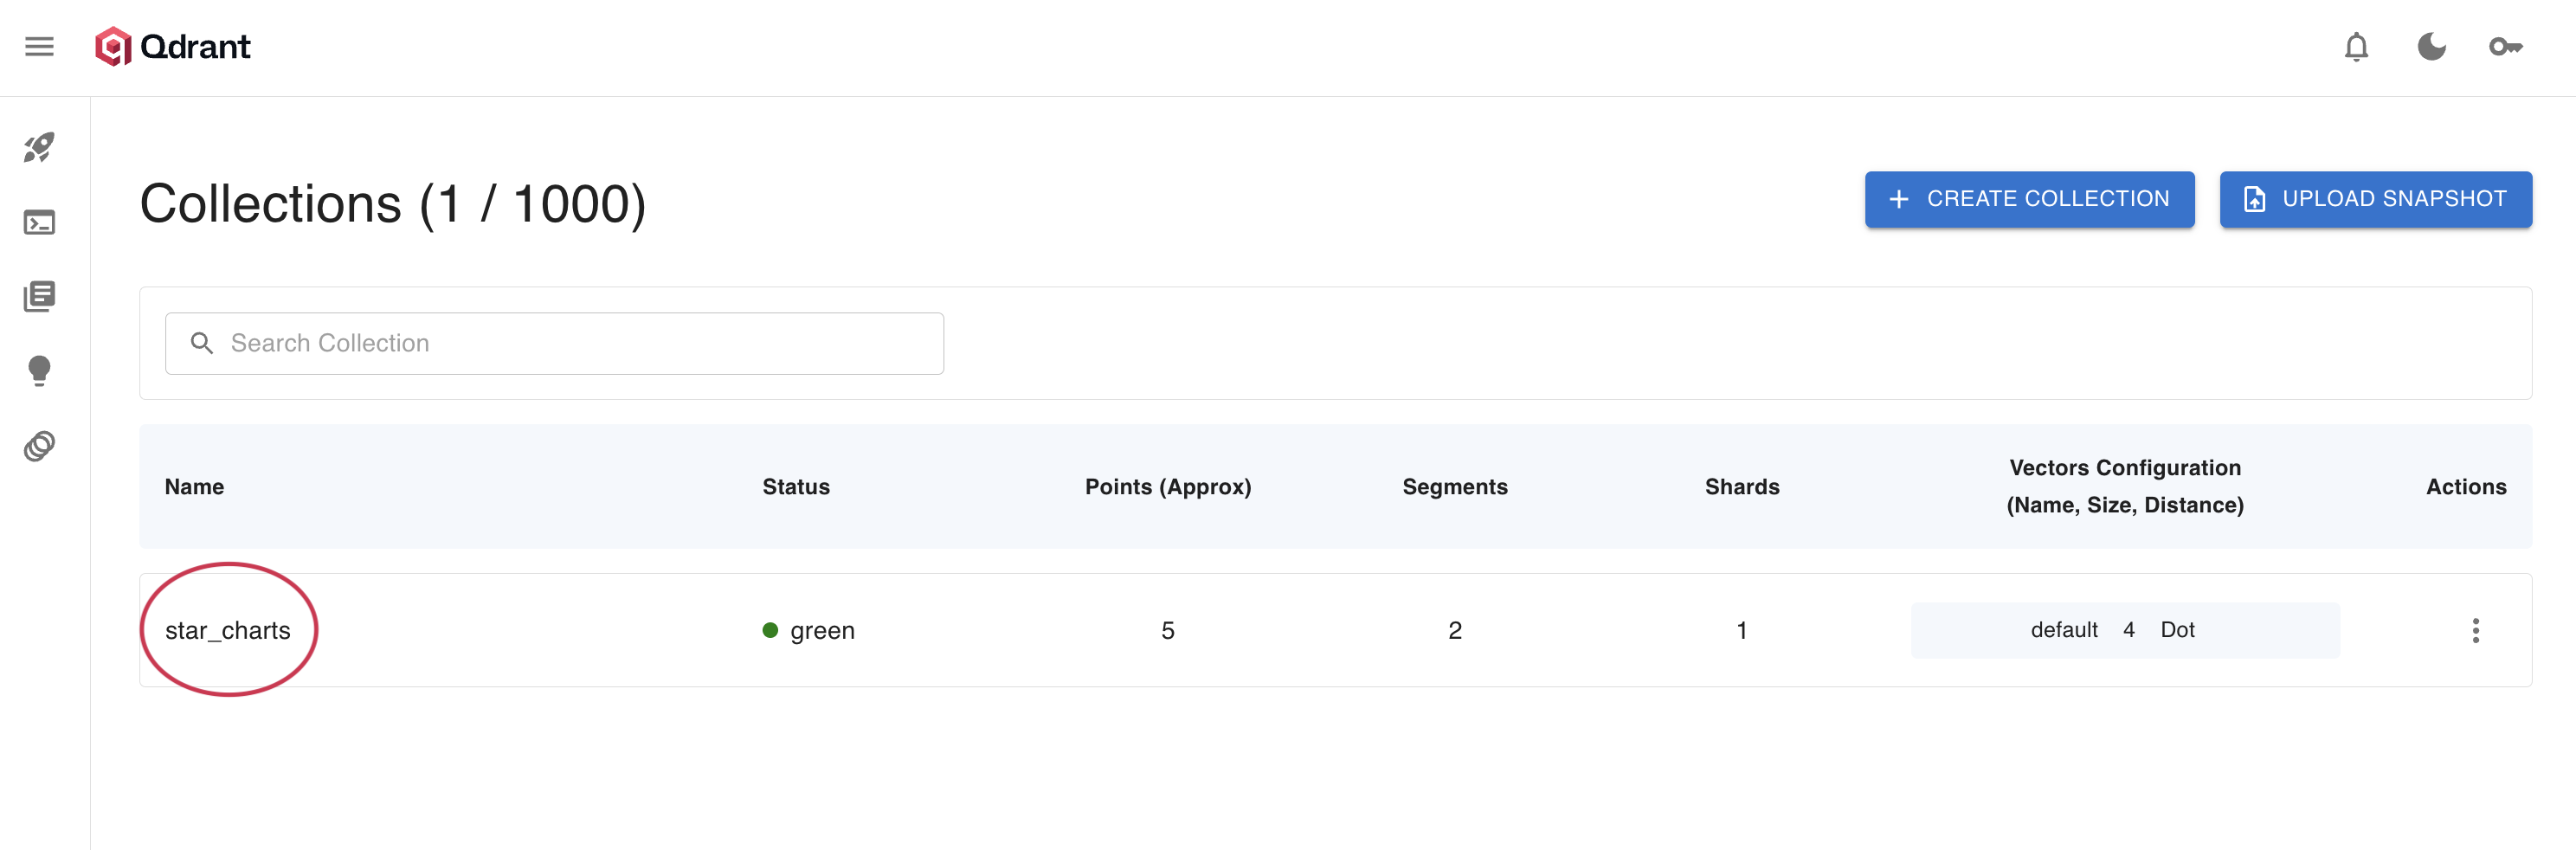
you’ll see a detailed view with several tabs. You don’t need all of these yet, so here’s a plain-language tour you can come back to later:
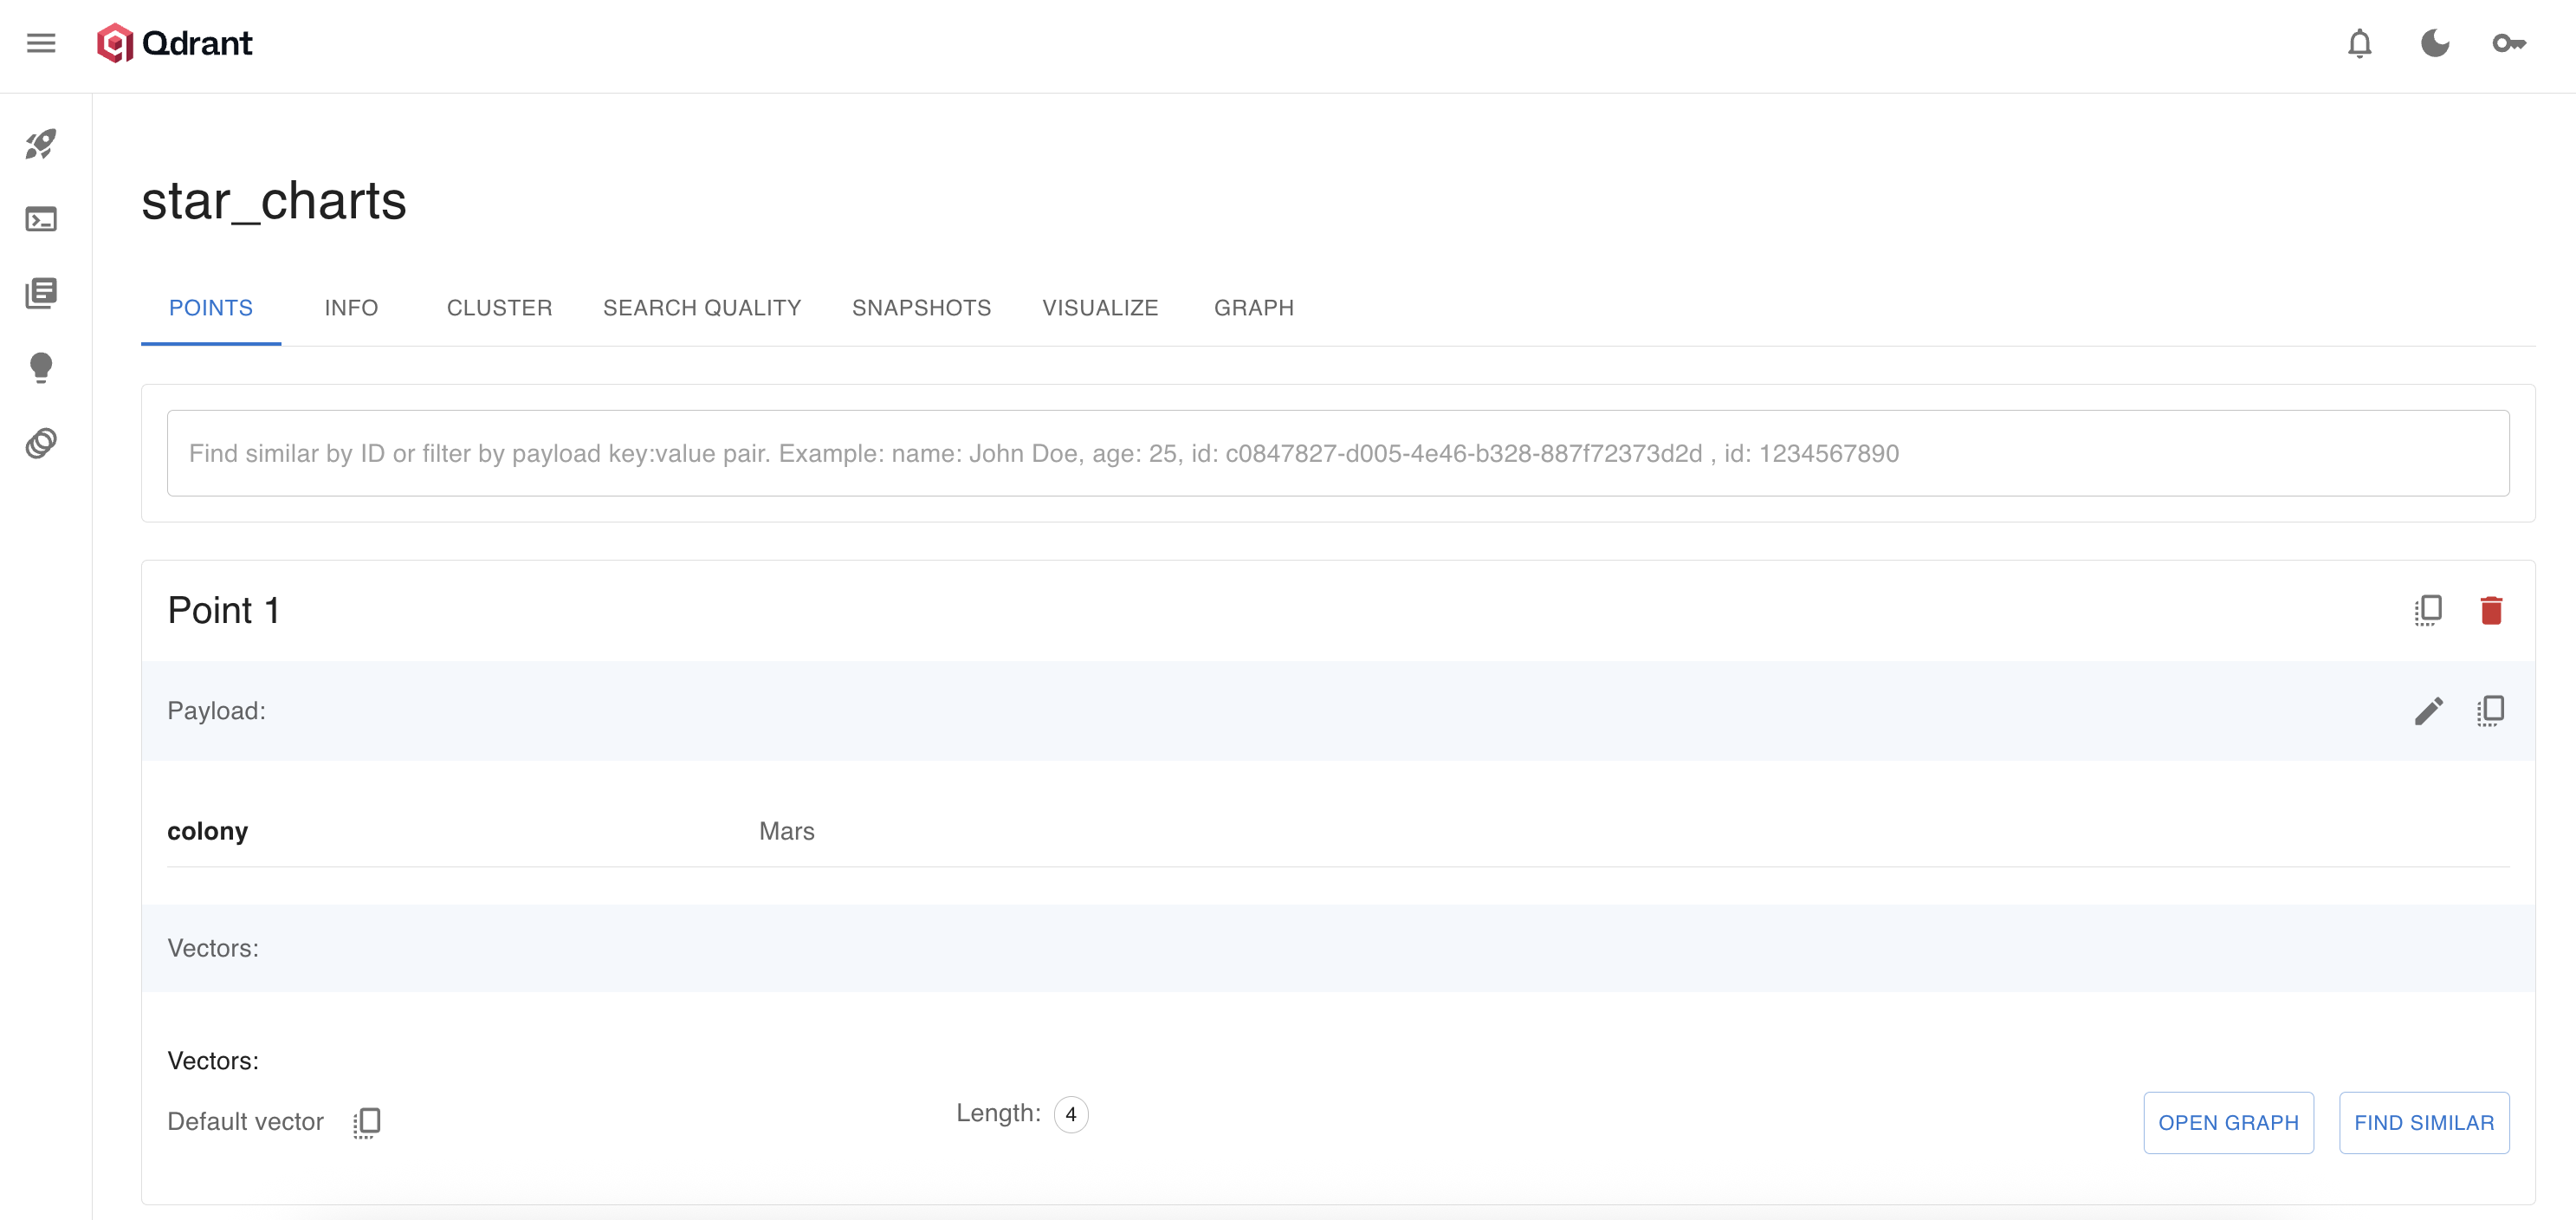
- Points Tab: Look at, search, and manage your individual data entries. You can view each entry’s data, run a quick “find similar” search, or open a graph view of how it connects to its neighbors.
- Info Tab: A health check for the collection. The one field to know for now is
status—greenmeans everything is healthy. - Cluster Tab: Shows how your data is spread across machines. You’ll care about this only once you scale up.
- Search Quality Tab: Measures how accurate your searches are. Useful later, when you start tuning.
- Snapshots Tab: Manage backups of the collection. You can create a collection snapshot, restore it, or move it to another cluster.
- Visualize Tab: See your vectors as a 2D map. A nice way to build intuition once you have real data loaded.
- Graph Tab: Explore how points connect to their nearest neighbors.
Connect from Python
Now let’s connect from code. First, store your credentials in a file named .env at the root of your project (or set them in Colab). Keeping them in a separate file means you won’t accidentally paste your key into shared code:
QDRANT_URL=https://YOUR-CLUSTER.cloud.qdrant.io:6333
QDRANT_API_KEY=YOUR_API_KEY
Then load those values and create a client. The client is the object your Python code uses to send requests to Qdrant:
from qdrant_client import QdrantClient, models
import os

client = QdrantClient(url=os.getenv("QDRANT_URL"), api_key=os.getenv("QDRANT_API_KEY"))

# For Colab:
# from google.colab import userdata
# client = QdrantClient(url=userdata.get("QDRANT_URL"), api_key=userdata.get("QDRANT_API_KEY"))

# Quick health check
collections = client.get_collections()
print(f"Connected to Qdrant Cloud: {len(collections.collections)} collections")
If that prints a line about being connected, you’re done. That’s the whole setup.
Other Ways to Connect
You can also reach your cluster directly over the web, without Python. This is handy for a quick test:
# Using the api-key header
curl -X GET https://xyz-example.eu-central.aws.cloud.qdrant.io:6333/collections \
  --header 'api-key: <your-api-key>'

# Using the Authorization header
curl -X GET https://xyz-example.eu-central.aws.cloud.qdrant.io:6333/collections \
  --header 'Authorization: Bearer <your-api-key>'
Quick Validation
If you want to double-check the connection, these two commands confirm your cluster is up and reachable:
# Service health
curl -s "$QDRANT_URL/healthz" -H "api-key: $QDRANT_API_KEY"

# List collections
curl -s "$QDRANT_URL/collections" -H "api-key: $QDRANT_API_KEY"
Good Practices
A few habits worth starting now:
- Keep your key out of your code. Use an environment variable or a secrets manager.
- Rotate your API keys now and then from the cluster Access tab.
- Use HTTPS only, and tighten access before you expose a cluster to the public internet.
Common Issues
- Authentication error: Recheck the API key and the
api-keyheader. A stray space or a missing character is the usual cause. - Connection error: Confirm the cluster is running and the region URL is correct. Some workplace networks block outbound connections, so try from a personal network if a request hangs.
Qdrant Cloud Inference
This part is optional, but good to know it exists. Normally you turn text or images into vectors yourself before storing them. Cloud Inference does that step for you inside Qdrant Cloud: you send raw text or images, and Qdrant creates the vectors and stores them in one call. You’ll create vectors by hand in the next lessons so you understand what’s happening, but this is a shortcut you can reach for later.
Learn more in the Qdrant Cloud Inference documentation.
Qdrant Agent Skills
If you’re using an AI coding assistant (Claude Code, Cursor, and others) alongside this course, install the Qdrant Advisor skill early with this simple command:
npx skills add qdrant/skills/meta/qdrant-advisor
It’s a single assistant that can troubleshoot and advise on any Qdrant deployment: when you describe a problem like slow search, memory climbing toward an out-of-memory crash, a stuck optimizer, a scaling decision, it searches live documentation, pulls only the branch of guidance that matches your symptom, and grounds its diagnosis in that current, official guidance instead of stale training data.