# Authentication
# Database Authentication in Qdrant Managed Cloud
This page describes what Database API keys are and shows you how to use the Qdrant Cloud Console to create a Database API key for a cluster. You will learn how to connect to your cluster using the new API key.
Database API keys can be configured with granular access control. Database API keys with granular access control can be recognized by starting with `eyJhb`. Please refer to the [Table of access](/documentation/operations/security/index.md#table-of-access) to understand what permissions you can configure.
Database API keys with granular access control are available for clusters using version **v1.11.0** and above.
## Create Database API Keys
1. Go to the [Cloud Dashboard](https://qdrant.to/cloud).
2. Go to the **API Keys** section of the **Cluster Detail Page**.
3. Click **Create**.
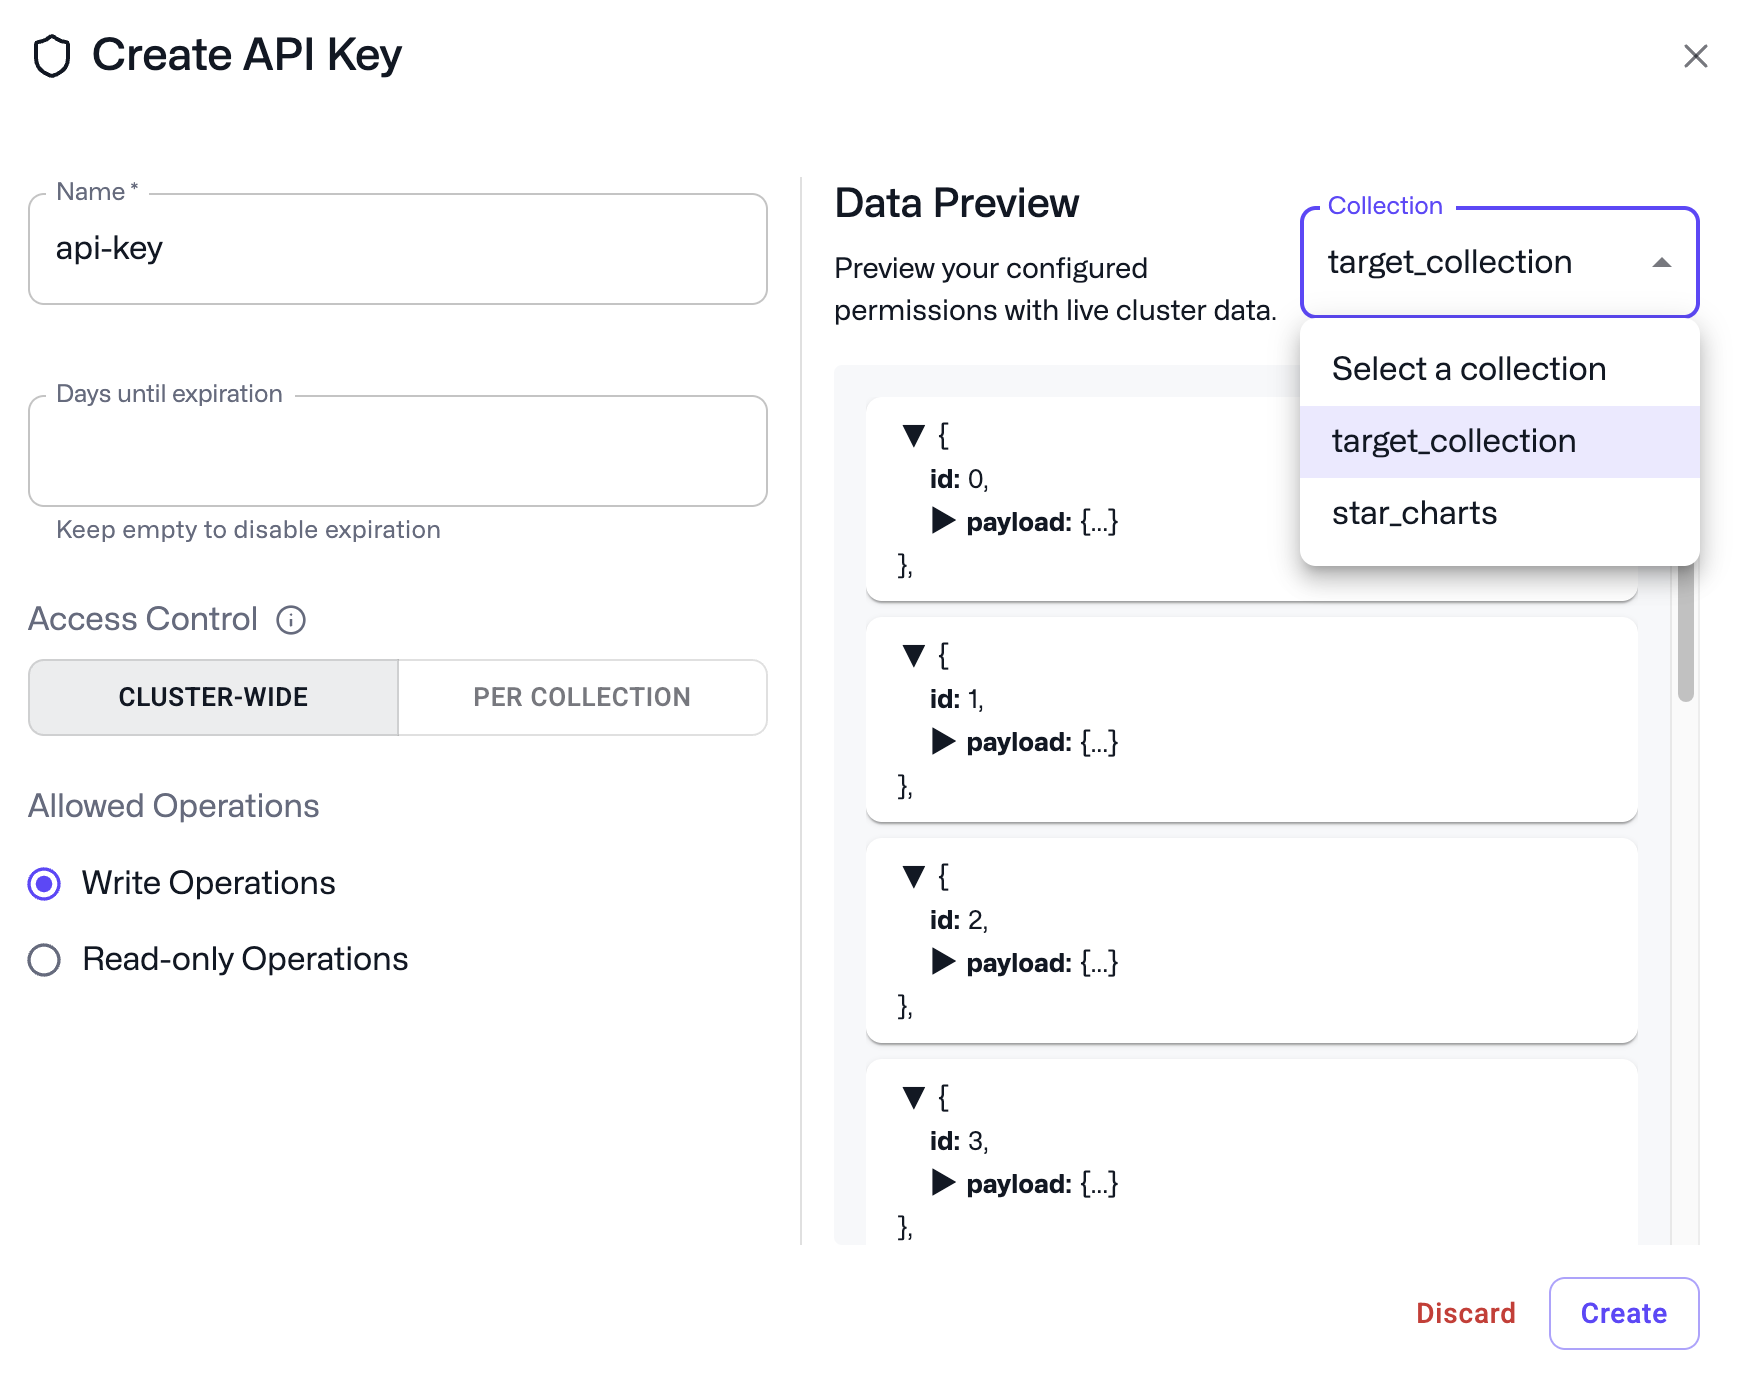
4. Choose a name and an optional expiration (in days, the default is 90 days) for your API key. An empty expiration will result in no expiration.
5. By default, tokens are given cluster-wide permissions, with a choice between manage/write permissions (default) or read-only.
To restrict a token to a subset of collections, you can select the Collections tab and choose from the collections available in your cluster.
6. Click **Create** and retrieve your API key.
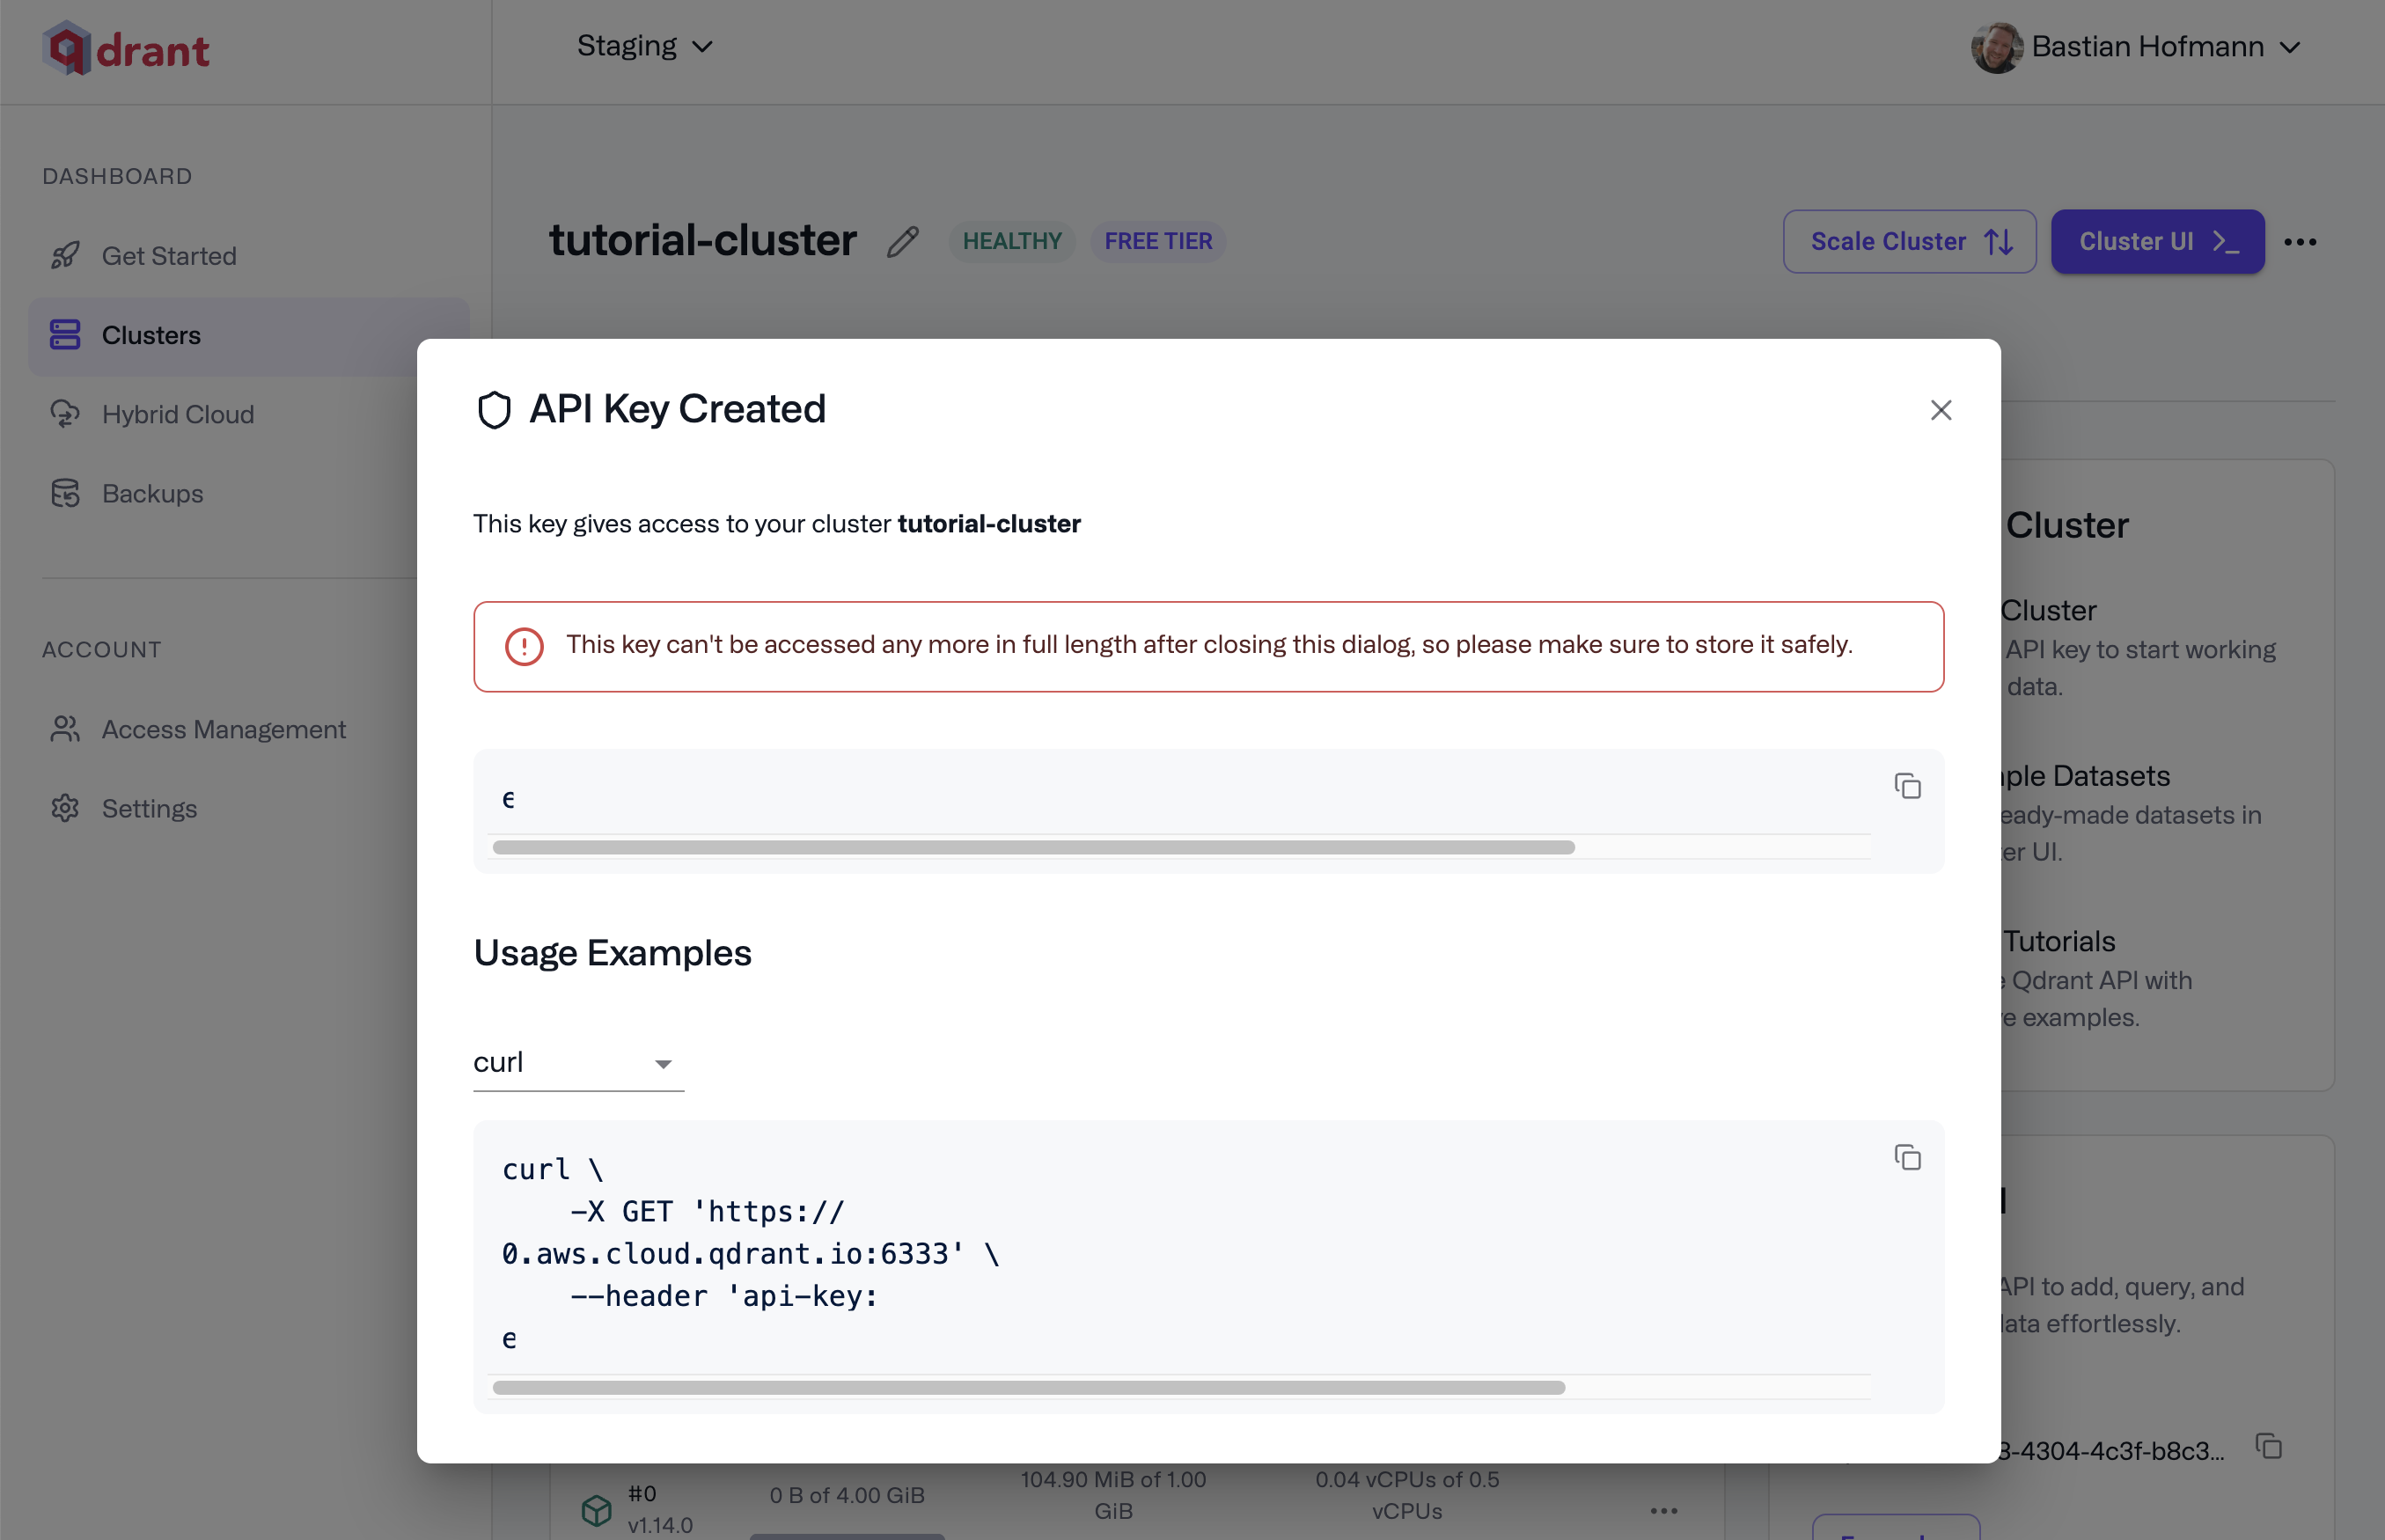
We recommend configuring an expiration and rotating your API keys regularly as a security best practice.
## Admin Database API Keys
The previous iteration of Database API keys, called Admin Database API keys, do not have granular access control. Clusters created before January 27, 2025 will still see the option to create Admin Database API keys. Older Admin Database API keys will continue to work, but we do recommend switching to Database API keys with granular access control to take advantage of better security controls.
To enable Database API keys with granular access control, click **Enable** on the **API Keys** section of the Cluster detail page.
After enabling Database API keys with granular access control for a cluster, existing Admin Database API keys will continue to work, but you will not be able to create new Admin Database API Keys.
## Test Cluster Access
After creation, you will receive a code snippet to access your cluster. Your generated request should look very similar to this one:
```bash
curl \
-X GET 'https://xyz-example.cloud-region.cloud-provider.cloud.qdrant.io:6333' \
--header 'api-key: '
```
Open Terminal and run the request. You should get a response that looks like this:
```bash
{"title":"qdrant - vector search engine","version":"1.13.0","commit":"ffda0b90c8c44fc43c99adab518b9787fe57bde6"}
```
> **Note:** You need to include the API key in the request header for every
> request over REST or gRPC.
## Authenticate via SDK
Now that you have created your first cluster and key, you might want to access your database from within your application.
Our [official Qdrant clients](/documentation/interfaces/index.md) for Python, TypeScript, Go, Rust, .NET and Java all support the API key parameter.
```bash
curl \
-X GET https://xyz-example.cloud-region.cloud-provider.cloud.qdrant.io:6333 \
--header 'api-key: '
# Alternatively, you can use the `Authorization` header with the `Bearer` prefix
curl \
-X GET https://xyz-example.cloud-region.cloud-provider.cloud.qdrant.io:6333 \
--header 'Authorization: Bearer '
```
```python
from qdrant_client import QdrantClient
qdrant_client = QdrantClient(
"xyz-example.cloud-region.cloud-provider.cloud.qdrant.io",
api_key="",
)
```
```typescript
import { QdrantClient } from "@qdrant/js-client-rest";
const client = new QdrantClient({
host: "xyz-example.cloud-region.cloud-provider.cloud.qdrant.io",
apiKey: "",
});
```
```rust
use qdrant_client::Qdrant;
let client = Qdrant::from_url("https://xyz-example.cloud-region.cloud-provider.cloud.qdrant.io:6334")
.api_key("")
.build()?;
```
```java
import io.qdrant.client.QdrantClient;
import io.qdrant.client.QdrantGrpcClient;
QdrantClient client =
new QdrantClient(
QdrantGrpcClient.newBuilder(
"xyz-example.cloud-region.cloud-provider.cloud.qdrant.io",
6334,
true)
.withApiKey("")
.build());
```
```csharp
using Qdrant.Client;
var client = new QdrantClient(
host: "xyz-example.cloud-region.cloud-provider.cloud.qdrant.io",
https: true,
apiKey: ""
);
```
```go
import "github.com/qdrant/go-client/qdrant"
client, err := qdrant.NewClient(&qdrant.Config{
Host: "xyz-example.cloud-region.cloud-provider.cloud.qdrant.io",
Port: 6334,
APIKey: "",
UseTLS: true,
})
```