
Why Bulk Uploading Matters
When you start using Qdrant at scale, one of the first challenges you may run into is uploading large amounts of data efficiently. Small uploads are usually straightforward, but bulk ingestion introduces a different set of concerns. As millions of vectors, payloads, and indexes are written into a collection, the system has to manage memory usage, disk writes, background optimization, and search availability at the same time.
If this process is not planned carefully, bulk uploads can create pressure on RAM, slow down ingestion, increase query latency, or cause the optimizer to fall behind. In more constrained environments, large uploads can even lead to out-of-memory issues or unstable performance.
The goal is not simply to upload data as fast as possible. The goal is to upload data in a way that is predictable and safe for the workload you are running. In this guide, we’ll walk through best practices for bulk uploads in Qdrant, including batching, parallelization, sharding, payload indexes, and on-disk vector storage.
Why Vector Type Matters
Before we get into the best practices, it’s important to remember that not all vectors behave the same way during ingestion. Dense and sparse vectors use different indexing approaches, which means they can create different performance considerations during bulk uploads.
Let’s quickly break down the difference before moving into the recommended upload strategies.
Dense and sparse vectors behave differently during ingestion because they use different indexing paths in Qdrant. Dense vectors rely on HNSW for fast similarity search. During a large upload, the background optimizer builds and updates this index as new segments are written. This can add CPU and memory pressure while uploads are in progress.
Sparse vectors use a separate indexing approach, and the sparse index is updated as points are written. This means sparse vector ingestion should not be treated the same way as dense HNSW indexing.
Choosing the Right Bulk Upload Strategy
Before we go through the best practices, understand there is no single configuration that works best for every bulk upload. The right approach depends on what you are trying to improve: upload speed, memory usage, search availability, or a balance of all three.
The safest approach is to choose the right strategy for the workload instead of relying on one universal setting.
Option 1: Reduce Memory Pressure
Dense vectors
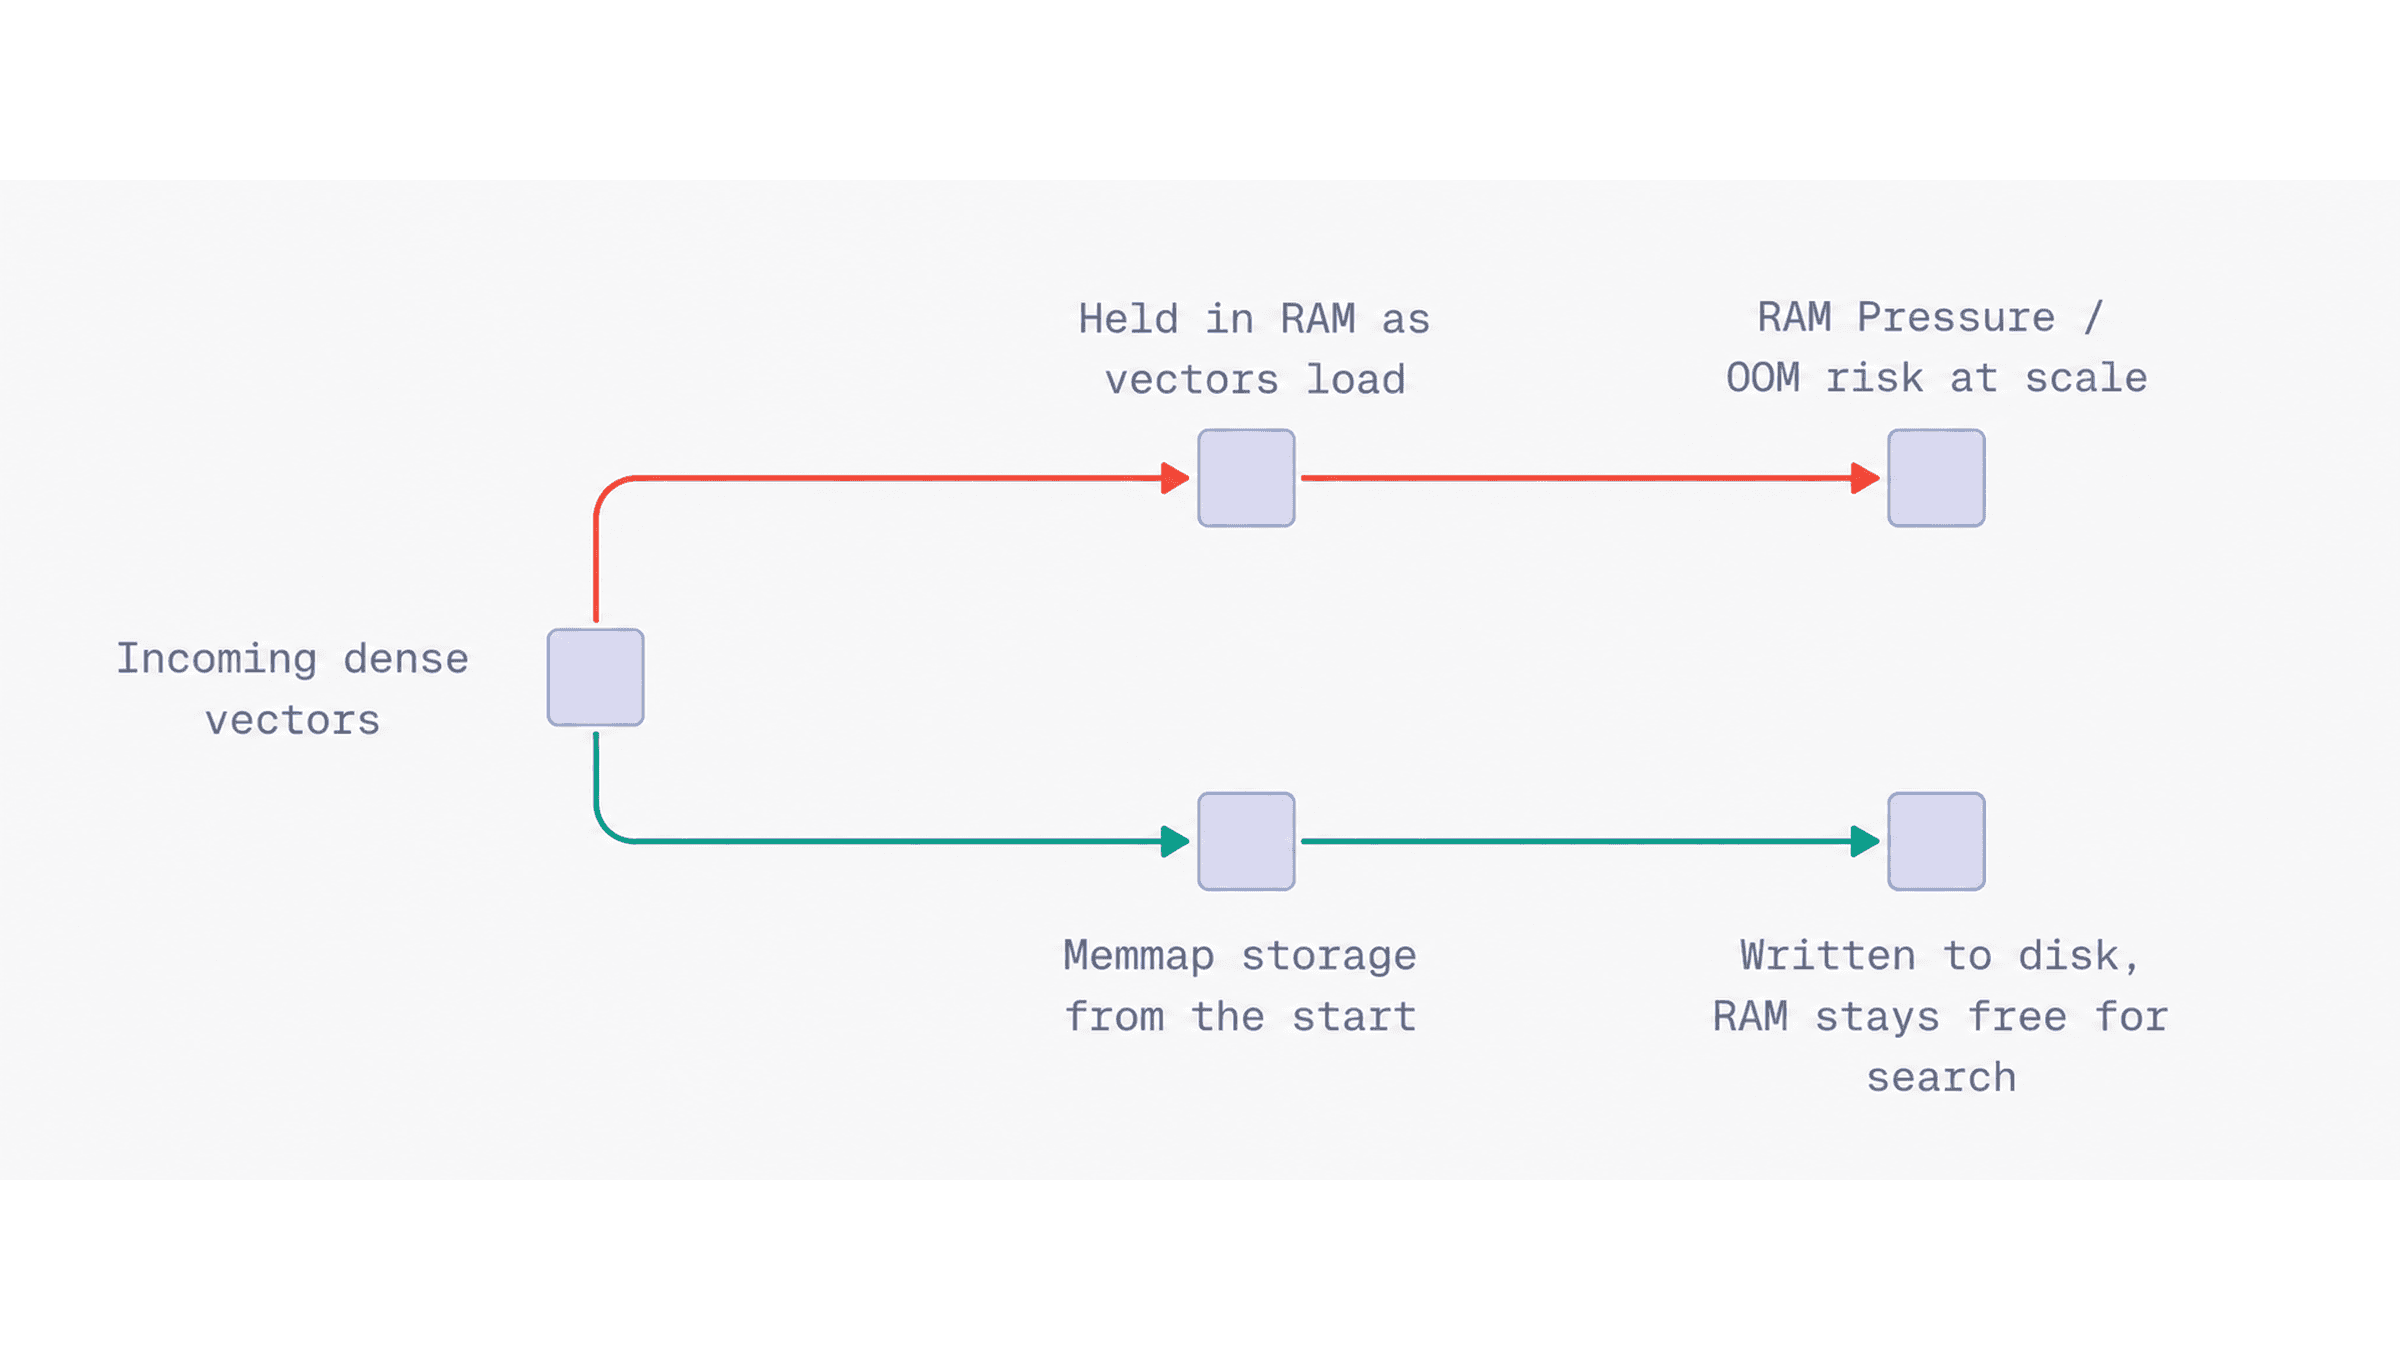
Memory usage can become one of the first bottlenecks during a large upload. Dense vectors are usually fixed-size embeddings, and when millions of them are inserted into a collection, the raw vector data alone can take up a large amount of RAM.
A safer approach is to store dense vectors directly on-disk when the collection is created. This allows incoming vector data to use memmap storage from the beginning, instead of relying on background optimization to move vectors from memory to disk later.
In Python, you can configure this with on_disk=True inside VectorParams:
client.create_collection(
    collection_name="my_collection",
    vectors_config=models.VectorParams(
        size=768,
        distance=models.Distance.COSINE,
        on_disk=True,
    ),
)
Best fit: Large dense vector uploads where raw vector data may put pressure on RAM.
Watch for: Search performance may depend more on disk access, especially if the workload needs to read original vectors often. You can usually balance this with quantization at search time, but the important part for bulk uploads is that vector storage is handled safely from the beginning.
Option 2: Create Payload Indexes (Before Uploading)
Dense vectors
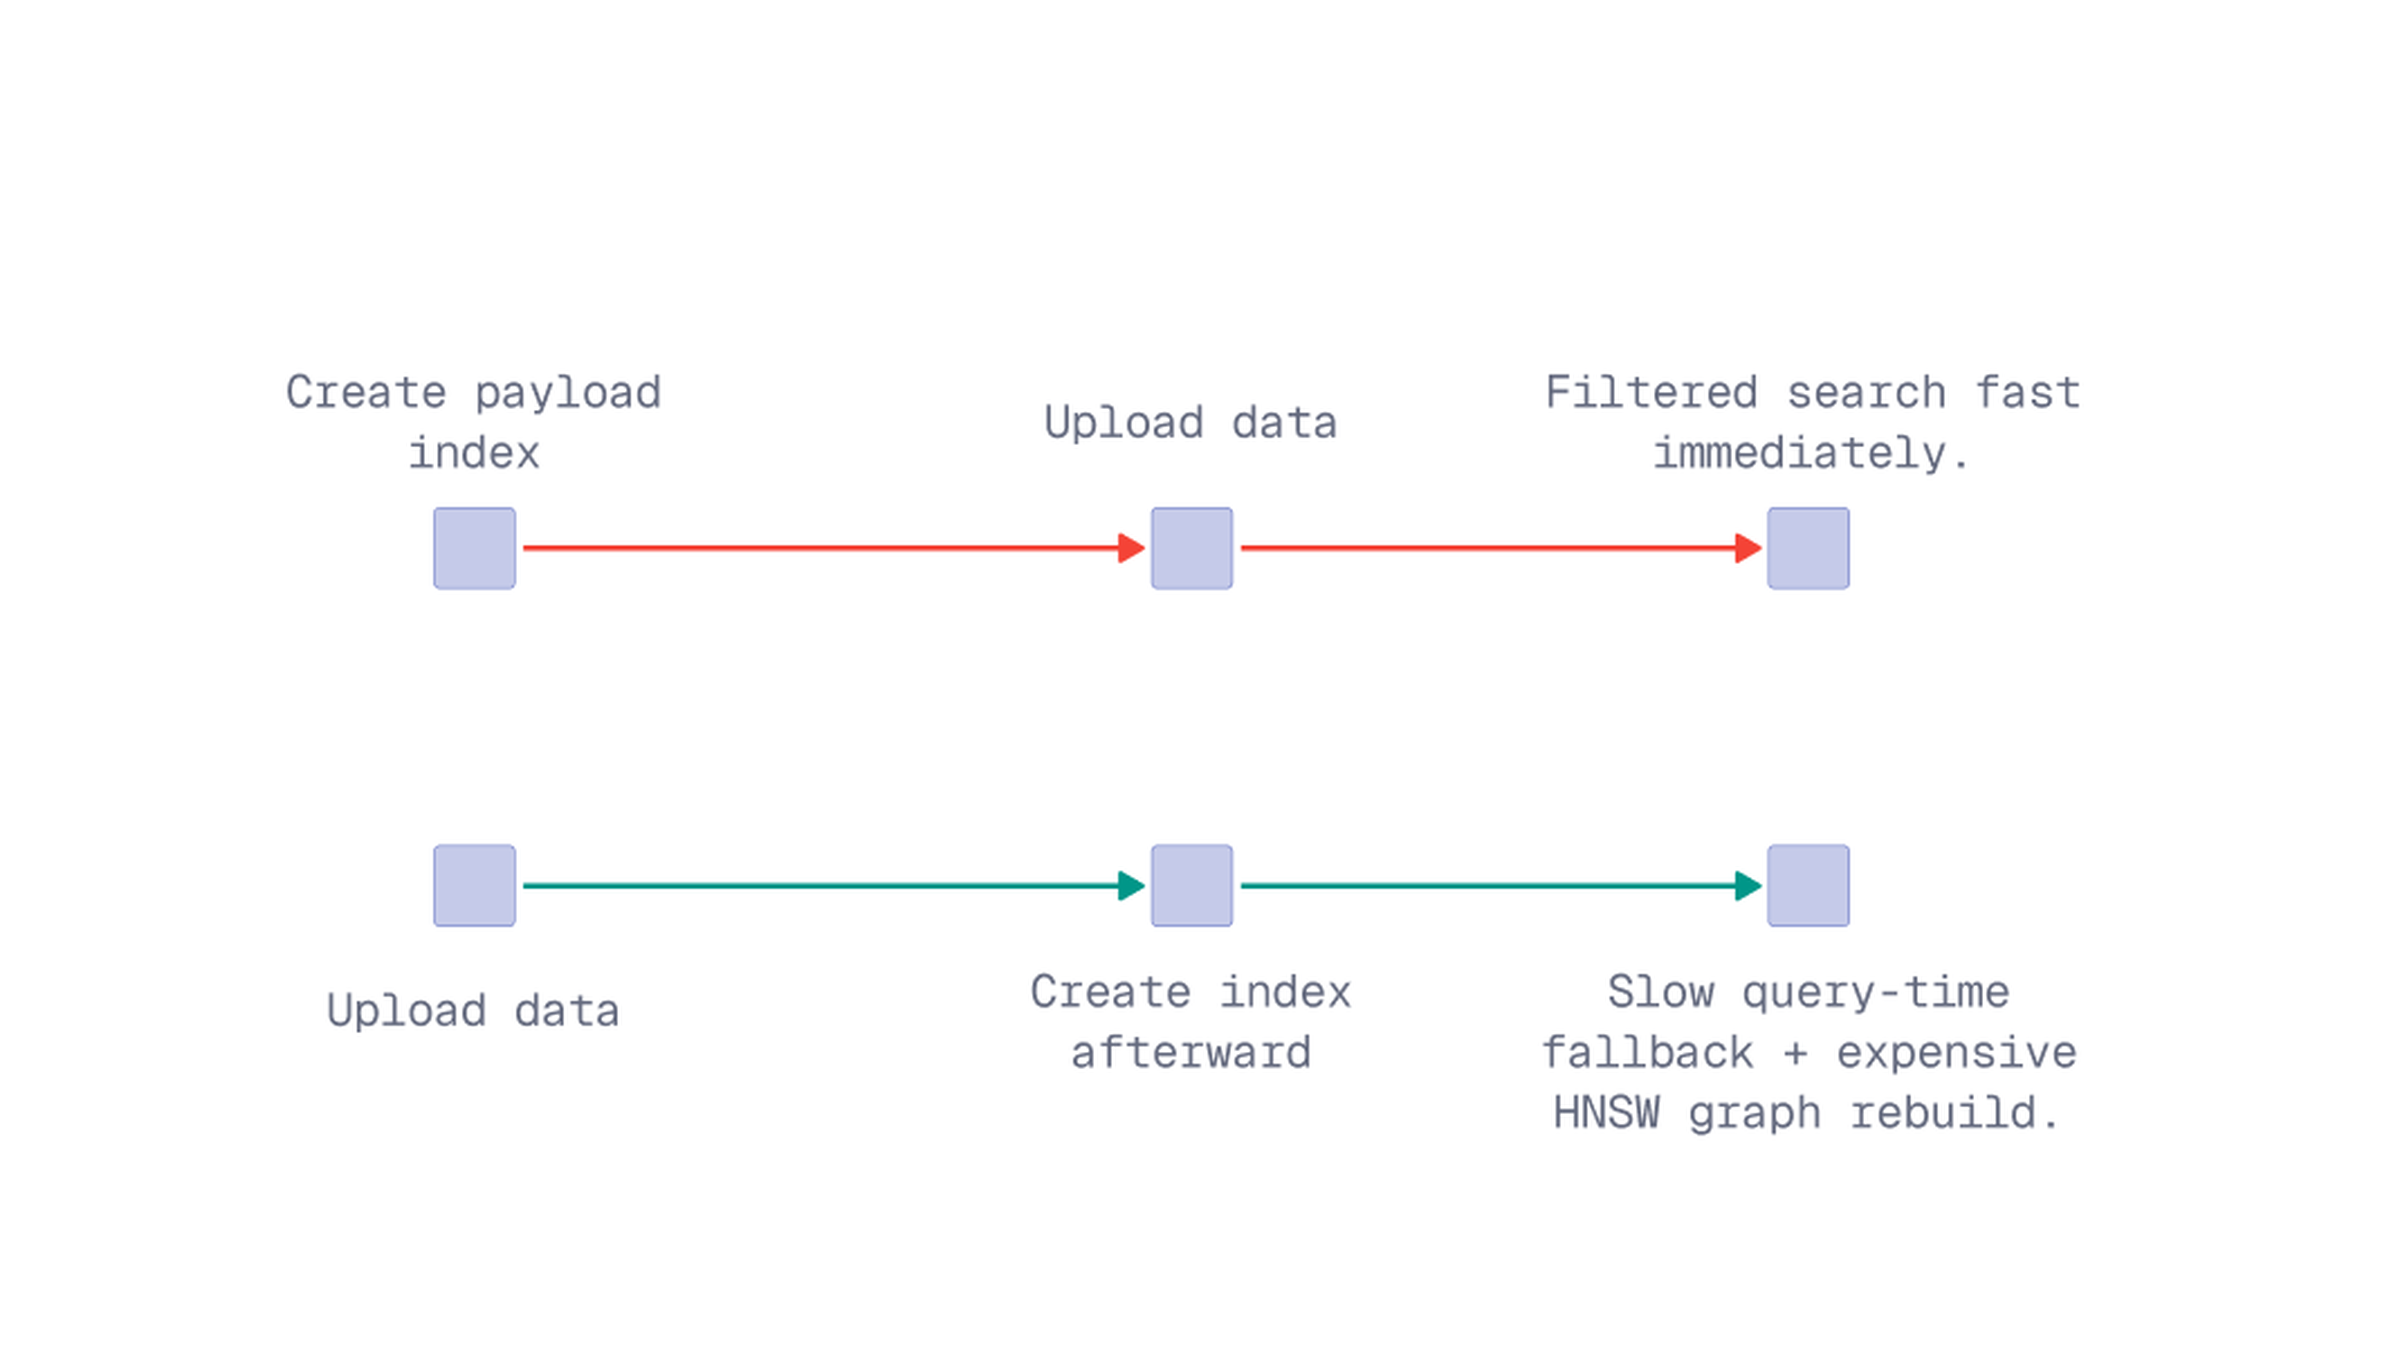
Use payload indexes before uploading points when you already know which fields will be used for filtering. This matters because dense vector search often relies on HNSW. When filters are part of the query, Qdrant can use payload indexes to make filtered search more efficient.
If those indexes are created after a large dataset has already been uploaded, filtered search will fall back to slower query-time strategies until the HNSW graph is rebuilt. Rebuilding the graph after the fact is resource-intensive and can take a long time.
Create the payload index before uploading:
client.create_payload_index(
    collection_name="my_collection",
    field_name="category",
    field_schema=models.PayloadSchemaType.KEYWORD,
)
Best fit: Workloads that already know which payload fields will be used for filtering, such as category, tenant ID, document type, source, or user ID.
Watch for: Payload indexes should be intentional. Indexing fields that are not used for filtering can add extra work without helping the upload or search path.
Option 3: Quantization to Balance Memory and Search Performance
Dense vectors
Storing original vectors on-disk can help reduce memory pressure during large uploads. However, this can also make search more dependent on disk access, especially when Qdrant needs to read the original vectors frequently.
Quantization can help balance this tradeoff. Instead of keeping full-size dense vectors in memory, Qdrant can keep a compressed version available while the original vectors remain on-disk.
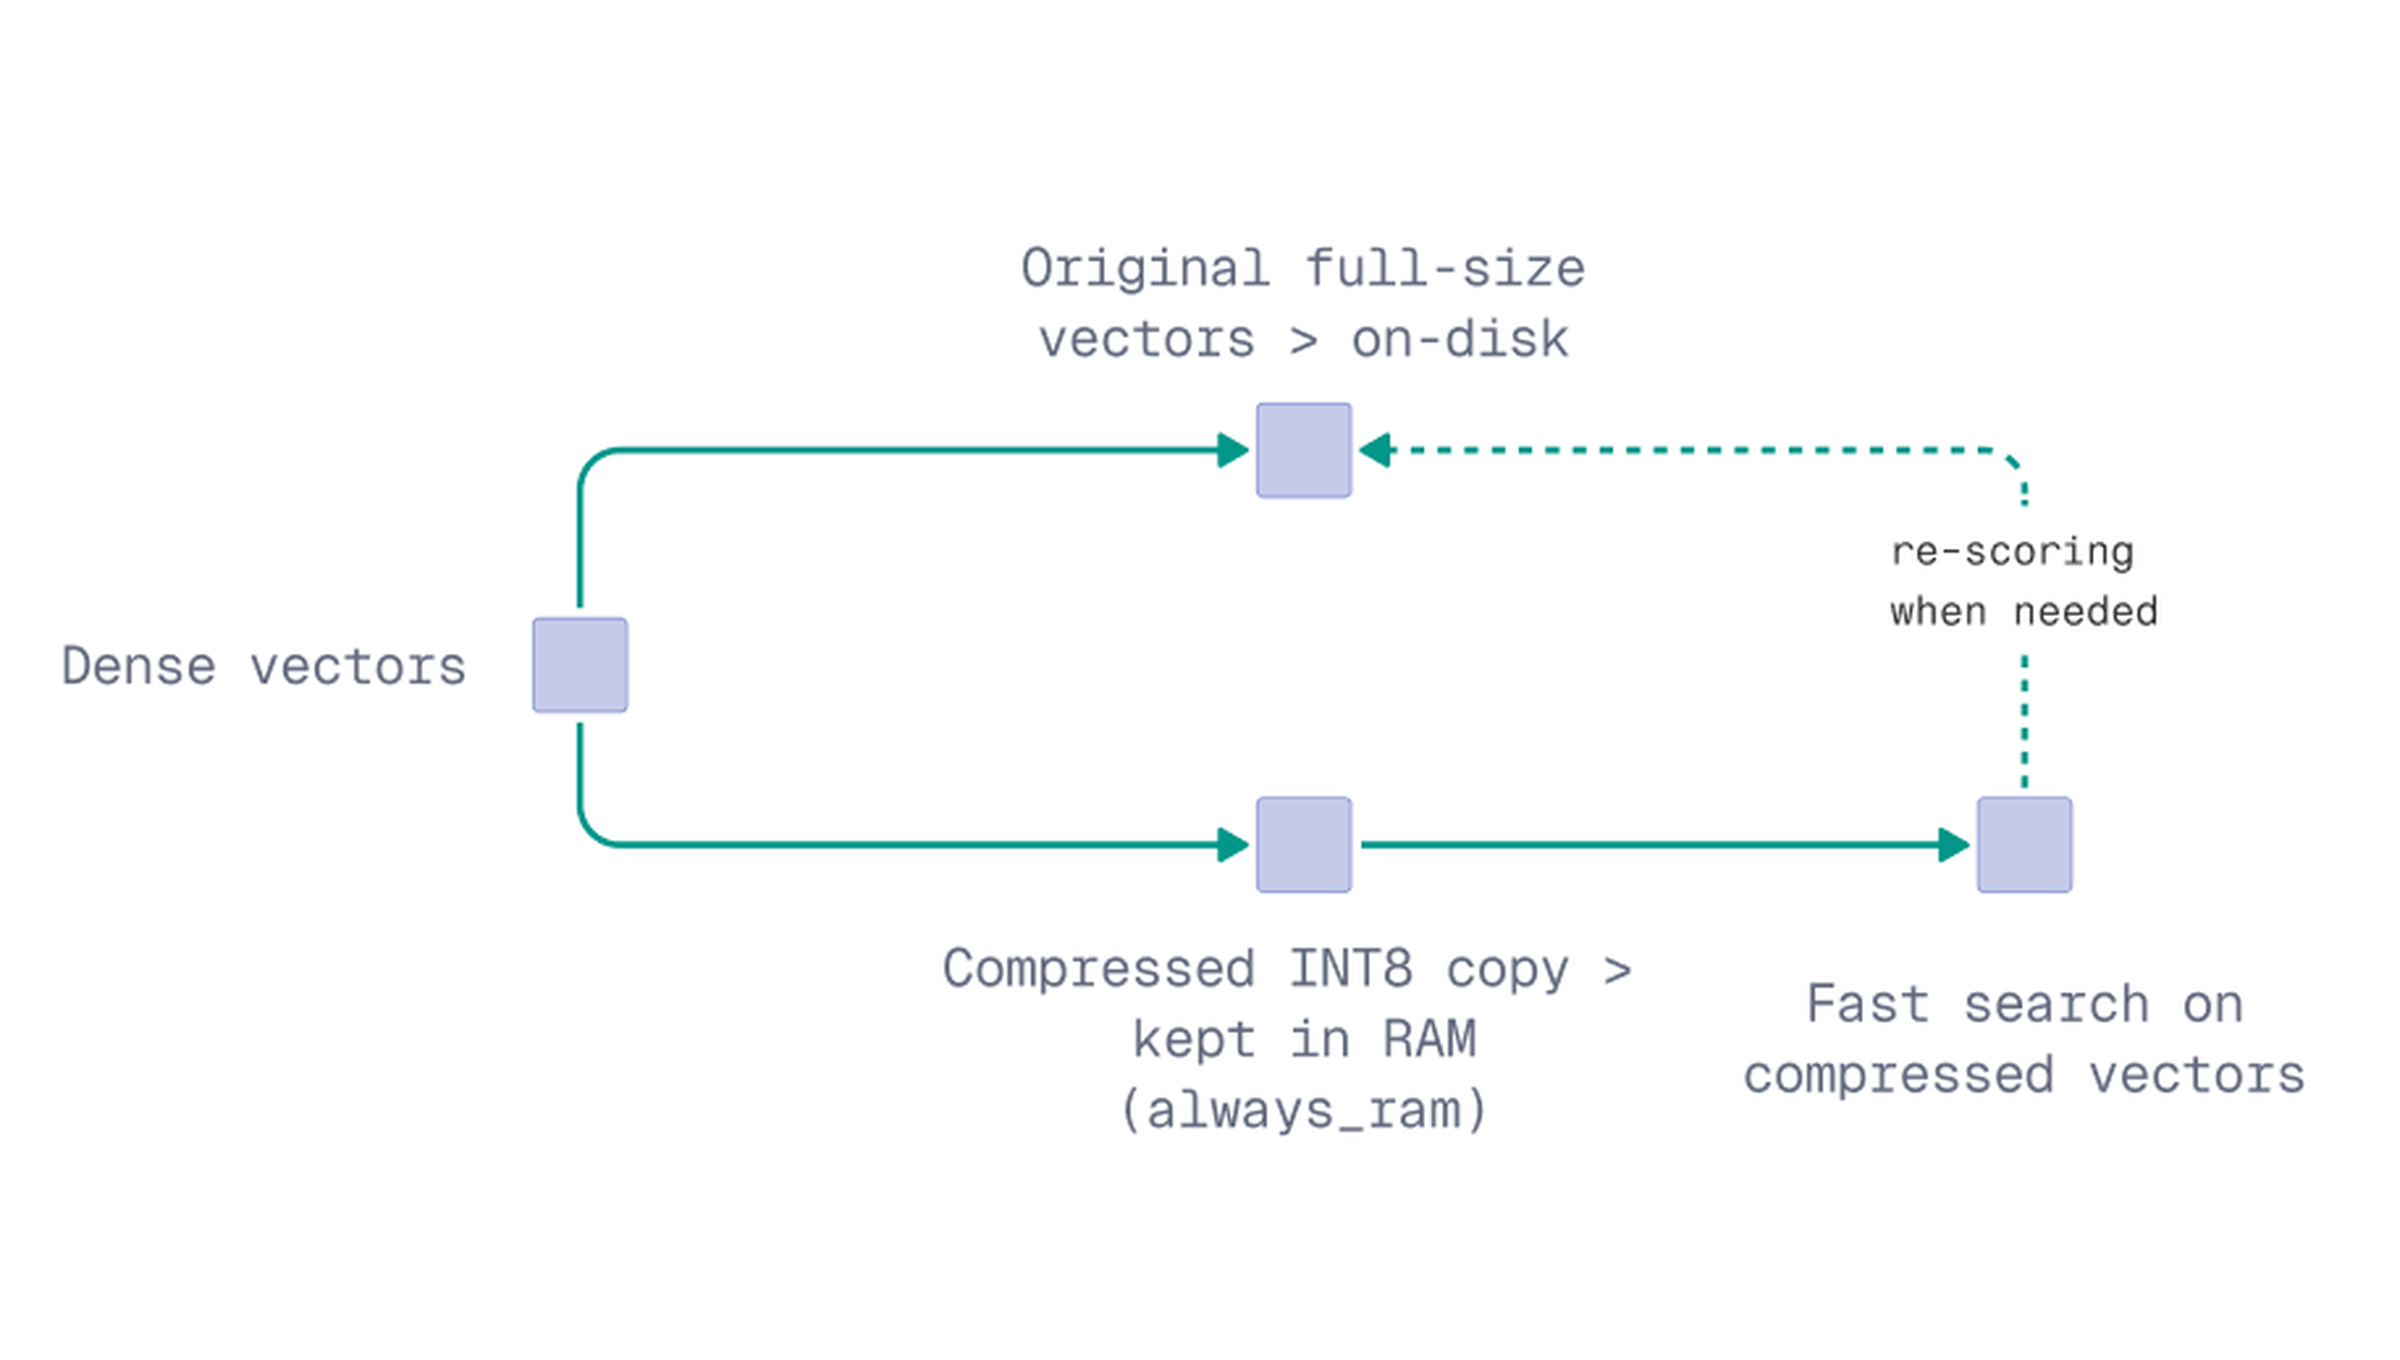
In Python, configure TurboQuant when creating the collection. The bits parameter sets the compression level: BITS4 (the default) stays closest to full precision, while BITS1 gives the most compression.
client.create_collection(
    collection_name="my_collection",
    vectors_config=models.VectorParams(
        size=768,
        distance=models.Distance.COSINE,
        on_disk=True,
    ),
    quantization_config=models.TurboQuantization(
        turbo=models.TurboQuantQuantizationConfig(
            always_ram=True,
            bits=models.TurboQuantBitSize.BITS4,
        )
    ),
)
Best fit: Dense vector workloads that need lower memory usage while still keeping search performance practical.
Watch for: Quantization can affect precision depending on the workload and configuration. For many use cases, this tradeoff is worth it, but search quality and latency should be tested with real data.
Option 4: Reduce Sparse Index Memory During Uploads
Sparse vectors
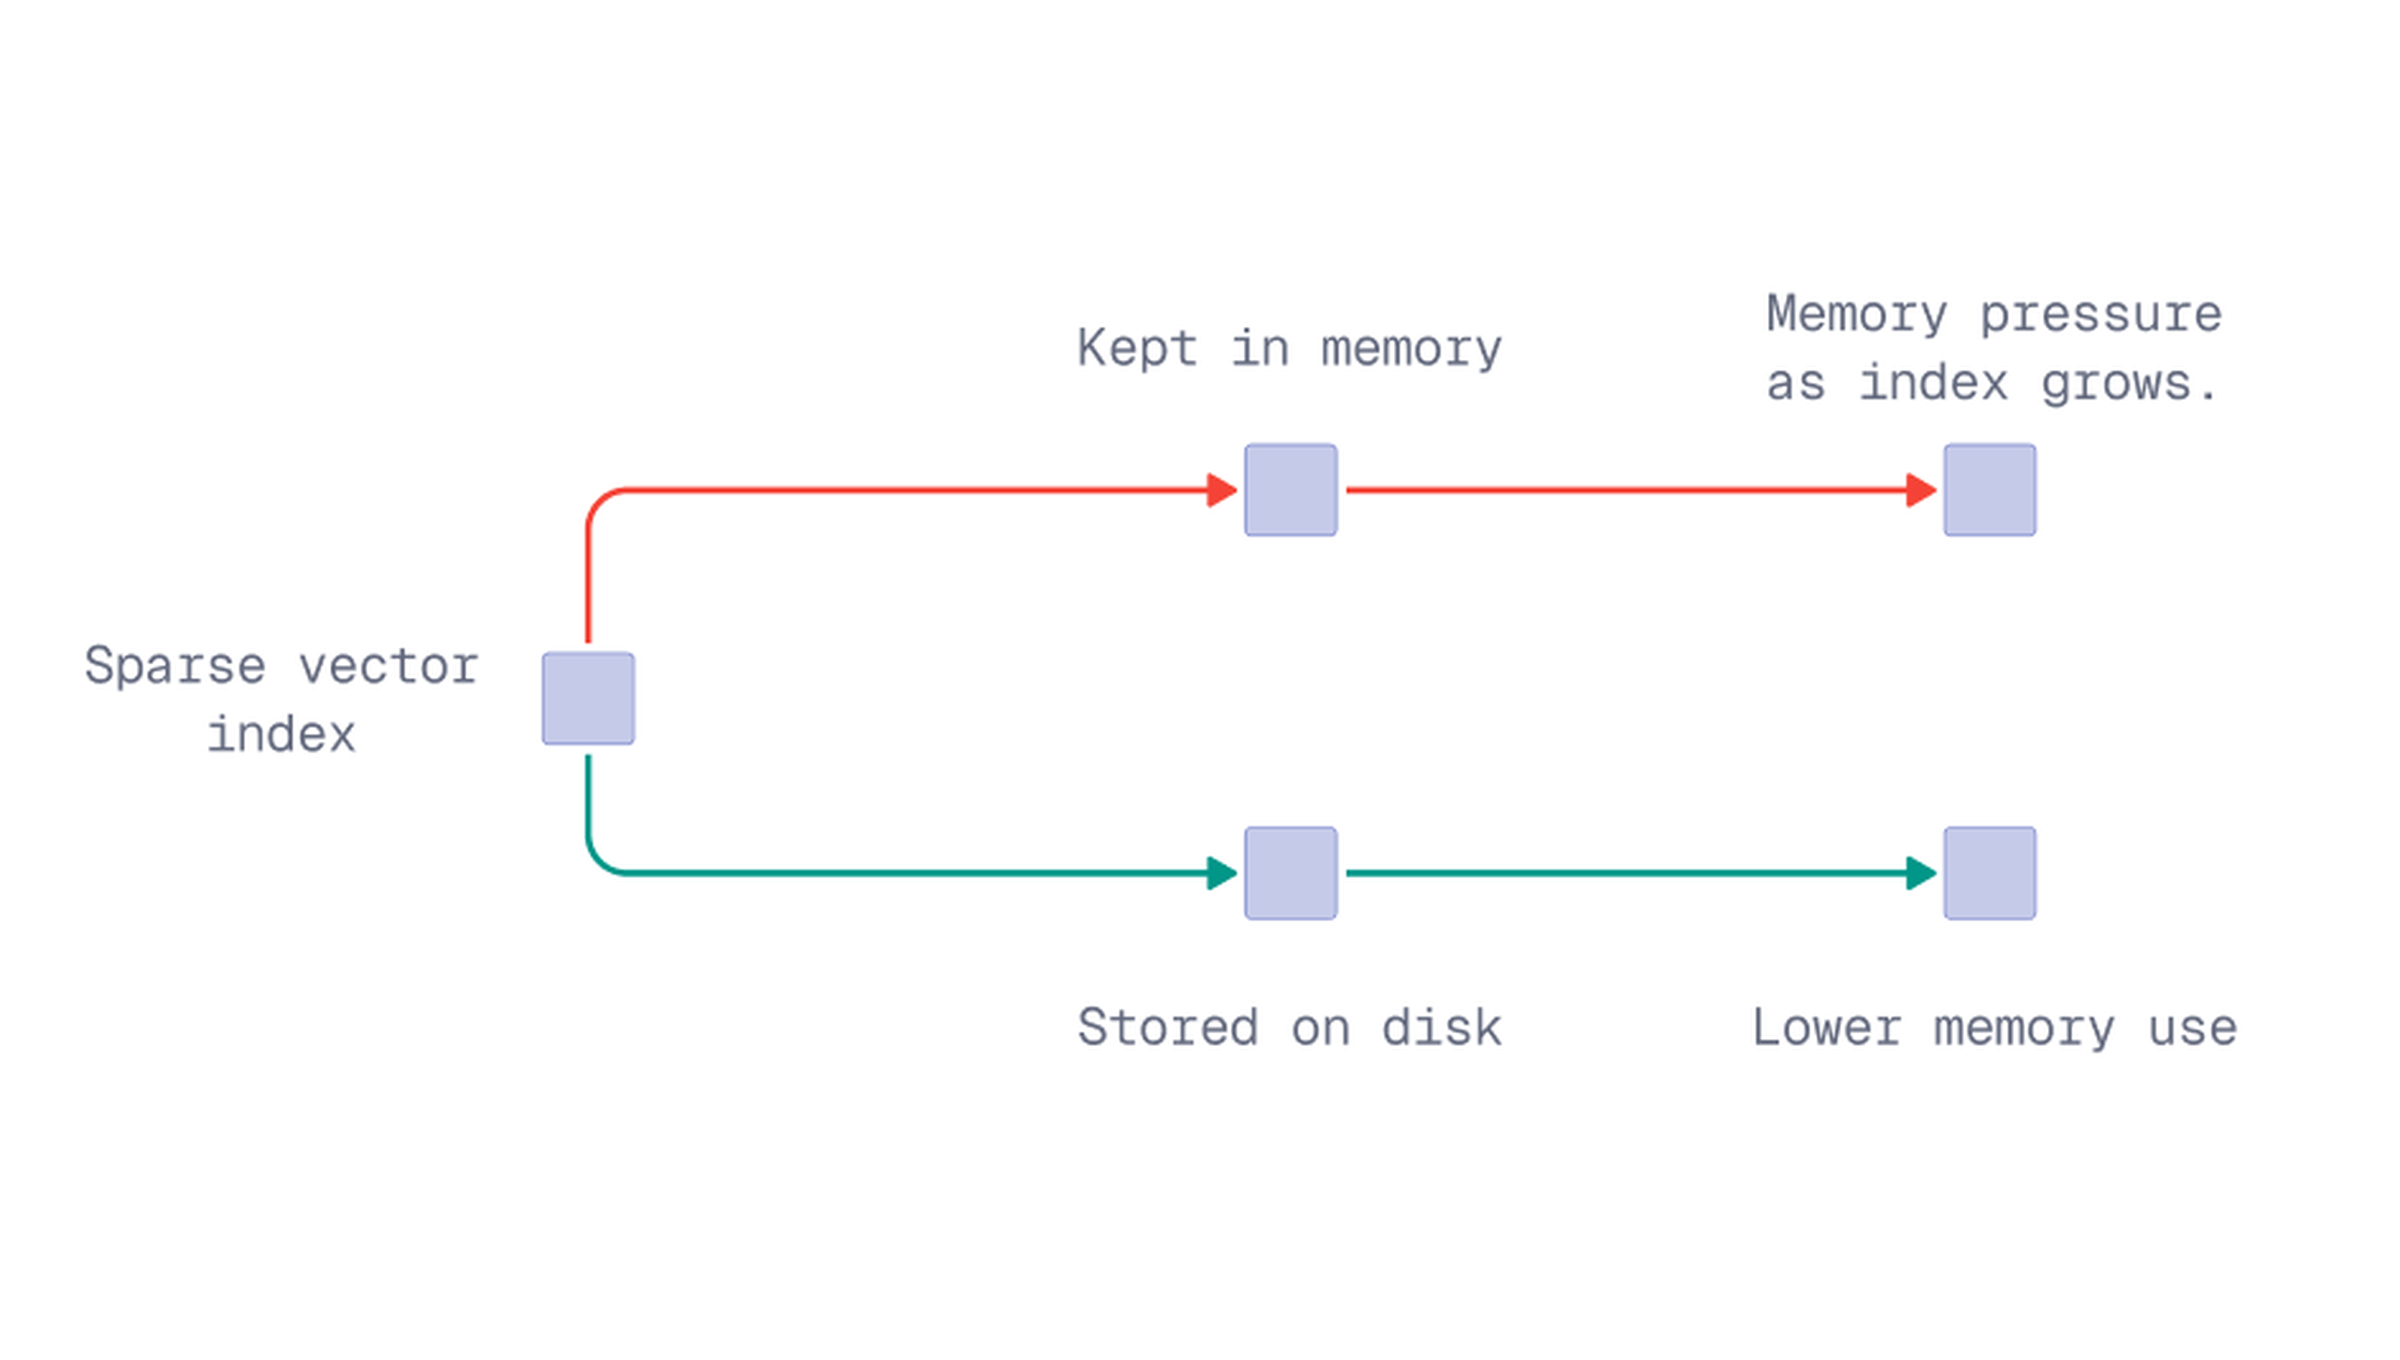
For large sparse vector workloads, one option is to store the sparse vector index on-disk. This can help reduce memory usage when the sparse index becomes large.
Enable on-disk storage for the sparse index:
client.create_collection(
    collection_name="my_collection",
    vectors_config={},
    sparse_vectors_config={
        "text": models.SparseVectorParams(
            index=models.SparseIndexParams(
                on_disk=True,
            )
        )
    },
)
Best fit: Large sparse vector workloads where the sparse index is putting pressure on memory.
Watch for: Storing the sparse index on-disk may slow down search because queries can depend more on disk access. If sparse vector search is latency-sensitive, keeping the sparse index in memory may be better.
Best Practices for Every Upload
The strategies above depend on your workload, such as vector type, memory limits, and search needs. The following techniques are different. Batching, parallelization, and sharding are not situational choices; they apply to any bulk upload and help improve ingestion throughput and stability regardless of how your collection is configured.
Tip: Connect with
QdrantClient(url, prefer_grpc=True)for bulk work. gRPC has lower overhead than HTTP and is meaningfully faster for large uploads.
Batch Your Uploads
Dense & sparse vectors
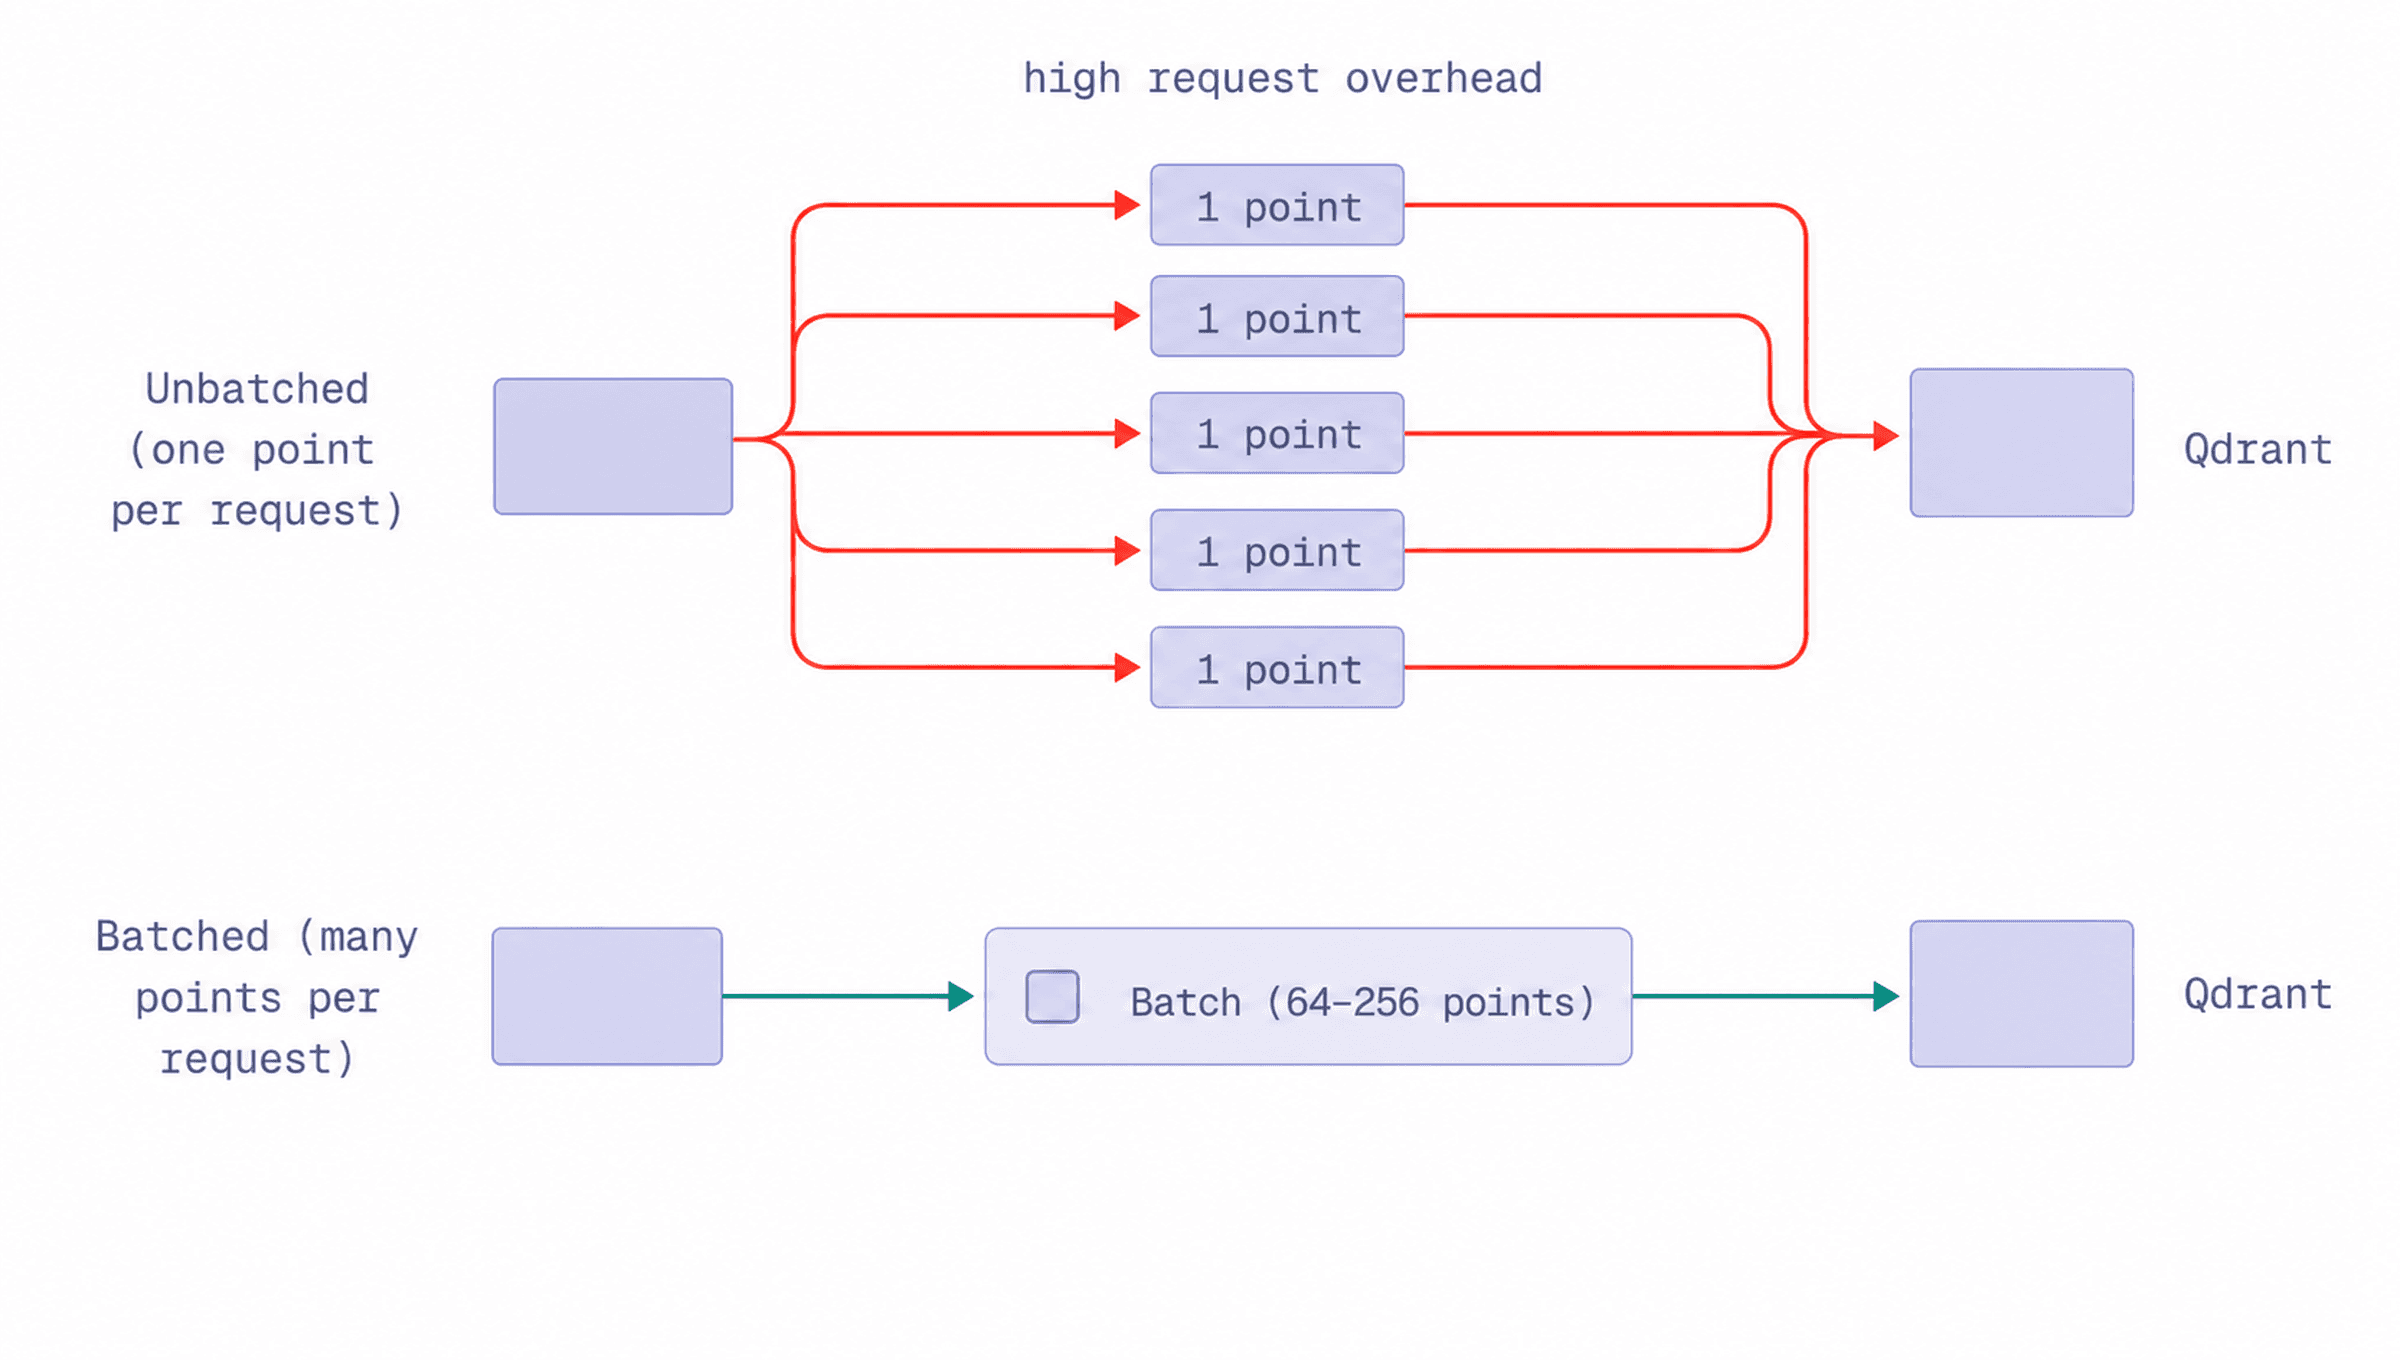
Uploading points one at a time can add unnecessary overhead. Each request has to go through the network, the write path, and internal processing. When this happens millions of times, the upload process can become slower than it needs to be.
A better approach is to upload points in batches. Batching allows Qdrant to process groups of points together instead of handling every point as a separate request.
Set a batch size when uploading points:
client.upload_points(
    collection_name="my_collection",
    points=points,
    batch_size=256,
)
Best fit: Large uploads where sending one point per request would create too much request overhead.
Watch for: A batch size of 64-256 points is a reasonable starting range. Larger batches can improve throughput but increase memory usage and make retries more expensive if a request fails.
Parallelize Uploads
Dense & sparse vectors
A single upload stream may not fully use the available write capacity of your Qdrant deployment. When uploading a large dataset, you can often improve ingestion throughput by sending multiple batches in parallel.
Parallel uploads allow several workers to upload different parts of the dataset at the same time. This keeps Qdrant’s write pipeline active, especially when the collection has multiple shards.
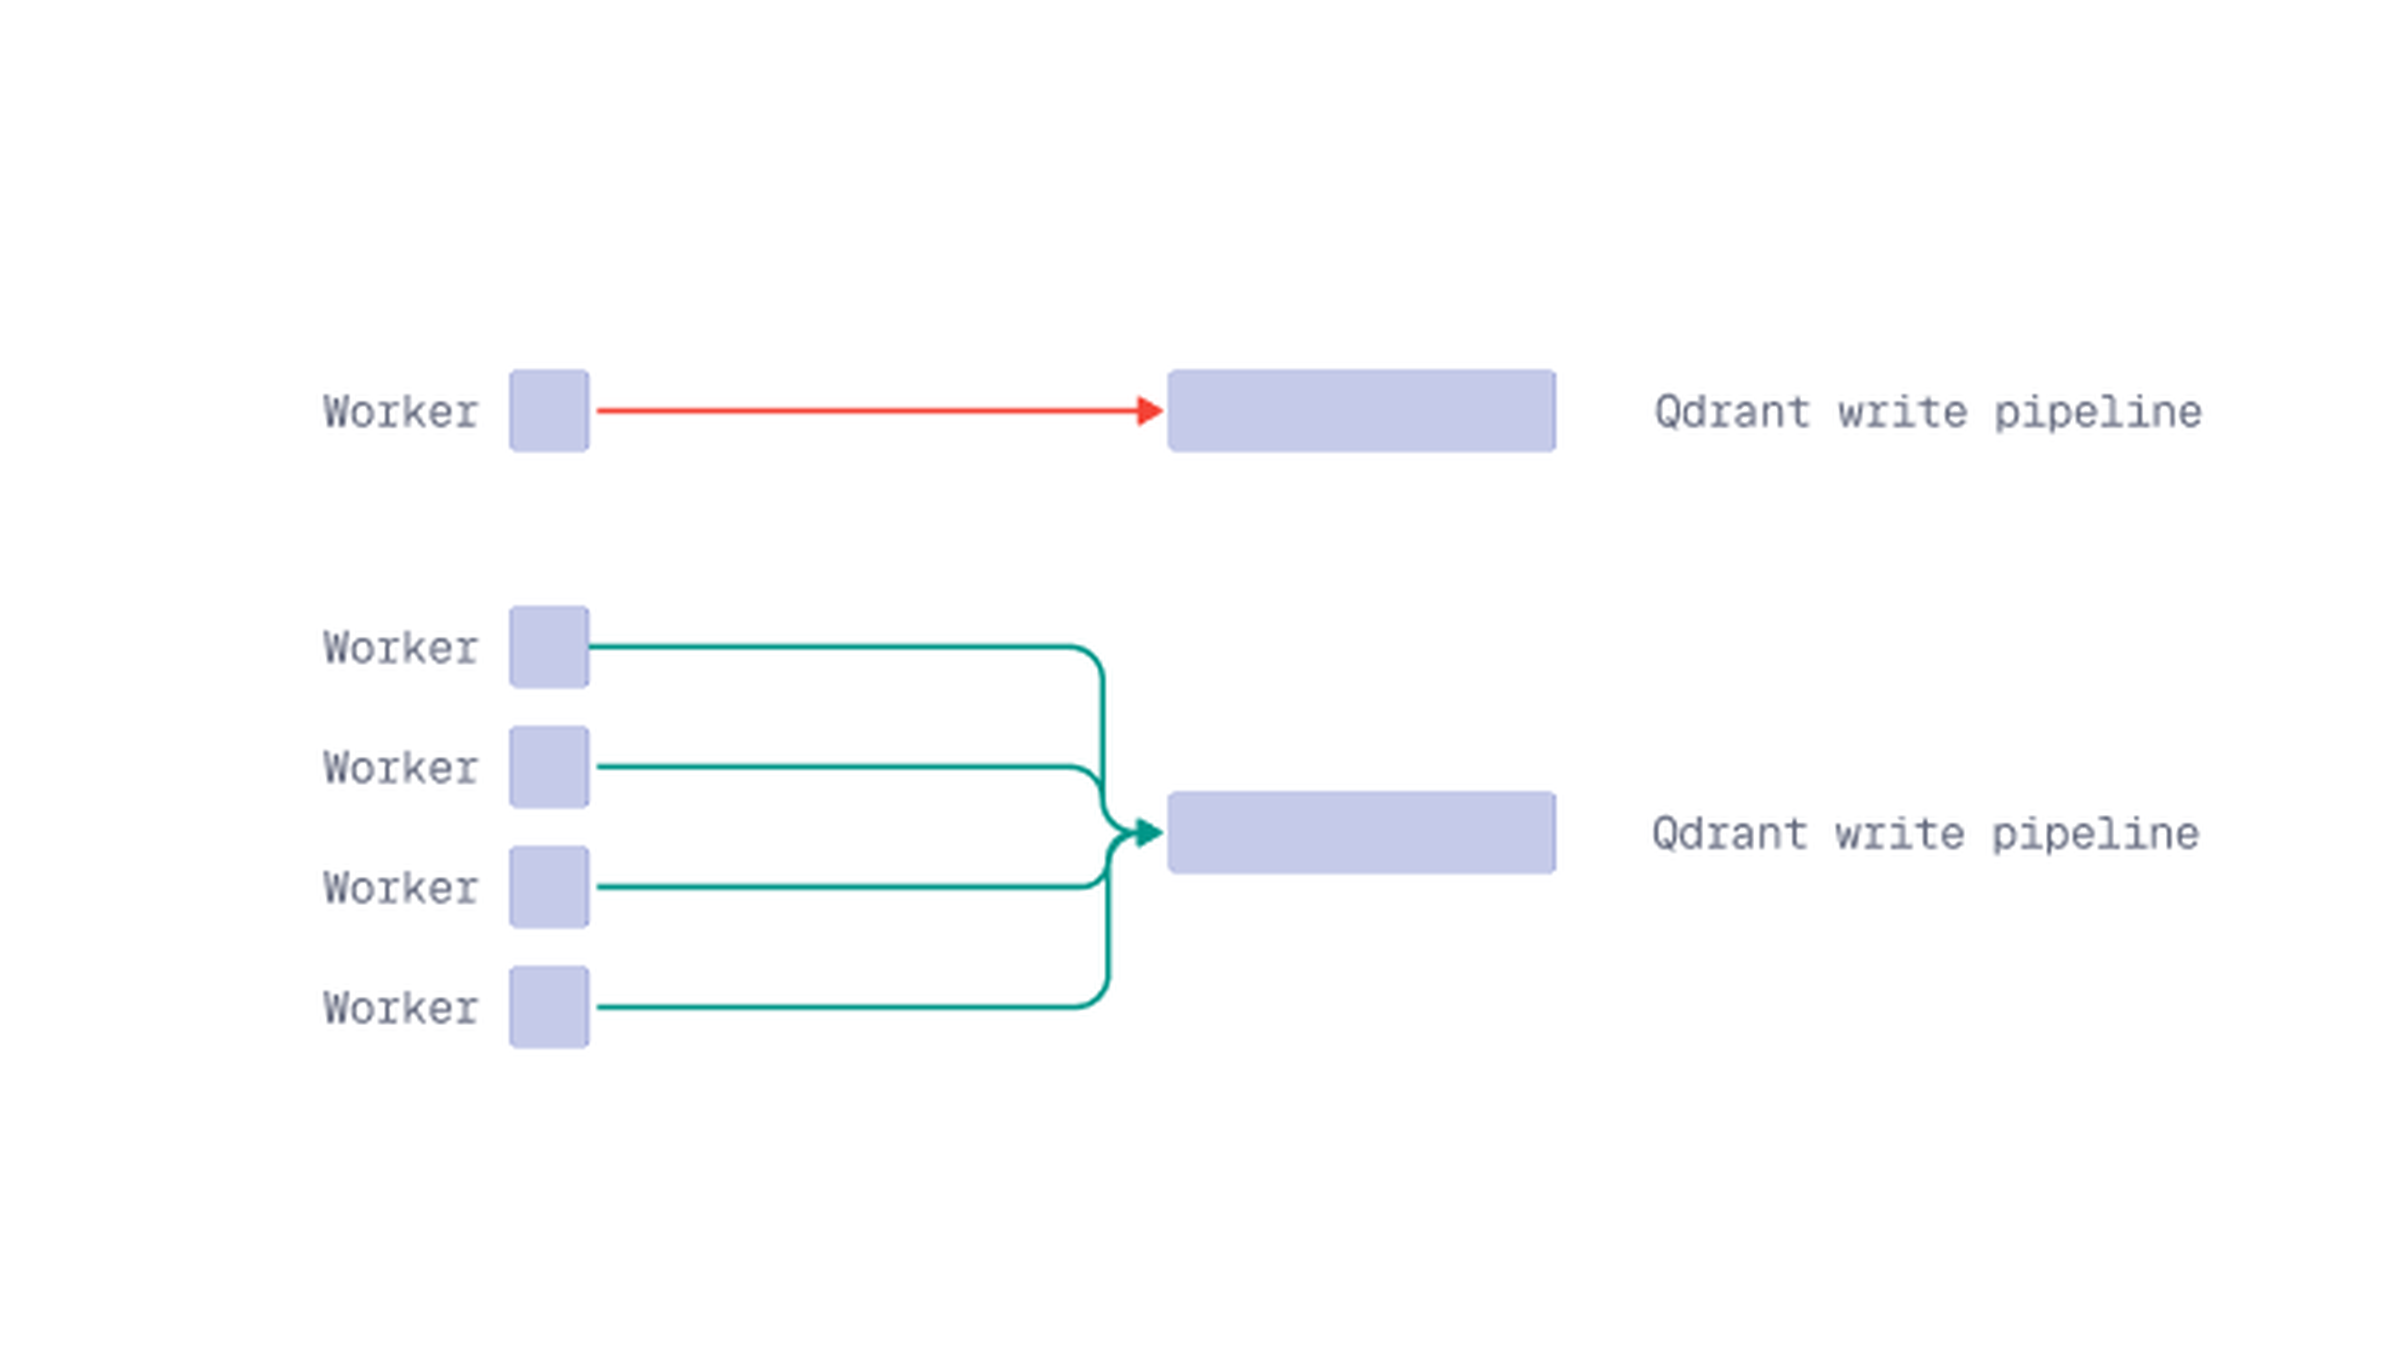
Note: Parallelism gains are not always linear; in some configurations, 2 workers may perform similarly to 1 before improvements appear at higher counts.
Add parallel workers to the upload:
client.upload_points(
    collection_name="my_collection",
    points=points,
    batch_size=256,
    parallel=4,
)
Best fit: Large uploads where one upload worker is not enough to use the available write capacity.
Watch for: Too much parallelism can create extra pressure on CPU, memory, disk I/O, and network resources. Start with a smaller number first, then increase based on system behavior.
Use Multiple Shards for Larger Uploads
Dense & sparse vectors
For larger uploads, sharding can help Qdrant process writes in parallel. A collection can be created with more than one shard, and each shard has its own write path. With multiple shards, Qdrant distributes ingestion work across independent write paths.

Set the shard count when creating the collection:
client.create_collection(
    collection_name="my_collection",
    vectors_config=models.VectorParams(
        size=768,
        distance=models.Distance.COSINE,
        on_disk=True,
    ),
    shard_number=2,
)
Best fit: Larger uploads where you want more ingestion parallelism, especially when paired with parallel upload workers.
Watch for: More shards are not always better. Each shard adds overhead, so the shard count should match the size of the deployment and the amount of write parallelism you actually need.
Choosing the Right Mix

Still deciding exactly what to configure for your workload? Qdrant’s Agent Skills provide hands-on, scenario-based guidance that walks you through the specific settings for your situation.
It’s Not One-Size-Fits-All
Bulk uploads are not just about sending as much data as possible into Qdrant. As datasets grow, the upload process also needs to account for memory usage, indexing behavior, disk writes, search availability, and overall system stability.
The safest approach is to choose the right strategy for the workload instead of relying on one universal configuration. Dense vectors, sparse vectors, and hybrid setups can all create different performance considerations during ingestion.
Tip: After a large upload, confirm the collection status is green and the optimizers have finished before serving production traffic.
By designing the collection and upload process before ingestion starts, you can make bulk uploads more efficient, more stable, and easier to scale as your dataset grows. To size your deployment, use the Qdrant sizing calculator.