How to Get Started With Qdrant Cloud
You can try vector search on Qdrant Cloud in three steps.
Instructions are below, but the video is faster:
Setup a Qdrant Cloud Cluster
- Register for a Cloud account with your email, Google or Github credentials.
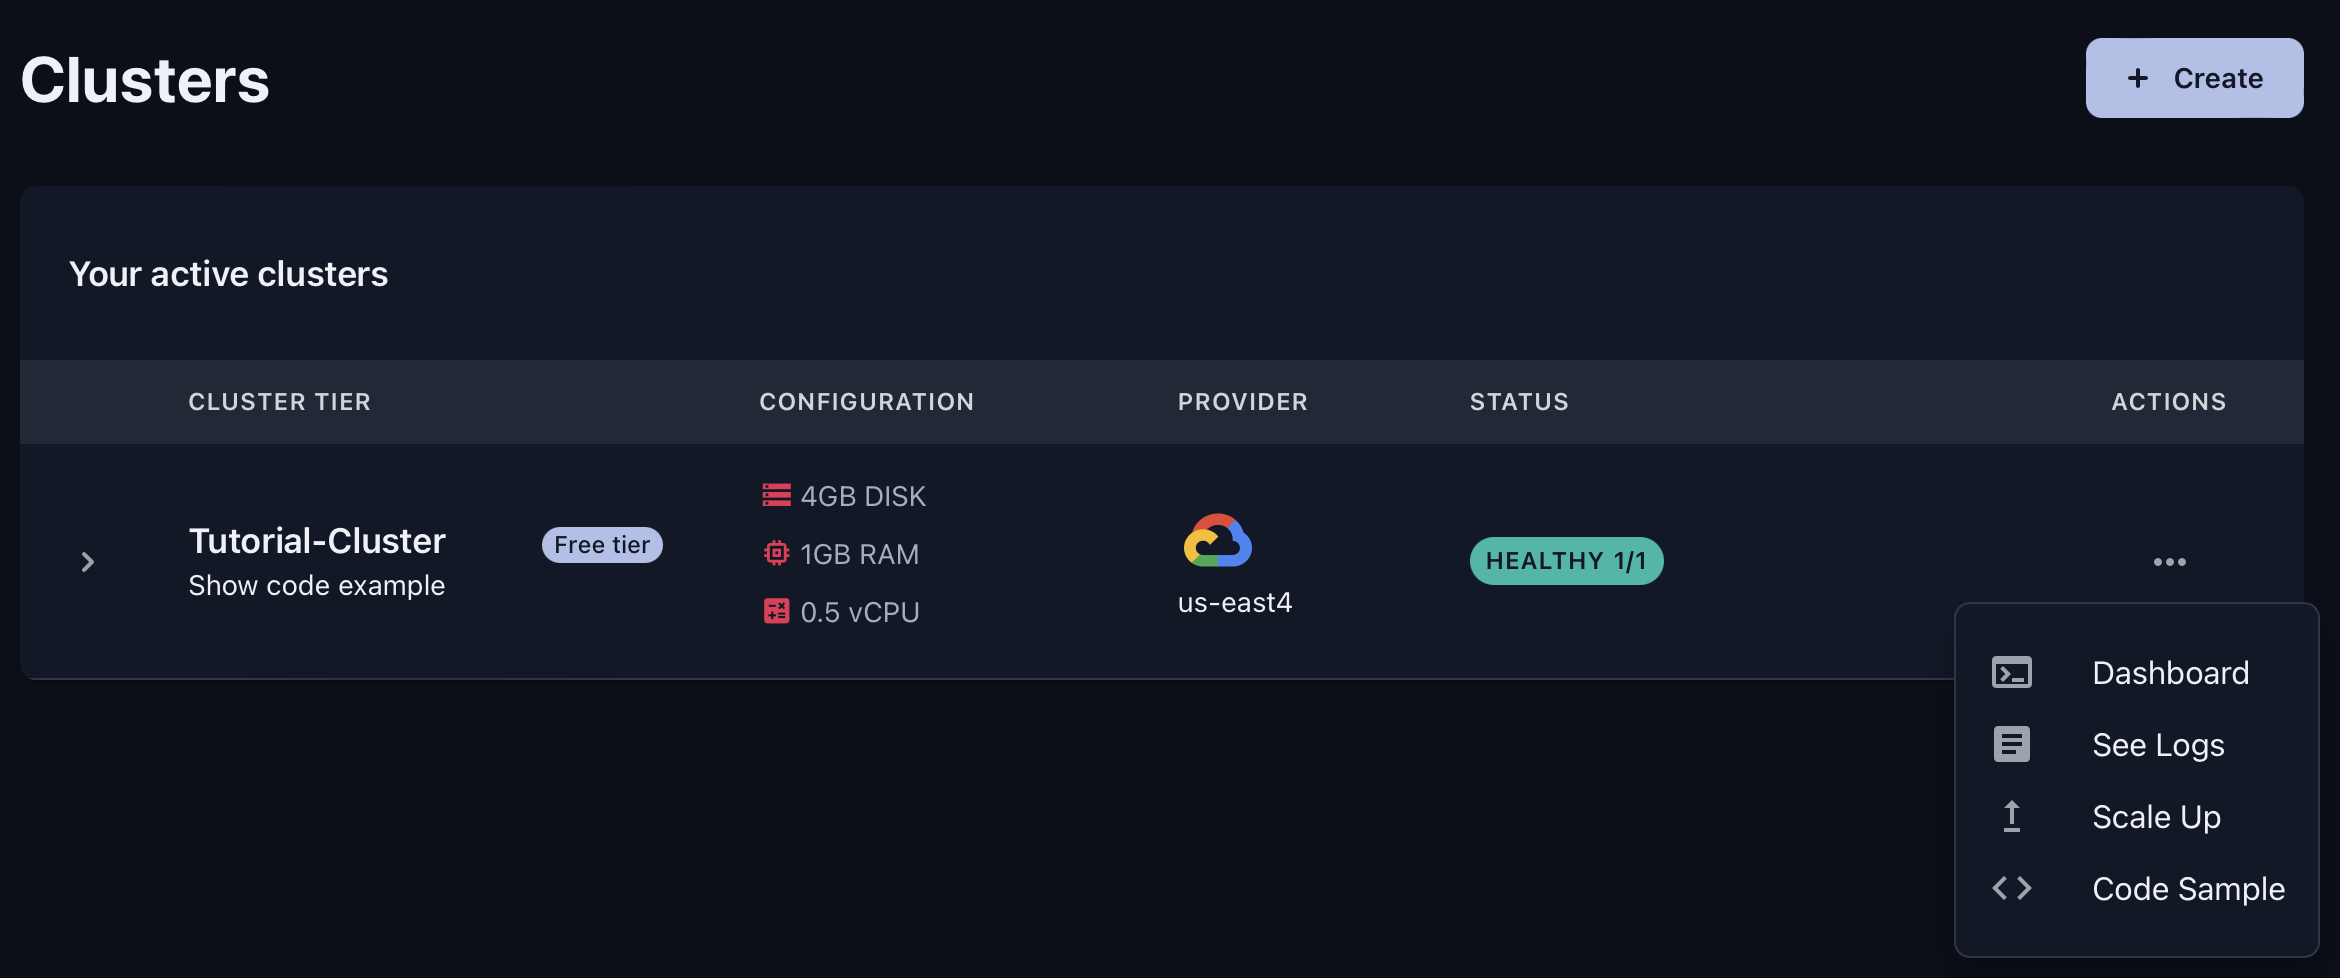
- Go to Clusters and follow the onboarding instructions under Create First Cluster.

- When you create it, you will receive an API key. You will need to copy it and store it somewhere self. It will not be displayed again. If you loose it, you can always create a new one on the Cluster Detail Page later.

Access the Cluster UI
- Click on Cluster UI on the Cluster Detail Page to access the cluster UI dashboard.
- Paste your new API key here. You can revoke and create new API keys in the API Keys tab on your Cluster Detail Page.
- The key will grant you access to your Qdrant instance. Now you can see the cluster Dashboard.

Authenticate via SDKs
Now that you have your cluster and key, you can use our official SDKs to access Qdrant Cloud from within your application.
curl \
  -X GET https://xyz-example.eu-central.aws.cloud.qdrant.io:6333 \
  --header 'api-key: <your-api-key>'

# Alternatively, you can use the `Authorization` header with the `Bearer` prefix
curl \
  -X GET https://xyz-example.eu-central.aws.cloud.qdrant.io:6333 \
  --header 'Authorization: Bearer <your-api-key>'
from qdrant_client import QdrantClient

qdrant_client = QdrantClient(
    host="xyz-example.eu-central.aws.cloud.qdrant.io",
    api_key="<your-api-key>",
)
import { QdrantClient } from "@qdrant/js-client-rest";

const client = new QdrantClient({
  host: "xyz-example.eu-central.aws.cloud.qdrant.io",
  apiKey: "<your-api-key>",
});
use qdrant_client::Qdrant;

let client = Qdrant::from_url("https://xyz-example.eu-central.aws.cloud.qdrant.io:6334")
    .api_key("<your-api-key>")
    .build()?;
import io.qdrant.client.QdrantClient;
import io.qdrant.client.QdrantGrpcClient;

QdrantClient client =
    new QdrantClient(
        QdrantGrpcClient.newBuilder(
                "xyz-example.eu-central.aws.cloud.qdrant.io",
                6334,
                true)
            .withApiKey("<your-api-key>")
            .build());
using Qdrant.Client;

var client = new QdrantClient(
  host: "xyz-example.eu-central.aws.cloud.qdrant.io",
  https: true,
  apiKey: "<your-api-key>"
);
import "github.com/qdrant/go-client/qdrant"

client, err := qdrant.NewClient(&qdrant.Config{
	Host:   "xyz-example.eu-central.aws.cloud.qdrant.io",
	Port:   6334,
	APIKey: "<your-api-key>",
	UseTLS: true,
})
Try the Tutorial Sandbox
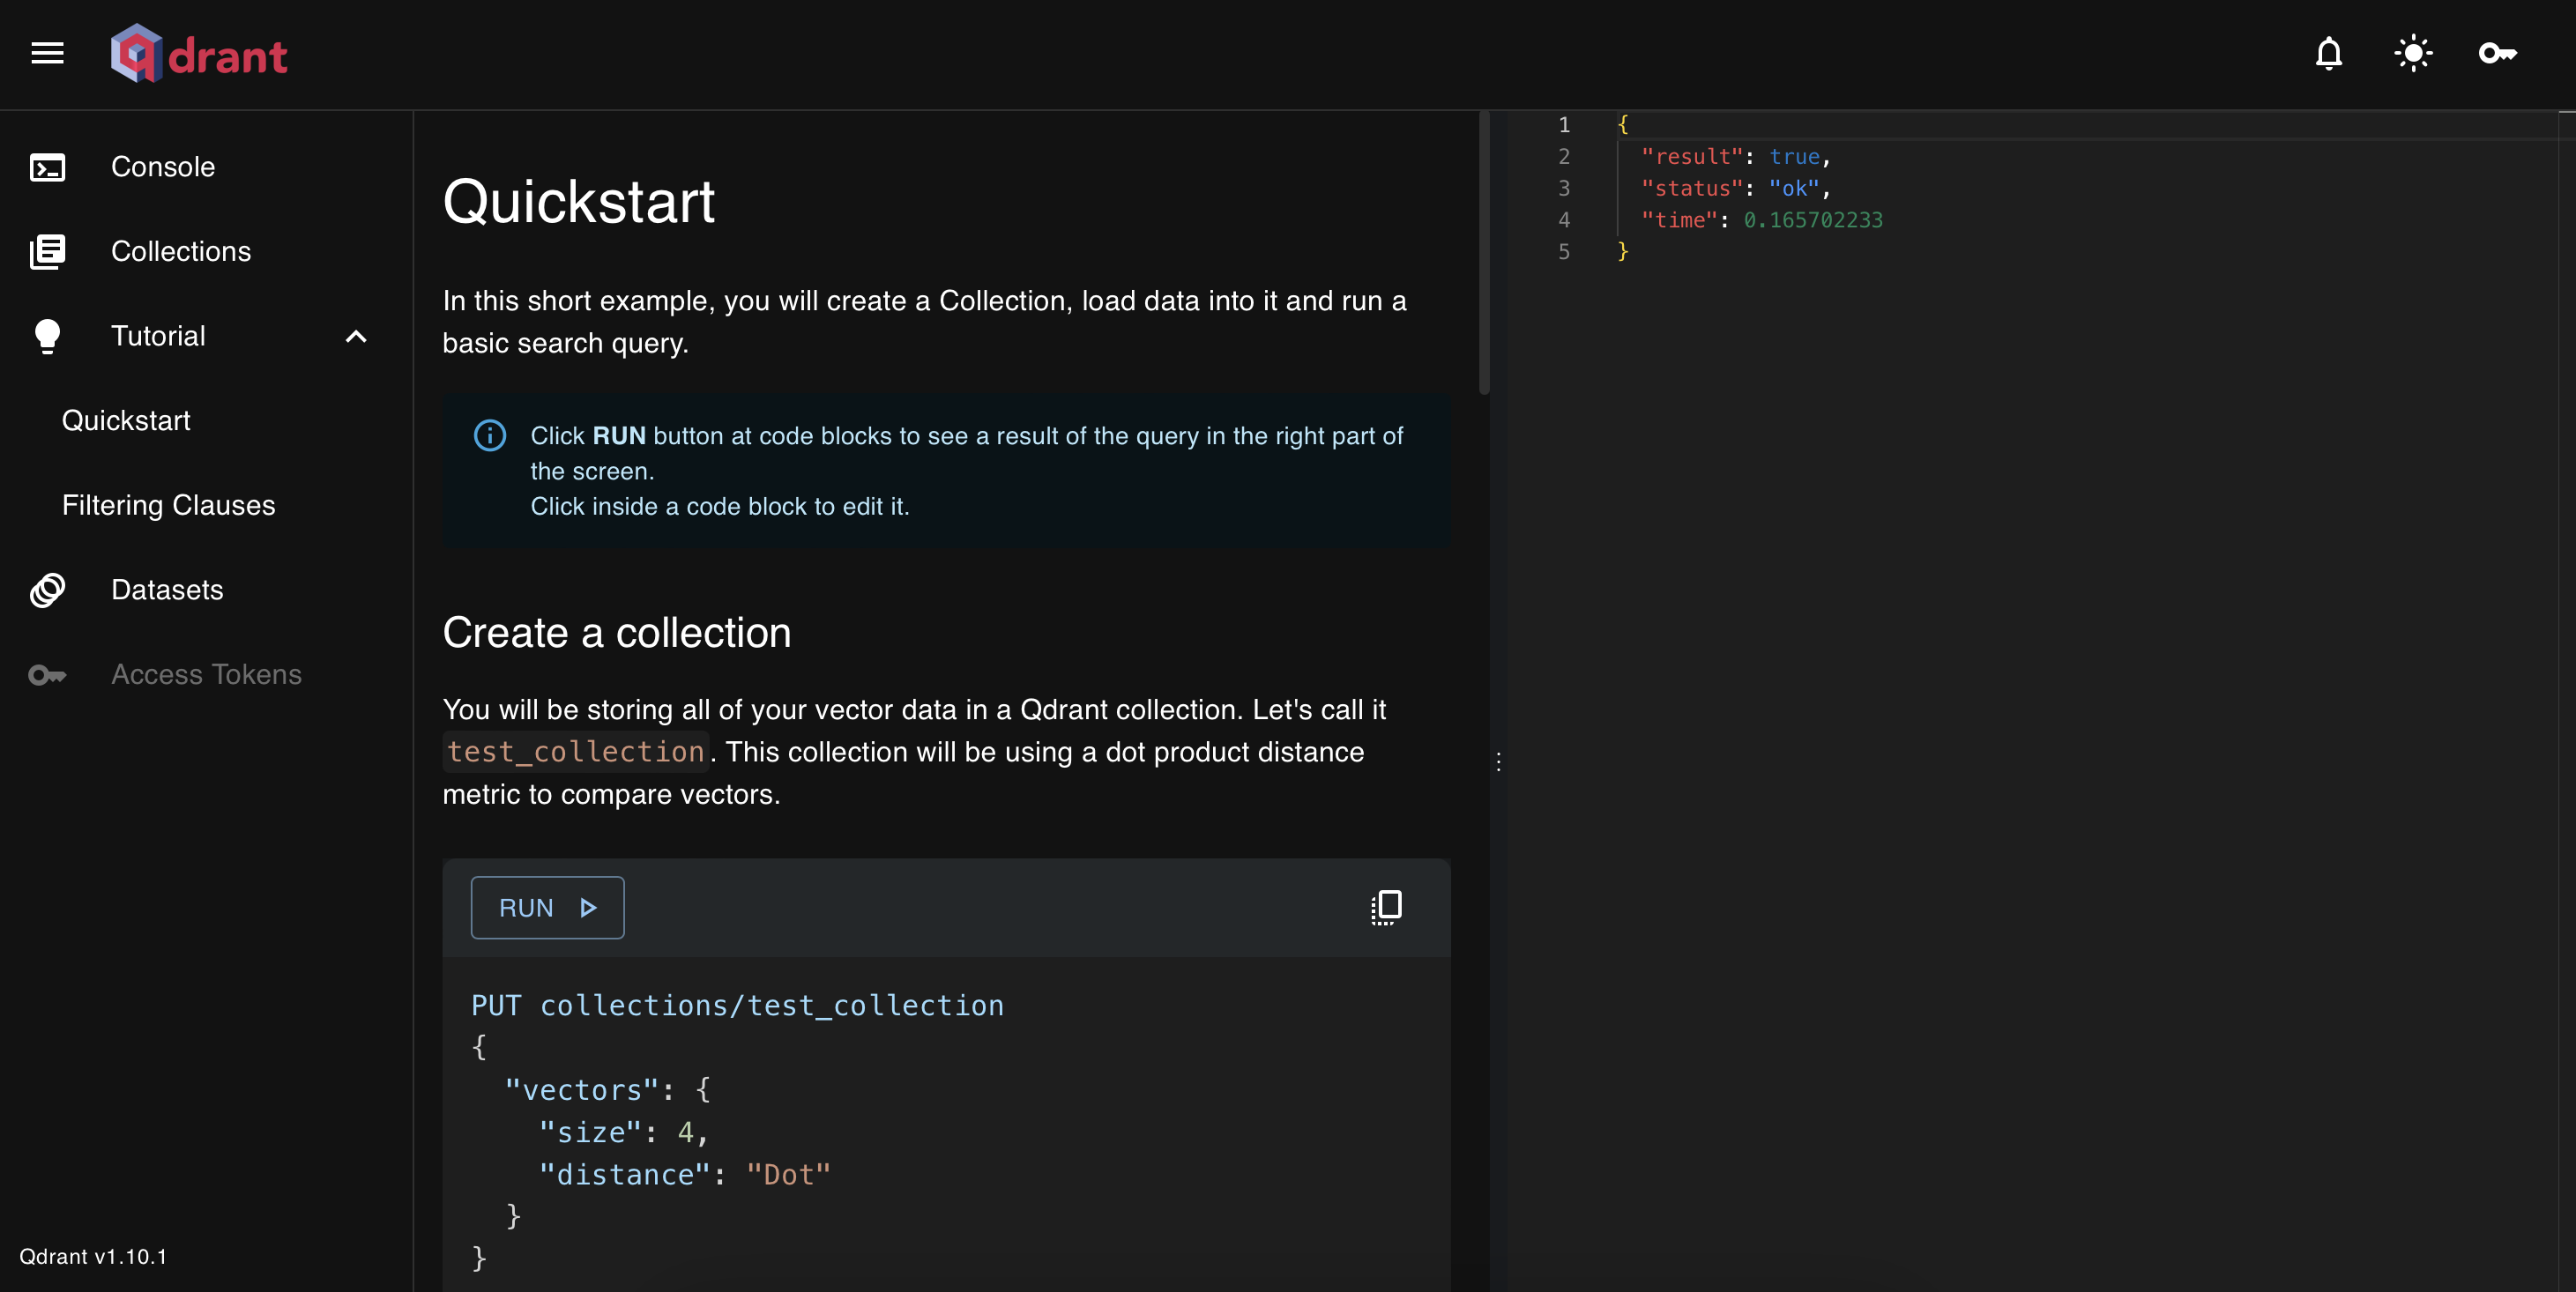
- Open the interactive Tutorial. Here, you can test basic Qdrant API requests.
- Using the Quickstart instructions, create a collection, add vectors and run a search.
- The output on the right will show you some basic semantic search results.

That’s Vector Search!
You can stay in the sandbox and continue trying our different API calls.
When ready, use the Console and our complete REST API to try other operations.
What’s Next?
Now that you have a Qdrant Cloud cluster up and running, you should test remote access with a Qdrant Client.
For more about Qdrant Cloud, check our dedicated documentation.


